Last Updated on October 18, 2026
Microsoft Word is the most popular word processing software in use today. It is used by home users, corporate users, schools and even on mobile devices. For the most part, the program works without any major problems, but occasionally you will come across an error or other issue that may leave you a bit confused as to how to fix it.
Word uses the .docx file extension and this has been the case since Word 2007. Before that, Word used the .doc file extension. If you were to open a document with the older .doc extension and then save it, Word would most likely ask you if you wanted to upgrade it to the newest file format to avoid compatibility issues.

If you are using a current version of Word and try and save a new document, it would be safe to assume that it would already be using the newest file format, and you would not need to upgrade it to match your version of Word. But you may come across a situation where Word thinks you are not up to date for some reason. In this article, we will be showing you the fix for the Microsoft Word document will be upgraded to the newest file format save message prompt you may receive when saving new documents.
Understanding the Compatibility Error
1. Review the Upgrade Message
When saving a new document for the first time, you may receive a popup box similar to the image shown below. This dialog box explicitly tells you that your document needs to be upgraded to the newest file format. Then when you click the OK button, your document will then be saved. If you click on Cancel, you will be taken back to your document without saving it.

2. Check the Title Bar for Compatibility Mode
You may also notice that your document says it is in compatibility mode at the top in the title bar before you save it. This visual cue appears right next to your document name. This is another clear indication that your document is not using the newest file format.

Updating the Normal.dotm Template
1. Locate Your Default Template File
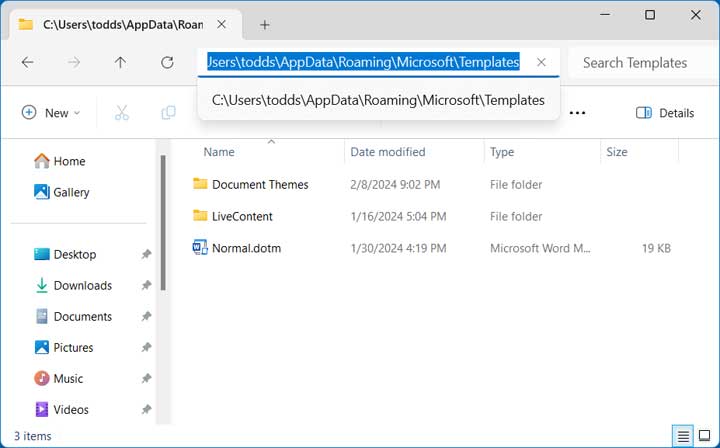
In order to prevent this upgrade box from showing every time you save your document, you will need to open the Normal.dotm file on your computer. This file is used as the default template for new documents created in Word. Its primary purpose is to store settings and formatting preferences that are applied to all new documents, ensuring consistency and efficiency in document creation. You can find the Normal.dotm file in your user directory under the following path. You will need to substitute username for the actual username associated with your Windows login.
C:\Users*username*\AppData\Roaming\Microsoft\Templates. If you do not see this folder, you may have to adjust your File Explorer settings to show hidden folders.
2. Convert the Template File
Once you open the Normal.dotm file, you will then need to go to the File tab and then the Info section. It most likely will show you that this file is in compatibility mode. You should then have an option to convert the file by clicking the Convert button.

3. Save as a New Macro-Enabled Template
Once you do this, you will need to save the Normal.dotm file with a different name. The system will not let you overwrite the currently open Normal.dotm file. You can also save it in a different folder with the correct name as another option. You will also need to be sure to save it exactly as a Word Macro-Enabled Template (*.dotm) file.

4. Replace the Old Template
Once you have saved the file with its new name or in a different location, you can close Word completely. Then delete the original Normal.dotm file or move it to a different location as a backup. Then you can rename your new file to Normal.dotm inside the Templates folder and open Word again. You can create a new document and then save it to confirm that it no longer asks you to upgrade the document to the newest file format.
For additional training resources, check out our online IT training courses.
Check out our extensive IT book series.