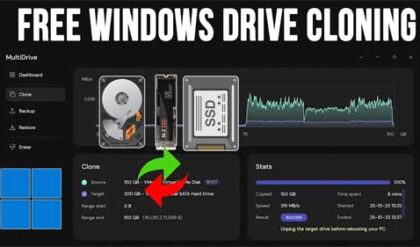
The hard drive in your computer stores things such as the computers operating system (such as Windows) as well as files like documents, music and pictures. Like any electronic component they can go bad and may need to be replaced. Some people even add additional hard drives to their computer for extra storage space.
In this section we will show you how to install an IDE hard drive into your PC. IDE hard drives are one of the most common type of hard drive used in computers today. Serial ATA hard drives are gaining popularity and starting to take over because of their increased data transfer rate.
Your computer will have 2 IDE controllers on the motherboard and each controller allows for 2 IDE devices. Keep in mind that CD-ROMs and other certain other devices count as IDE devices so that takes away from one of your 4 available devices. There will be a primary and secondary IDE controller on the motherboard. Newer motherboards will designate the primary controller with a blue connection. Always make sure the computer is off and unplugged before taking off the cover and adding or removing devices!
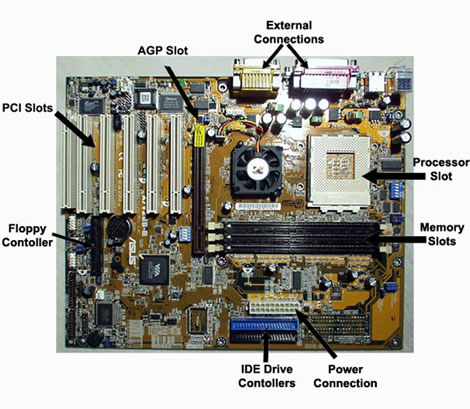
You will want to use the primary controller for your hard drive that you will boot from which will most likely contain your operating system. If you are adding an additional hard drive you can use any controller position you may have open.
One important step to remember is to set your hard drive jumpers to match what you already have in your system. If you only have one hard drive you want to set it as master or cable select. Cable select determines the master/slave setting by which connection on the cable you use. If you are adding a hard drive to your secondary IDE controller for example and you have a CD-ROM installed as a master drive on the same controller, then you need to make your new hard drive a slave or else you will have a conflict.
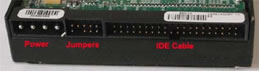
Jumpers are usually on the back of the drive and have a diagram showing what position the jumper needs to be in for what setting. You will also notice that there is a plug for power and a port for an IDE cable. In most cases the red stripe on the cable will go next to the power plug. Most cables are keyed you can’t put it in wrong.
Once you have the hard drive in place and everything plugged in its time to configure and format the drive. If it is your primary drive and you have no operating system installed already then you need to boot to a disk to start the installation process. In most cases the installation process will give you a chance to format your new hard drive. Keep in mind you cant use it without formatting it first.
If it is a secondary drive you should be able to boot into your operating system and see the new drive and format it from there. Once thing to watch for is when the computer starts and shows the installed drives is to make sure your new drive shows up in this listing. Most modern motherboards have good auto detect capabilities which will find the drive when you start up.
If all goes well its time to start enjoying all that new found space!