Virtualization is a great way to do things such as test out new operating systems without needing to change the configuration of your computer to do so. You can also use it to test out new software or operating system patches without risking harming your main computer. Not too long ago, you needed to use expensive servers to create virtual machines but now you can do so on your desktop computer running Windows, Linux or even macOS.
VirtualBox is a free desktop virtualization app that runs on Windows and Linux and once you have it installed, you can then create virtual machines running a variety of operating systems. You can then run as many virtual machines (VMs) as your host computer has the resources to handle.
When you are working on one of your virtual machines, you would normally access it via the console screen from the VirtualBox Manager software. But this is not the only option you can use to connect to your VM. In this article, we will be showing you how to connect to any VirtualBox virtual machine using the Remote Desktop client.

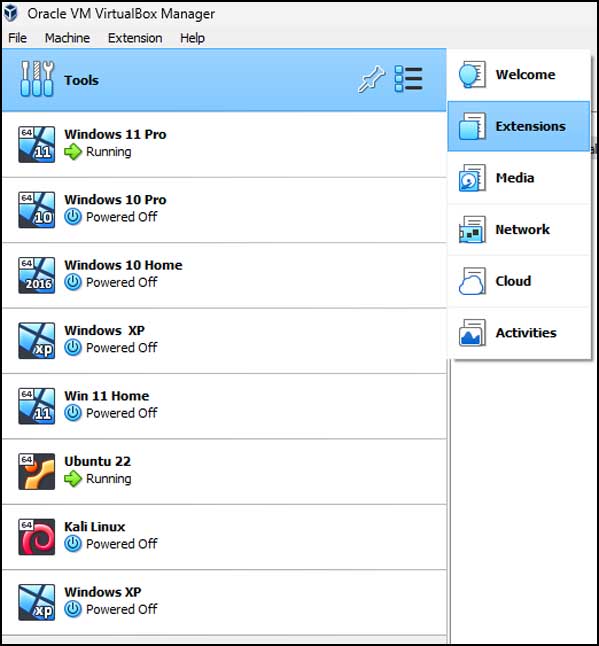
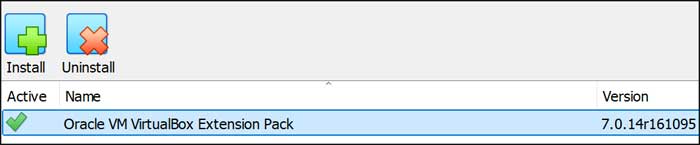
In order to connect to your virtual machines using the Remote Desktop client, you will need to make sure that you have the Oracle VirtualBox Extension Pack installed. You can check by going to the Tools section in the VirtualBox Manager and then to Extensions.
If you do not have the VirtualBox Extension Pack there, then you will need to install it. You also need to be sure that you are using the same version of the extension pack that matches your version of VirtualBox. You can download the extension pack here and click the Install button to browse to the file you downloaded.
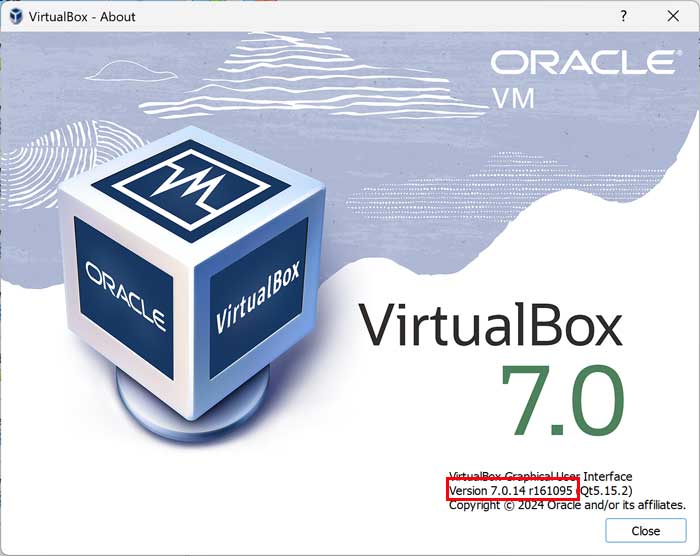
You can find your version of VirtualBox by going to the Help menu and then About VirtualBox.
Once you have the extension pack installed you can go to the settings for the virtual machine you want to connect to with Remote Desktop. Next, go to the Display section and click on the Remote Display tab and check the box for Enable Server.
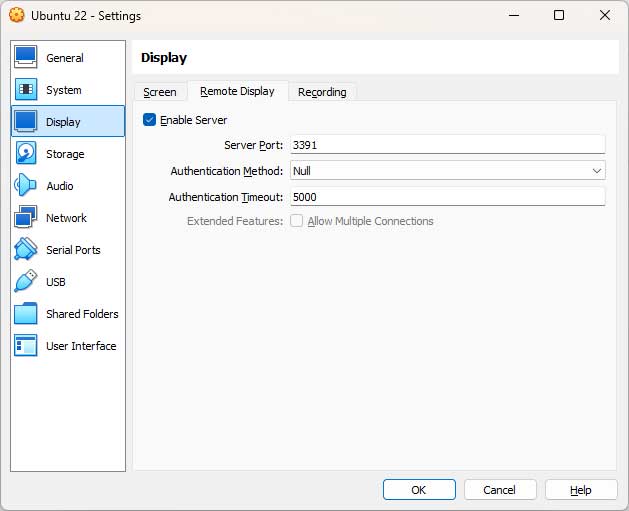
You should then change the server port from 3389 to something different since that is the default port used with Remote Desktop, and you do not want to get into some connection loop since you are technically connecting to your own computer since it’s running VirtualBox.
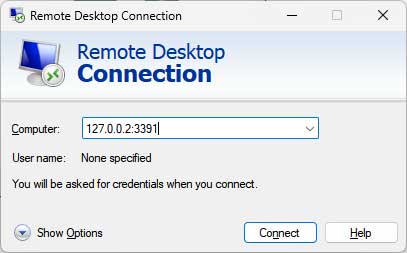
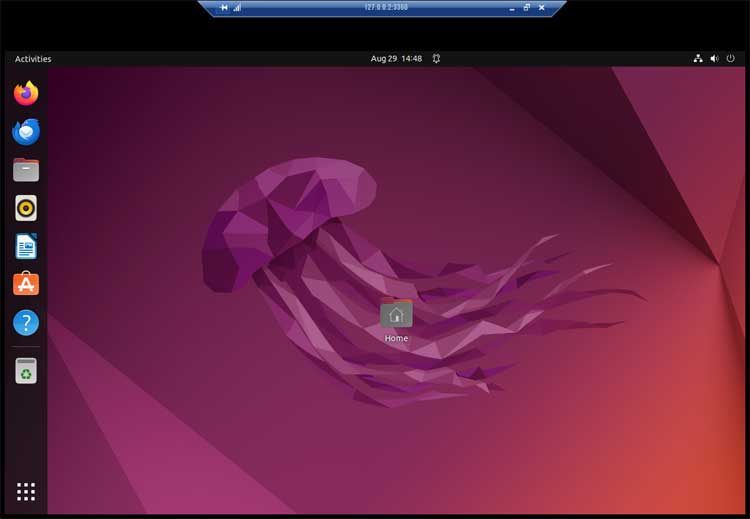
For our example, we will be using port 3391 and you can use whatever number you like. The IP address you should use will be 127.0.0.2 and you need to add a colon and then the port number after it. So, for our example, we will enter 127.0.0.2:3391 in the Computer box in the Remote Desktop client.
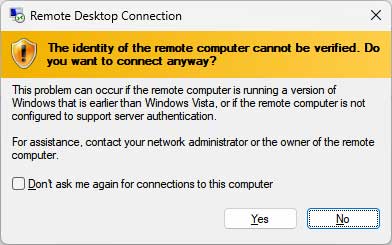
Once you click the Connect button, you should see a warning telling you that the identity of the remote computer cannot be verified and if you want to connect anyway. This is a fairly normal message for Remote Desktop connections. You can check the box that says Don’t ask me again for connections to this computer if you do not want to see this message next time you connect to the VM.
Once you click the Yes button, your Remote Desktop connection will be made to your virtual machine. As you can see in the image below, we connected to a Linux VM using Remote Desktop which is something you typically cannot do.
If you plan on using the remote display feature with other virtual machines, you should give each one their own unique port number to make sure Remote Desktop connects to the right one.
For additional training resources, check out our online IT training courses.
Check out our extensive IT book series.