
Last Updated on May 8, 2026
Why You Should Check Your Computer Uptime
Most of us leave our computers running 24 hours a day without giving it a second thought.
When we do that, things can start to slow down thanks to your memory (RAM) being used and not released completely when we close open programs.
It is nice to be able to find out exactly how long your computer has been running.
This helps you decide if it is time to shut down all of your open programs and perform a clean reboot.

There are several ways you can check the uptime of your computer, but the exact results you get will vary slightly.
You can use the command line, PowerShell, or even the Windows GUI (Graphical User Interface) itself.
In this article, we will be going over all of these methods so you can choose the procedure that works the best for you.
Using the Command Line to Check Uptime
If you are the type of person who likes to type commands into a command prompt window, you can easily use these methods.
The catch is that the results you get here will show you the exact last reboot time and not the last time your computer was simply woken up.
If your computer was completely powered off and you then turned it on, it would tell you the last reboot time, not the time since you powered it on from a dead stop.
Here are several commands that you can use to check when your computer was last rebooted.
The WMIC Command
The first method uses the WMIC command to query the operating system.
Step 1: Open your command prompt and type: wmic path Win32_OperatingSystem get LastBootUpTime
Step 2: Press Enter to run the command.
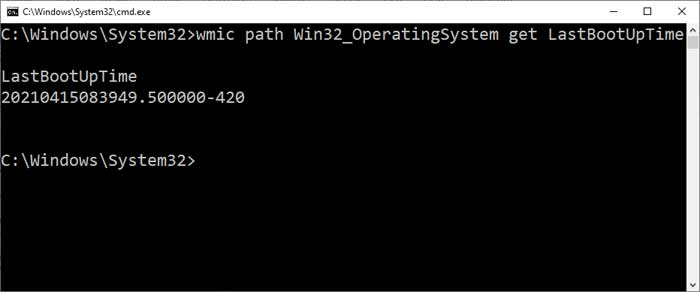
Here you will have to interpret the time, but it breaks down into year, month, day, and then time.
For example, a result of 20210415083949 means the reboot date and time was April 15, 2021, at 8:39 AM.
Please note that this specific command is deprecated and will not work in newer versions of Windows, such as Windows 11.
The Systeminfo Command
A much more readable command line option uses the systeminfo tool.
Step 1: Open your command prompt and type: systeminfo | find “System Boot Time”
Step 2: Press Enter to view the results.
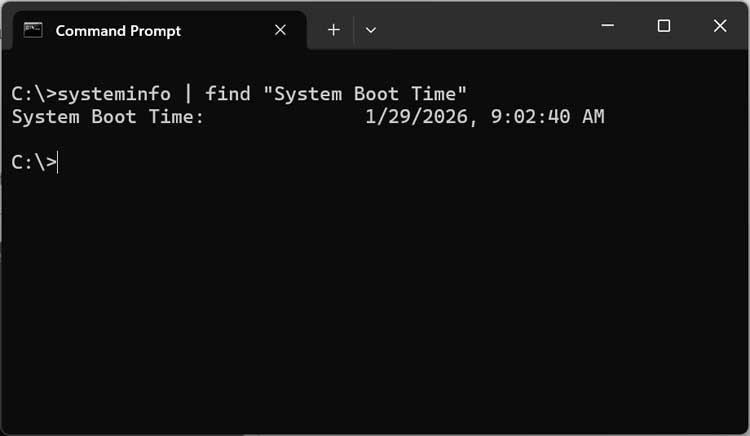
This method will clearly show you the last reboot date and time precisely where it says “System Boot Time.”
The Net Statistics Command
Step 1: Open your command prompt and type: net statistics workstation
Step 2: Press Enter to execute the command.
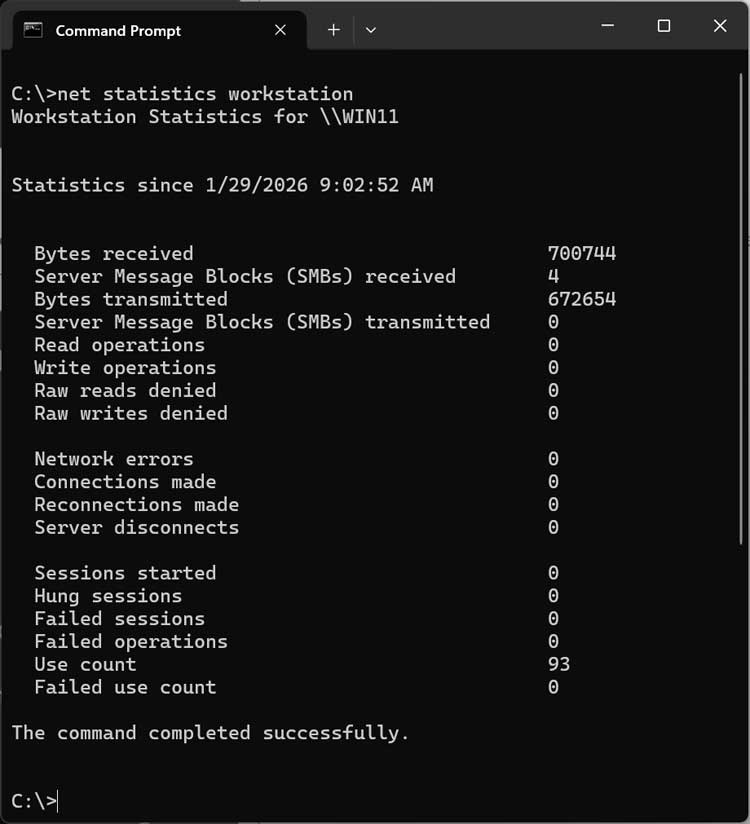
This method will show you the last reboot time as well as some additional network information.
The specific line that says “Statistics since” will show the exact date and time of the last reboot.
Using PowerShell to Find Windows Uptime
Using PowerShell is similar to the command line, but it offers much more powerful tools and commands.
To start PowerShell, simply type “PowerShell” into your Windows search box and open the application.
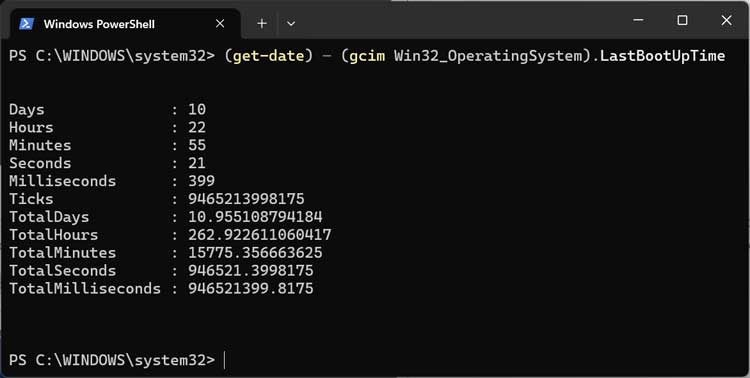
You can use the Get-Date command combined with WMI classes to find out exactly how long your computer has been running.
This information is conveniently broken down into days, hours, minutes, seconds, and milliseconds.
Step 1: Open PowerShell and type:
(get-date) – (gcim Win32_OperatingSystem).LastBootUpTime
Step 2: Press Enter to see the time breakdown.
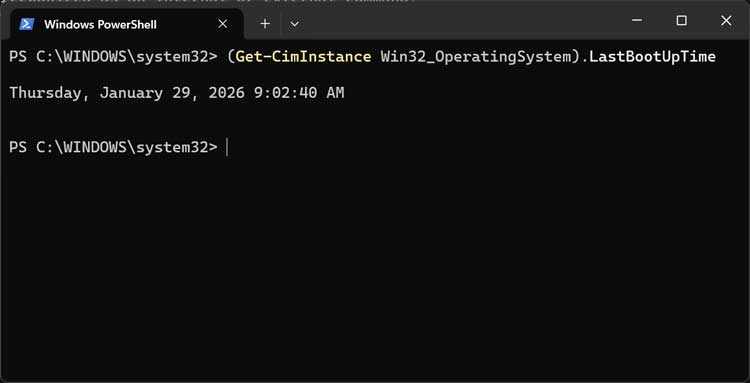
You can also use a slightly different command to get just the timestamp.
Step 1: Type this command into the prompt:
(Get-CimInstance Win32_OperatingSystem).LastBootUpTime
Step 2: Press Enter to view the date and time.
There is another dedicated command you can use in PowerShell, but it requires PowerShell version 6 or higher on your computer.
Since Windows usually defaults to version 5, you may need to manually upgrade your PowerShell version to use it.
If you have version 6 or newer, simply type Get-Uptime -Since to see the results.
Finding Uptime in the Windows Task Manager
A very easy and visual way to see exactly how long your computer has been running is to use the Windows Task Manager.
To open the Task Manager, you can right-click on any blank spot on your Taskbar and choose Task Manager.
You can also press Ctrl-Alt-Del on your keyboard and then choose Task Manager from the provided security screen choices.
Once you are in Task Manager, you will want to navigate to the Performance tab.
Next, click on the CPU section on the left side of the window.
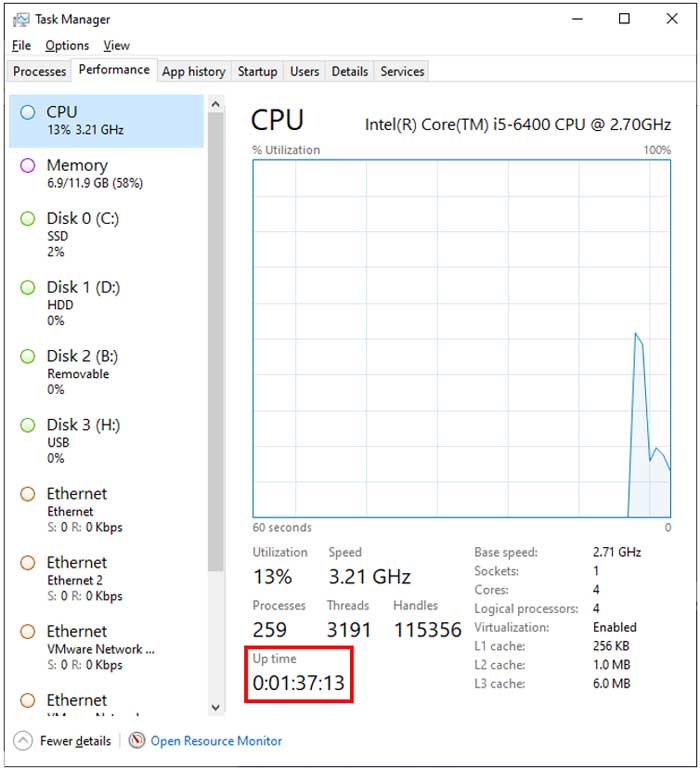
Look closely at the bottom of the window for a section labeled “Up time.”
This live counter will tell you exactly how long your computer has been running in days, hours, minutes, and seconds.
Checking Uptime via Network Adapter Status
Another easy GUI method to find your computer’s running time is to check the status of your network adapter.
To do so, you will need to open the Windows Control Panel and go to the Network and Sharing Center.
From there, click on “Change adapter settings” located on the left-hand menu.
Next, you will need to find the specific network adapter that you are currently using to connect to the internet.
If you only have one active connection, then that will be your only choice.
When you locate your active network adapter, simply double-click on it to bring up the connection statistics window.
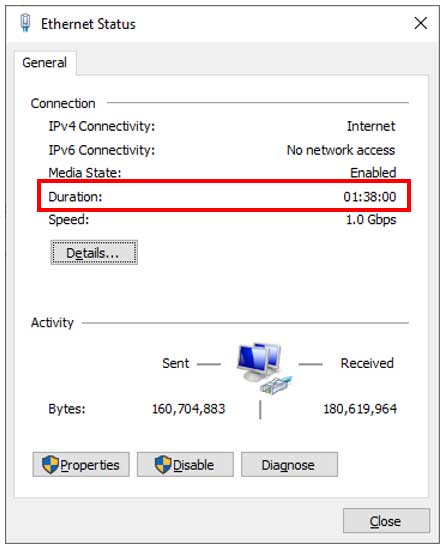
Here you will see a section named “Duration,” which tracks how long the connection has been active.
Assuming your network connects as soon as Windows boots up, this will accurately tell you your system uptime as well.
As you can see, you have several quick ways to find out how long your computer has been running or even the exact time it was last rebooted.
For additional training resources, check out our online IT training courses.
Check out our extensive IT book series.


