
Last Updated on March 12, 2026
Starting with Windows 8, Microsoft decided to standardize their operating system between desktop computers and tablets. They started releasing apps that run on both PCs and mobile devices to unify the ecosystem. Apps are different than standard desktop programs in the way they interact with Windows. They tend to look and feel much more like something you would use on your smartphone.
Apple has their App Store and Android has their Play Store. Microsoft came up with their own centralized place to download secure applications. It is officially called the Microsoft Store. You can easily access this digital storefront to find completely safe software for your computer without downloading random files from the internet.
Go Shopping For Apps at the Microsoft Store
1. Open the Microsoft Store
To open the Microsoft Store you simply type the word store directly into your Windows 11 Start menu search box. Click on the Microsoft Store icon from the search results to launch the application. This connects you to the modern digital storefront instantly.
2. Browse the Home Screen
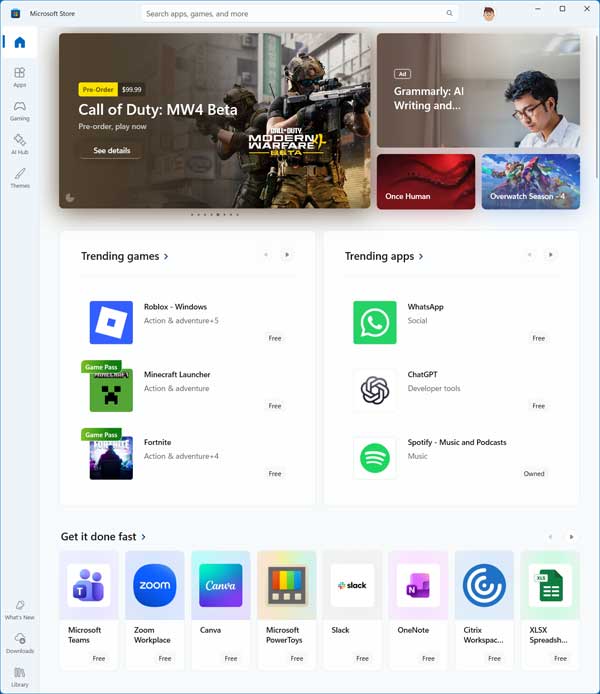
After you open the Microsoft Store you will see the redesigned home screen. This main dashboard highlights trending games, popular apps, and AI writing assistants. You will also see special promotional deals currently offered by Microsoft.
3. Navigate the Store Categories
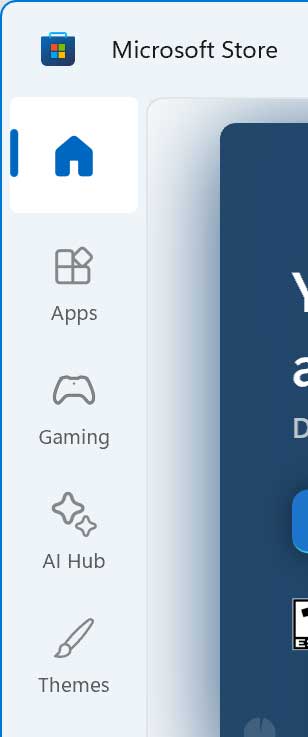
There is a dedicated navigation menu located on the far left side of the window. You can choose from specific categories such as Apps, Gaming, AI Hub, and Windows Themes. Clicking on one of those categories brings up the top downloads and newest releases for that specific section.
4. Search for Specific Apps
There is also a prominent search box located at the very top of the screen. You use this to search for a specific app or terms related to the software you need. Hitting enter brings up a clean list of software matching your exact keywords.
Installing and Launching Your Apps
1. Review the App Details
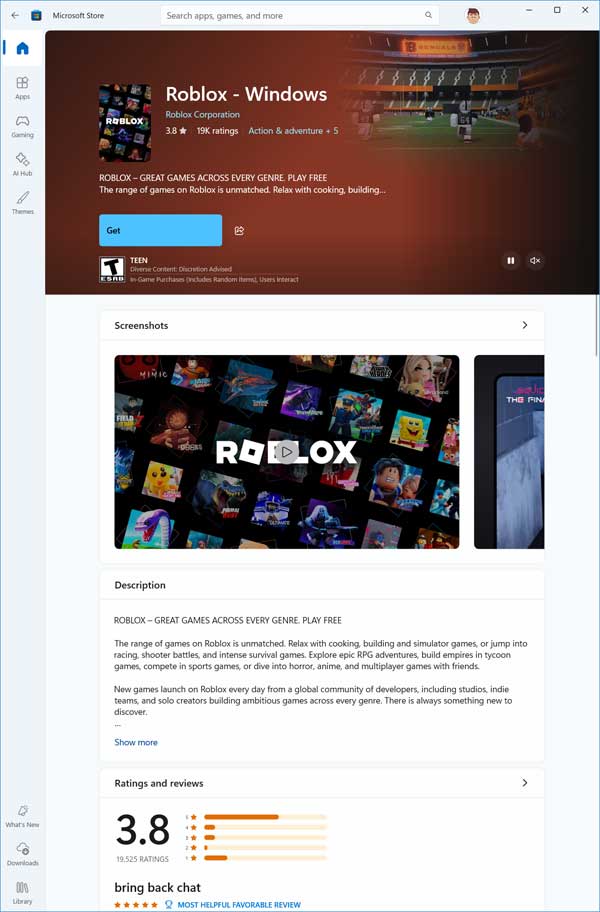
Once you find the app that you want, click on it to open the detailed description screen. Here it shows you critical information like the user rating, interface screenshots, and system requirements. Reviewing this information ensures your computer hardware can actually run the software smoothly.
2. Download and Install the App
If everything checks out, simply click on the blue Get button to install the app on your computer. Free apps download immediately. Premium apps require a Microsoft account configured with a valid credit card to process the purchase.
3. Launch from the Start Menu
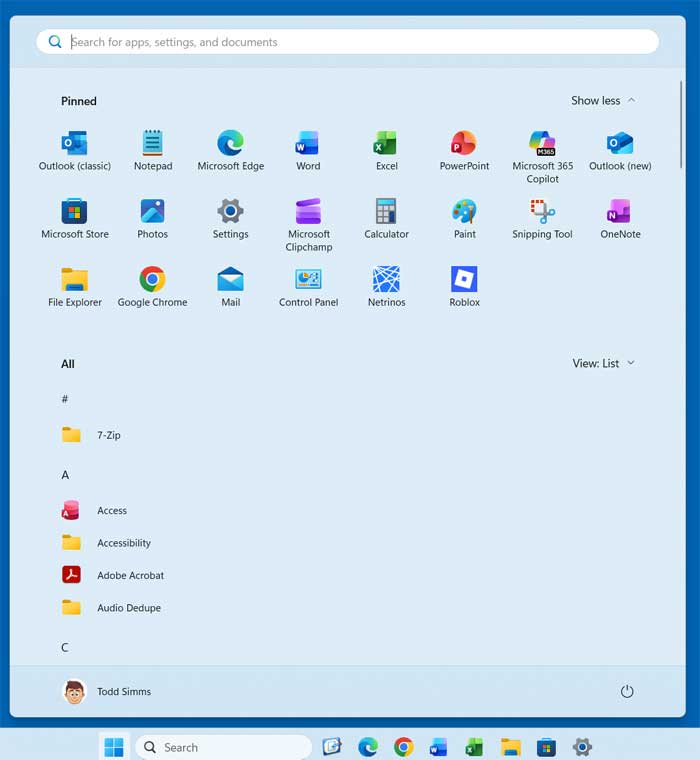
After the app finishes installing, you might get a popup notification to launch it. If you miss the notification, open your Windows 11 Start Menu. The new app will appear in your Pinned section or under the All apps list.
Uninstalling Apps to Free Up Space
1. Understand App Storage Space
You might decide you do not want to use an app anymore. You can uninstall it quickly to get your hard drive space back. Modern apps take up physical storage space on your drive. High-end video games consume massive amounts of room.
2. Uninstall Directly from the Start Menu
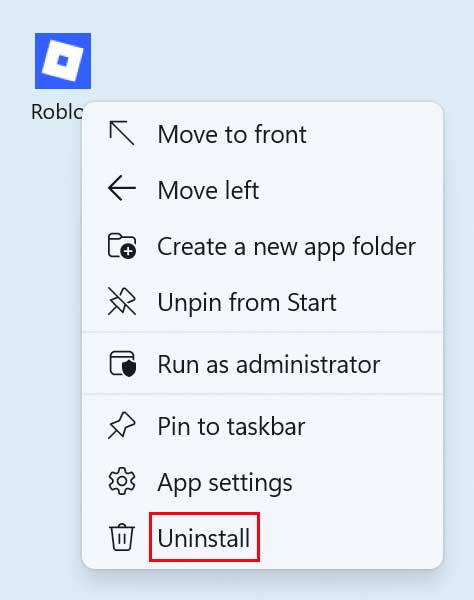
There are several ways to uninstall an app in Windows 11. The absolute easiest method is finding the app icon right on your Start Menu. Right-click the icon and choose Uninstall from the context menu. Windows will warn you that the app and its related data will be permanently removed.
3. Reinstalling Apps Later
Once the app is uninstalled, it is completely gone from your computer. You must re-download and reinstall it again from the Microsoft Store if you ever want it back. Your previous purchases remain tied to your Microsoft account forever.






