
Last Updated on March 17, 2026
Make your computer easier to use with the Windows Ease of Access features
The Ease of Access Center a feature of Windows that lets you turn on and set up accessibility settings and programs available in Windows. You can adjust settings that make it easier to see your computer, use the keyboard and mouse, as we as other input devices. You can access the Ease of Access Center by going to Control Panel and then the Ease of Access icon or searching for ease of access from the start menu search box or Cortana for Windows 10.
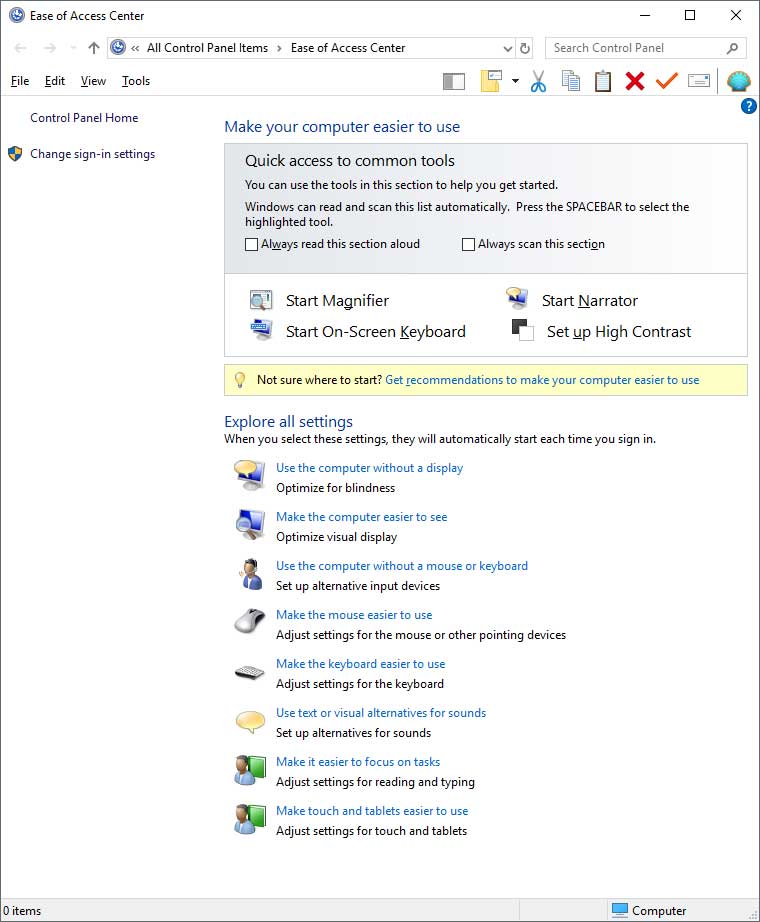
When you first open the Ease of Access Center you will be on the main screen that has all the main categories you can choose from. If you check the box that says Always read this section aloud then Windows will speak the text of the 4 main items you can work with in the top section when you click on them. These items are Start Magnifier, Star Narrator, Start On-Screen Keyboard and Set up High Contrast. The Always scan this section checkbox will have Windows scan and highlight tools in Ease of Access Center.
If you are running Windows 10 you can click on Settings and then Ease of Access to get the same options plus some extra features you don’t find in older versions of Windows. We will mainly focus on the Control Panel version since it applies to older versions of Windows as well as Windows 10 but we will also discuss some Windows 10 only options.
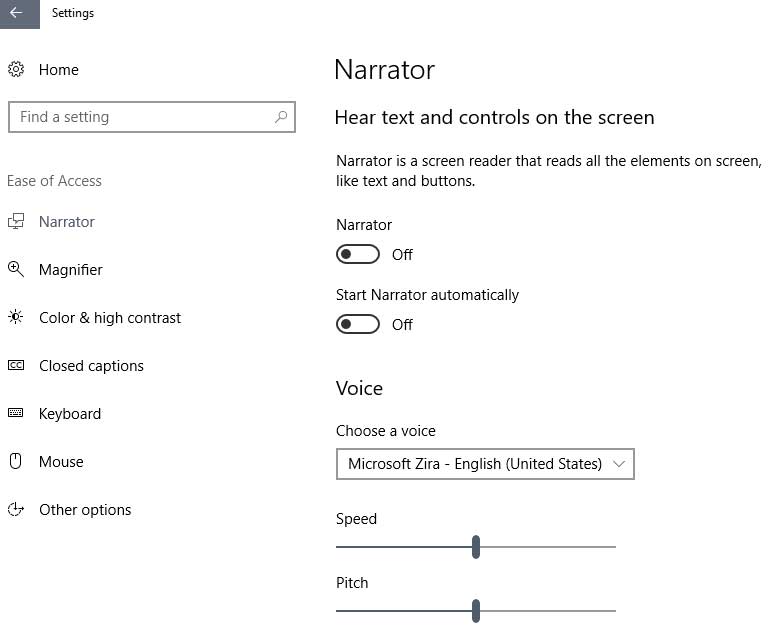
Windows 10 Ease of Access Center from the Settings area.
Control Panel version of Ease of Access Center
Now let’s talk about the 4 main tools from the top section of the settings from the Control Panel version.
The Magnifier is used to enlarge the screen where you have positioned the mouse so you can get a better view of what you are trying to see. You can magnify the screen from 2x up to 16x. You can also have the magnifier track the mouse cursor, keyboard focus or have it follow where you are typing. Another option is to invert the screen colors to allow you to see certain items better.
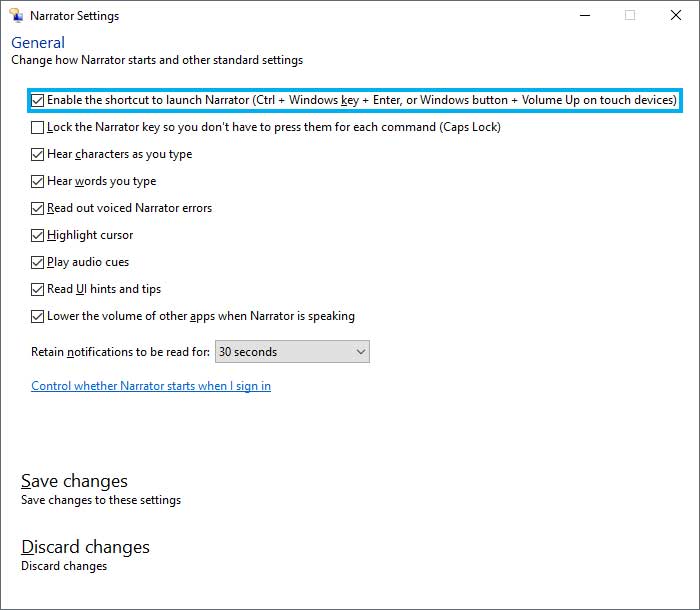
The Narrator is used to read text on the screen aloud and can also describe events such as an error messages that appear while you’re using your computer. This is useful for people with impaired vision. The Narrator will read text to you on the screen in case you are having trouble seeing it. For example you can highlight text in a document and it will read that text out loud or you can right click a link on a webpage and it will read that as well. When you click on Narrator to enable it you will get a window that has options for various settings such as how to navigate while using Narrator, how to change the voice and speed of the voice and access to the Narrator user guide. If you are feeling technical you can also create your own commands that can be used with Narrator. If you go to the General section you can see that there are many options you can check and uncheck such as hear words you type and having the cursor highlighted at the sections that are being read. Windows 10 has some additional options such as intonation pauses for voices and the ability to change the amount of contextual reading for controls and buttons.
The On-Screen Keyboard can be used in place or in addition to a regular physical keyboard. It’s useful if you have trouble typing or using your hand/fingers on the keyboard. It displays a visual keyboard with all the standard keys. You can select keys using the mouse or another pointing device like your fingers if you have a touchscreen on your computer.
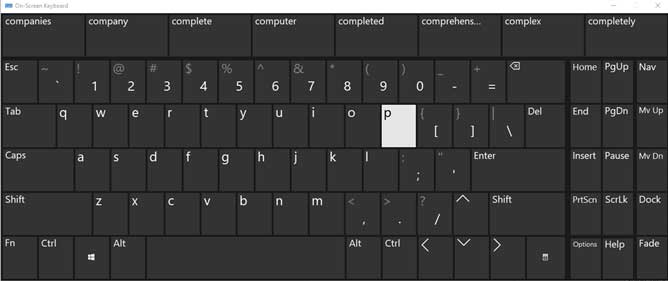
You can configure the keyboard by accessing the Options key to bring up the options dialog box. You can type characters either by clicking on the appropriate key or you can hover over the character for a set amount of time and have it type it in Hover over keys mode. You can also turn on the number pad as well. One nice feature is the text prediction option that will try and predict what you are typing like how your keyboard on your smartphone works. Once you type a few letters it will try and figure out what you are going to type and then you can click on that word on the top of the keyboard to select it. You can also enable Sticky Keys which lets you press one key at a time for keyboard shortcuts and Toggle Keys which will sound an audible tone when the caps lock, numbers lock or scroll lock keys are pressed. The keys on the very right will let you do things like fade the keyboard into the background and dock it at the bottom of the screen. There is also an option to have the on screen keyboard start with Windows.
The High Contrast option sets a high-contrast color scheme that heightens the color contrast of some text and images on your screen, making those items more distinct and easier to identify. You can use hot keys (Left Shift + Left Alt + Print Screen) to toggle High Contrast on and off when needed. It will ask you if you want to turn it on to confirm after pressing the hotkey combination and you use that same key combination to turn it off. It will not change the existing programs you have open such as web pages but any new items you open like a new webpage will be in high contrast mode.
Now let’s talk about the other sections under the 4 main tools.
If you choose the Use this computer without a monitor option Windows will automatically turn on the Narrator and Audio Description features. There are a few other options you can configure in this section if needed.
The Make this computer easier to use feature will enable the high contrast mode and if you like you can check other options for the Narrator and Magnifier so that they are enabled when you enable this mode.
Use this computer without a mouse or keyboard will enable the on screen keyboard and you can also enable speech recognition so you can speak commands to Windows.
The Make the Mouse Easier to Use section allows you to change the mouse pointers to make them larger or stand out more using high contrast colors. Mouse Keys allow you to use the numeric keypad to move the mouse around the screen. You can also set the mouse to activate a window by simply hovering over it rather than having to click on the window itself.
The Make the Keyboard Easier to Use section is where you can setup features such as Sticky Keys which allow you to apply multiple keystrokes with just one key, Toggle Keys which can play an alert each time you press the caps lock, num lock, or scroll lock keys in case you didn’t mean to press them and Filter Keys which ignore keystrokes that occur in rapid succession, or keystrokes that are held down for several seconds unintentionally.
Use Text or Visual Alternatives to Sounds provides settings for using visual cues to replace sounds in many programs. The Turn on visual notifications for sounds (Sound Sentry) option sets sound notifications to run when you start Windows. These notifications replace system sounds with visual cues, such as a flash on the screen. This notification method makes sure that you see system alerts just in case you don’t hear them. The visual warnings include flash active caption bar, flash active window or flash desktop. The Turn on text captions for spoken dialog option has Windows display text captions in place of sounds to indicate that activity is happening on your computer such as printing a document.
The Make it easier to focus on tasks area allows you to enable things like Sticky keys, Narrator, Toggle keys and Filter keys when you enable this setting.
Make touch and tablets easier to use will let you setup a shortcut key (Windows button and volume up) to start a specific accessibility feature such as the Magnifier, Narrator or On screen keyboard.
Windows 10 has a Closed Caption setting which will allow you to read the words that are spoken from a video, TV show, or movie.
You will notice that some of the sections contain the same features such as turning on Toggle Keys. Don’t be concerned because it is just another way to get to the same feature.
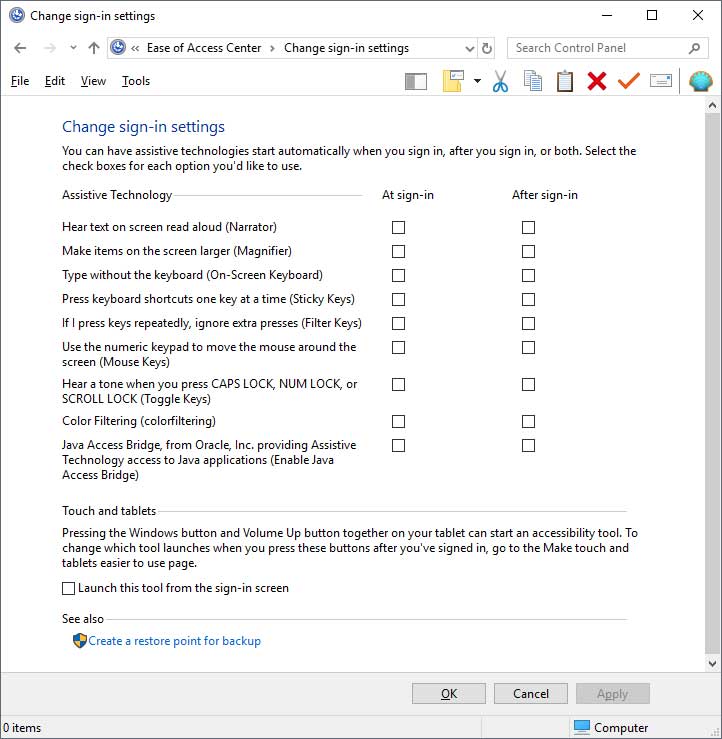
If you click on the Change sign-in settings link you can tell Windows what features you want to have automatically enabled at sign-in or after sign-in.
If you are not sure which Ease of Access feature is right for you then you can click the link that says Not sure where to start? Get recommendations to make your computer easier to use link on the Ease of Access start page. It will take you through a series of questions to help you better understand the features that are best for you.
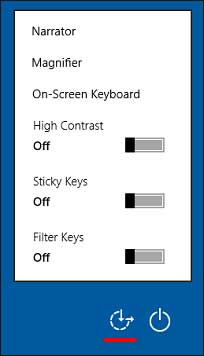
You can also turn on certain Ease of Access features when you get to the login screen by clicking on the Ease of Access button on the lower right hand side of the screen and choose which feature you want enabled when you log in.
For additional training resources, check out our online IT training courses.
Check out our extensive IT book series.


