Virtualization allows you to use the physical hardware on your computer (the host) as virtual hardware for your virtual machines (guests). This way its easy to add or remove hardware on your virtual machines (VMs) with just a few mouse clicks. By being able to do this, we can customize our VMs to suit the particular task that the guest computer was created for.
With VMware Workstation, its easy to add additional hard drives (virtual disks) and when you do so, Workstation simply creates a new VMDK file on your host computer. Then you simply need to add the new drive in the operating system that is running on your guest. You can even use the hard drive on the host itself as storage for your VM rather than making a new VMDK if you know how to do it. You can check out the process here.
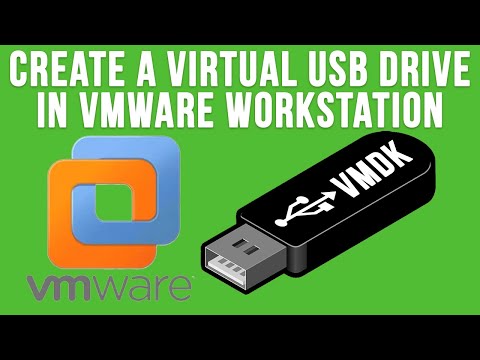
Even though you can attach a USB flash drive to a virtual machine in VMware Workstation, it is still shared via your host computer and when you remove it from your host, its removed from the VM as well. But there is a way to create a virtual USB drive on your guest virtual machine which will act more like a real USB drive rather than a shared one.
Virtual USB Drive Creation Process
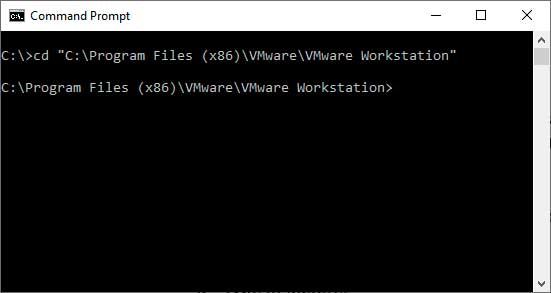
The first thing you will need to do to create a virtual USB drive in VMware Workstation is to create a new VMDK file on your host computer’s hard drive. Once you create this VMDK file, you can use it for other virtual machines as well, but you would need to disconnect it from the other VM first.
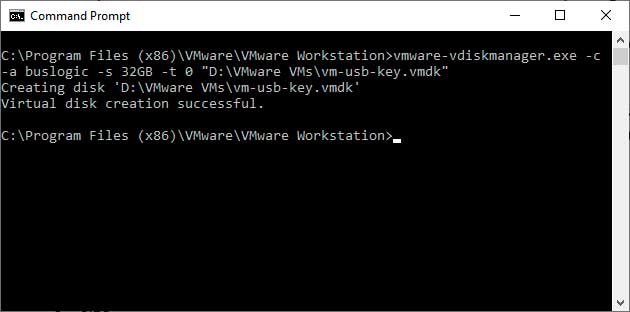
To do this, you will need to open a command prompt on your host computer. You might want to open an administrative command prompt just to make sure things work correctly. Once you have the command prompt open, navigate to your VMware Workstation installation directory which should be C:\Program Files (x86)\VMware\VMware Workstation if you kept the defaults when installing VMware Workstation.
Next, you will need to create the virtual USB drive’s VMDK file by using the following command:
vmware-vdiskmanager.exe -c -a buslogic -s 32GB -t 0 “D:\VMware VMs\vm-usb-key.vmdk“
You will need to change the section that says “D:\VMware VMs\vm-usb-key.vmdk” to match the location on your hard drive you want to create the VMDK file and also its name if you don’t want to use the one from the example. In my example, I will be creating a 32GB virtual disk file using the buslogic adapter that will grow dynamically.
Here is what the switches from the command do.
-c = create
-a = type of adapter
-s = size
-t = type
0 = dynamically sized virtual disk in one file
You will see a message that says Virtual disk creation successful if you typed in everything correctly.
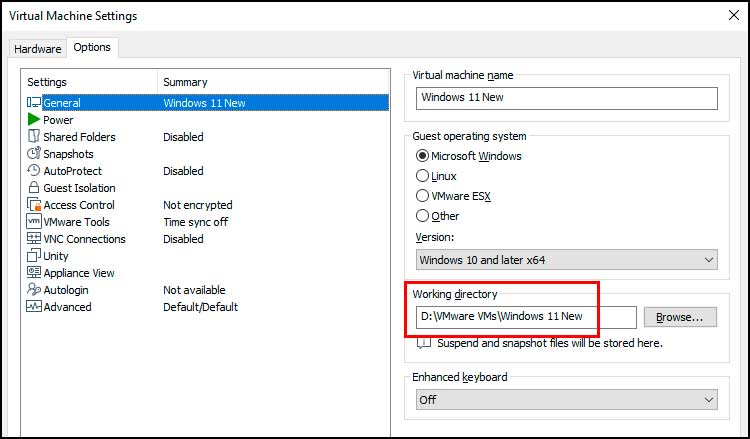
If you didn’t use the directory that contains the virtual machines other disk files in the command, then you will need to copy of move your new VMDK file to that directory.
Editing the Virtual Machine’s VMX Configuration File
The next step involves making sure a couple of lines are in the VMX file for the virtual machine you want to attach the new virtual USB drive to. They should be there by default, but it doesn’t hurt to check. To do so, navigate to the directory that has the files for your virtual machine. If you don’t know this location, then you can find it from the virtual machine’s settings.
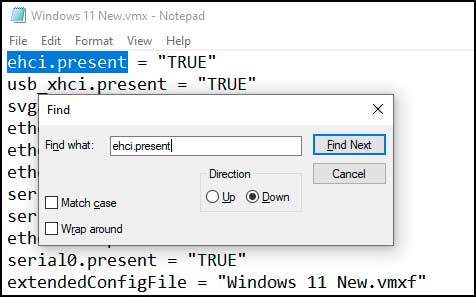
The VMX file will have the same name as your virtual machine with .vmx after it. You can open it with something like Notepad by right clicking on it and choosing Open with . Then look for the following two lines or use the search feature to find them. The xx in the second line will have an actual number.
ehci.present = “TRUE”
ehci.pciSlotNumber = “xx”
Next, you will need to add the following lines to your VMX file by copying them below and pasting them at the bottom of the file. Just make sure the name for the ehci:0.fileName line matches the name of your previously created VMDK file.
ehci:0.present = “TRUE”
ehci:0.deviceType = “disk”
ehci:0.fileName = “vm-usb-key.vmdk”
ehci:0.readonly = “FALSE”
Then you can save your VMX file and double click it to open the VM in VMware Workstation.
Configure the Virtual USB Drive in the Guest Operating System
Next you will need to start your virtual machine so you can have your guest OS configure the new virtual USB drive for usage. This process will vary depending on if you are using Windows or Linux etc. For Windows, you can right click on your Safely remove hardware icon and you should see your new virtual USB drive with its assigned letter.

If you want to change the letter, you can open Disk Management and see your new USB drive and change drive the letter if needed.
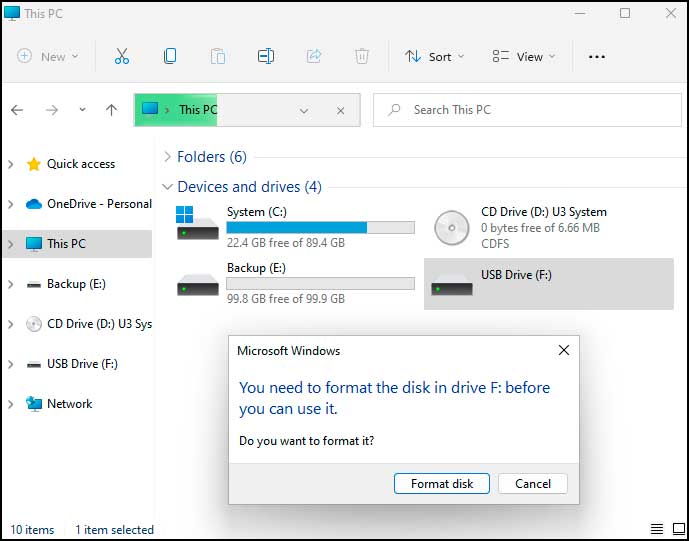
If you try and open your new virtual USB drive, you will get a message saying it needs to be formatted before you can use it. You will have to complete this procedure before continuing.
After your format your new virtual USB drive, you will able to use it just like a USB drive attached to your local computer.
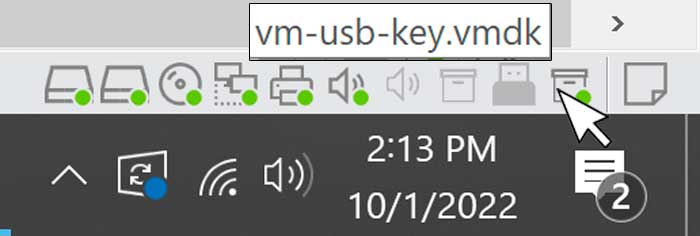
You will also be able to see it in your VMware Workstation system tray at the lower right and if you hover your mouse over it, you will see the name of your VMDK file.
One thing to keep in mind is that if you eject this USB drive in Windows, you will most likely have to add the lines back to the VMX configuration file reboot to get it back.
For additional training resources, check out our online IT training courses.
Check out our extensive IT book series.