Keeping your important files backed up has always been one of the most critical tasks that needs to be performed with your computer on a regular basis. There are multiple ways to backup your files such as copying them to an external drive or uploading them to a cloud service such as OneDrive or Dropbox.
Another common practice is to synchronize your files with another folder on another drive so that way you have two exact copies of the files in your folders. This gives you some additional flexibility because you can do things like sync the new and changed files over to the new folder or keep both files in sync with each other so if you add or delete files from either folder, the other will be updated to match.

There are many programs you can use to synchronize your files and in this article, we will be using the free AOMEI Backupper software to synchronize a folder to a different drive. The first thing you need to do is download and install the software.
Even though the AOMEI Backupper software does more than just synchronize files, we will be using the sync feature for our demonstration. When you open the software, there will be a Sync section on the left hand side of the screen with several options. For the free version, you will only be able to use one of these methods though.
Setting Up a Folder Synchronization Job
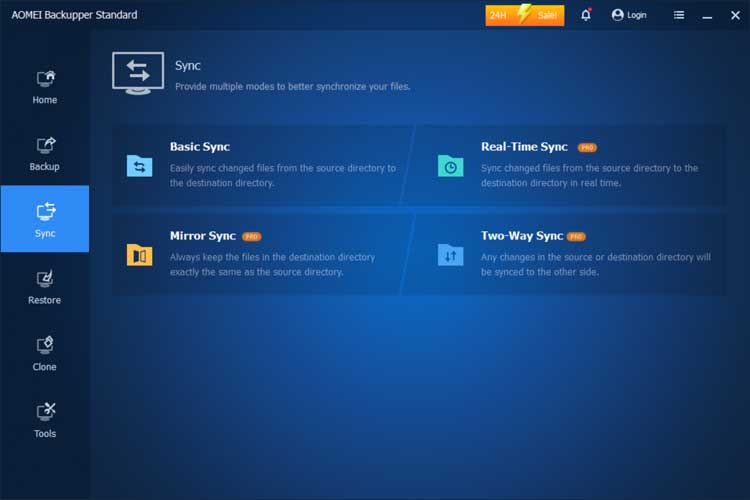
Here is what each type of synchronization job will do.
- Basic Sync – This is a one way sync from a source folder to a destination folder.
- Real-Time Sync – This is also a one way sync but when you change files in the source directory, they will be synchronized with the destination folder in real time.
- Mirror Sync – This method keeps the destination folder exactly the same as the source folder.
- Two-Way Sync – This will keep both the source and destination drive in sync with each other so any changes made to either side will be reflected on the other side.
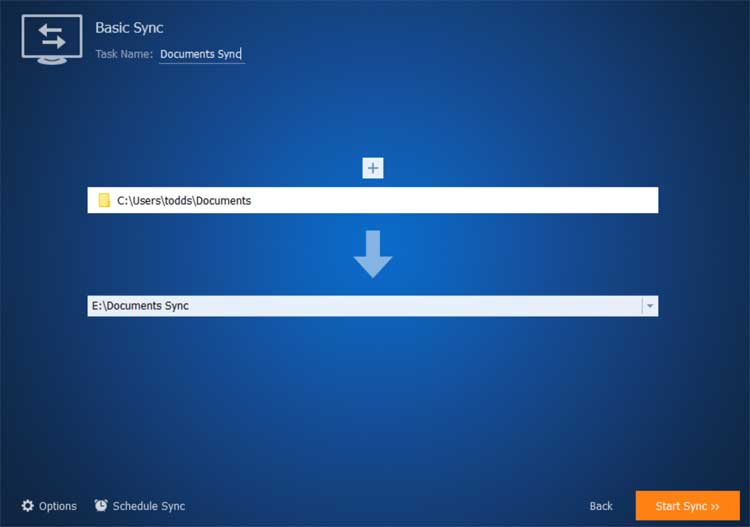
We will now set up a basic sync job between the documents folder on our PC and another folder on our backup drive. To begin, click on the Add Folder button to choose your source folder and then in the box below this button, you can browse to the destination folder or create a new one.

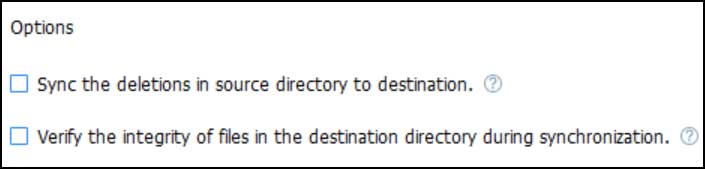
If you click the Options button, you will have the ability to have files that are deleted in the destination folder also be deleted in the source folder during the sync process.
The verify the integrity of files in the destination directory during synchronization option is used to copy files that are in the source directory over to the destination directory if there is not currently a copy of that file there. This comes in handy when you add new files to the source folder and want them copied to the destination folder.
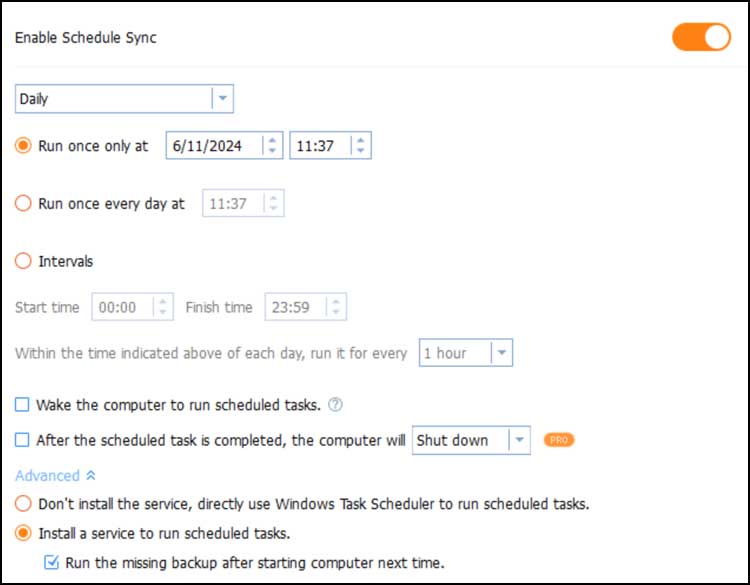
You can schedule your sync jobs to run on a regular basis if you do not want to run them manually. You can schedule them to run daily, weekly, monthly or even when a certain event occurs or when you connect a USB drive.
Performing the Synchronize and Restore Processes
Once you have your source and destination folders configured, you can then click the Start sync button to begin the synchronization process.
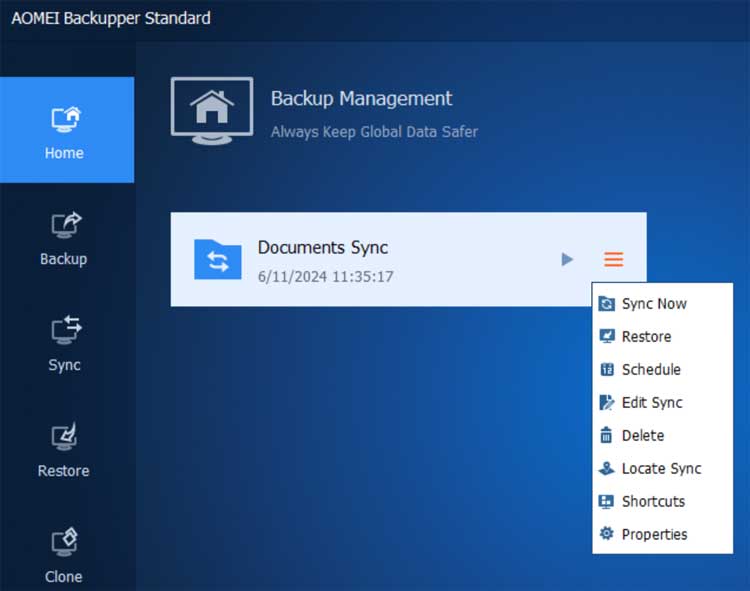
Once the job is complete, you will see it in the Home section of the program. You can then click on the job to see what actions you can take on it such as run, edit and delete. The Shortcut feature is nice because it will place a shortcut for the sync job on your desktop so you can quickly run it from there.
Here is how the Backup Sync feature works when you make changes to your files.
- If we were to make a change to a file at the source and run the sync, the changed file would be updated at the destination.
- If we were to delete a file from the source folder and run the sync, it would not delete the matching file in the destination folder unless the sync deletions in the source directory to the destination setting was enabled in the settings.
- If we were to delete a file from the destination folder and run the sync again, it would not copy that file back over from the source unless it was changed at the source because it would be marked as a changed file or the verify the integrity of files in the destination directory during synchronization option was enabled in the settings.
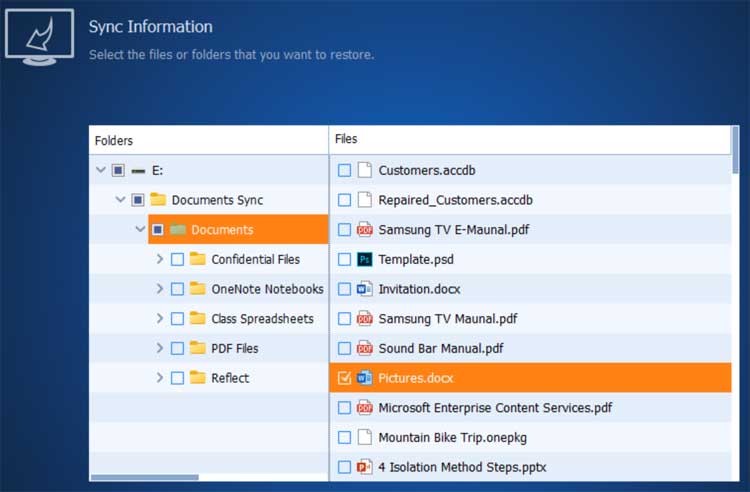
Even though we are technically synchronizing files, we are still backing them up so this means we can restore files if needed. This comes in handy when you do things such as accidentally delete a file, make an unwanted change to a file, or if a file were to become corrupted.
Once you choose the Restore option from your sync job, you can choose which files or folders you want to restore and check the box next to each one.
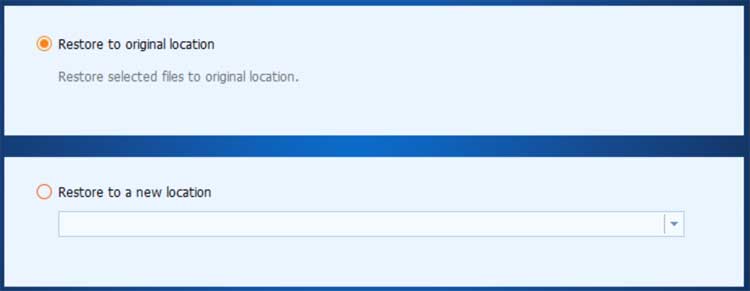
You will then have the option to restore the file to its original location or a different location. One thing to keep in mind is that if you restore the file to the original location and there is already a copy of that file there, it will not be replaced UNLESS the copy in the destination folder is newer than the one at the source.
As you can see, the AOMEI Backupper software can do quite a bit and even the free version with the basic sync backup feature might be all you need.
For additional training resources, check out our online IT training courses.
Check out our extensive IT book series.