
Last Updated on March 12, 2026
Having documents signed with a legally binding signature can be a lot of work if you need to have a professional service do the work for you or if you need to mail out physical copies of the document to be signed by the party on the other end. Fortunately, If you need to have documents signed on a regular basis or need to sign documents yourself before sending them out, then you can use your Dropbox account to send documents for signatures using the Dropbox Sign eSignature feature that can be connected to your Dropbox account.
Many people use Dropbox for storing their files online so they can be shared with other people for collaboration purposes or even as a way to back up your important files. You can even use advanced features such as Automated Folders and Dropbox Transfer to help you get your work done. Dropbox now owns the Sign service, and they have a limited Free plan where you can make 3 free signature requests per month. But this is only available if you are using a Dropbox Business account.

How to send a Dropbox Sign eSignature document for a signature
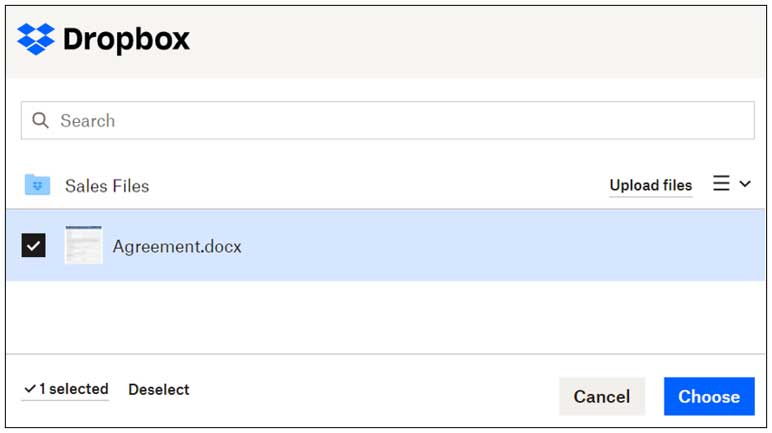
Once you link your Dropbox account to the Sign service, you just need to go to the Sign page. Then you can then choose a file from any Dropbox folder to be sent out for a signature by clicking on Share and then Send for Signature.
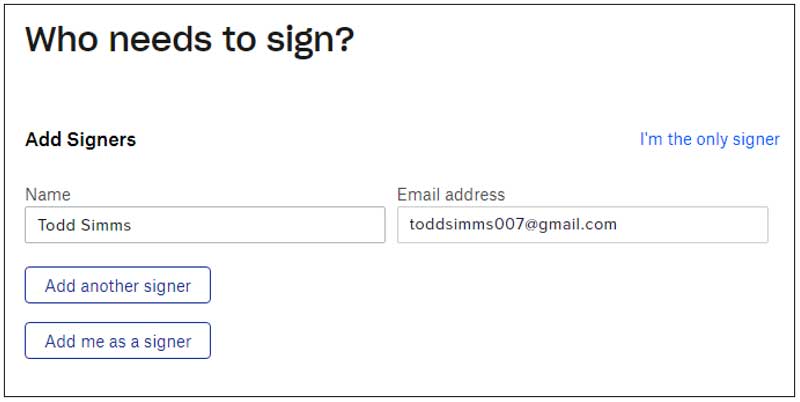
Next, you can fill in the names and email addresses of the people who need to sign the document.
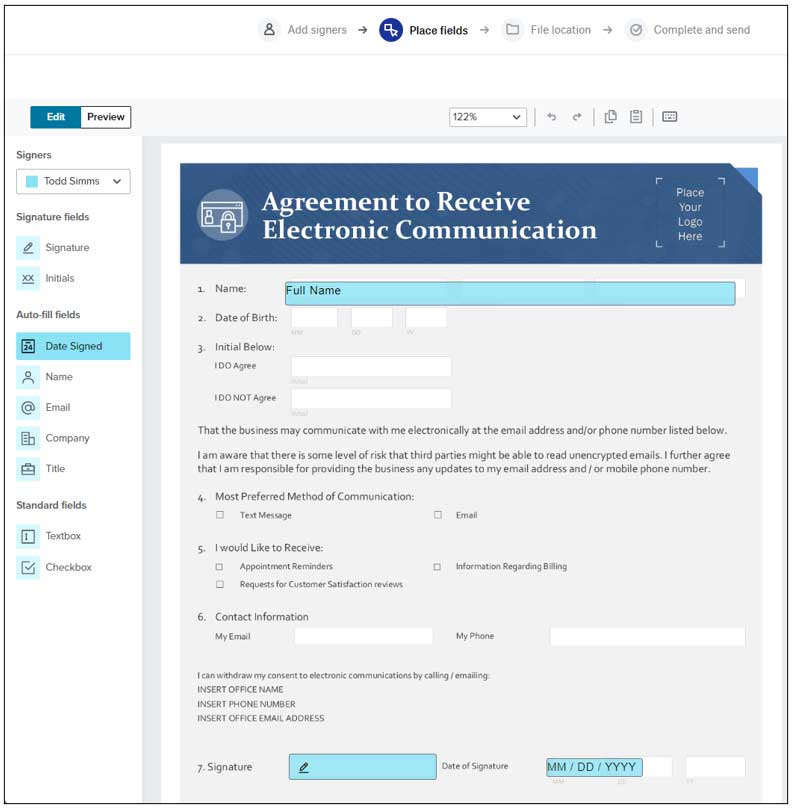
Your document will then be opened in an interface where you can add the signature field along with other fields such as initials, name, date and so on. To add these fields to your document, you can just drag and drop them on the page. You don’t need to have preconfigured field boxes like I have in my document.
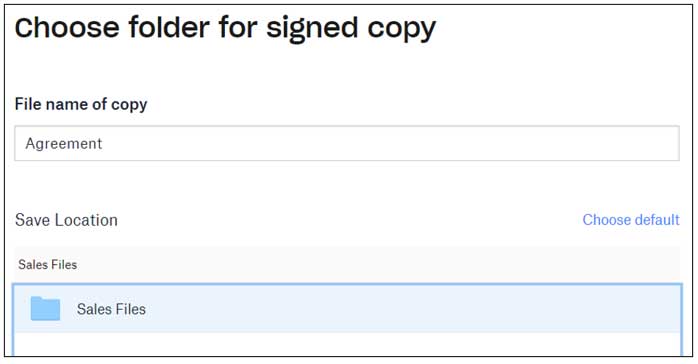
Next, you will need to choose the location where the signed document will be stored. You can keep it in the same folder as the original if you like.
You can then add an additional message if needed and when everything looks good, you can click on the Send for signature button.

How the recipient signs the document
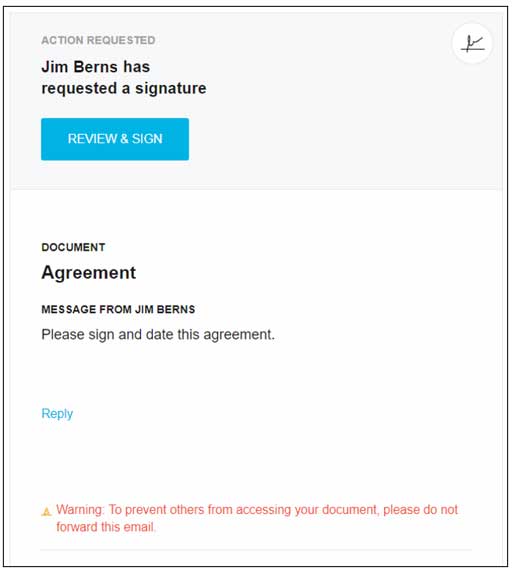
The image below shows how the email will look when received by the person who needs to sign the document. They can then click on the Review & Sign button to start the signing procedure.
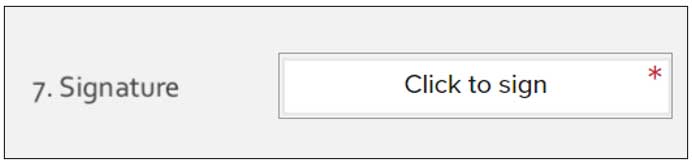
If you added a name and date field, they will automatically be filled in based on the name you put in the request and the date the person signs the document. For the signature, they just need to click on the Click to sign button to get started.
They will then have three signing options including signing it with their mouse or finger, typing it in or adding a signature image.

Once they click the Insert button, their signature will be added to the document.

After they sign the document, they can click the Continue button and then click on the I agree button.
Viewing the signed document
The image below shows what the email will look like that is sent back to you after they sign it. You can then click on the View on Dropbox button to see the signed document, or just go to the folder that you specified the document to be placed in.

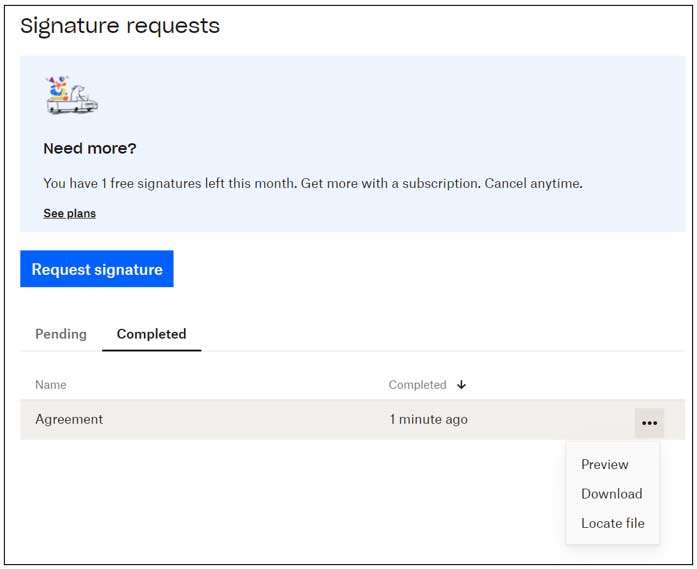
You can also check your signature request status page and preview, download or locate the file from there.
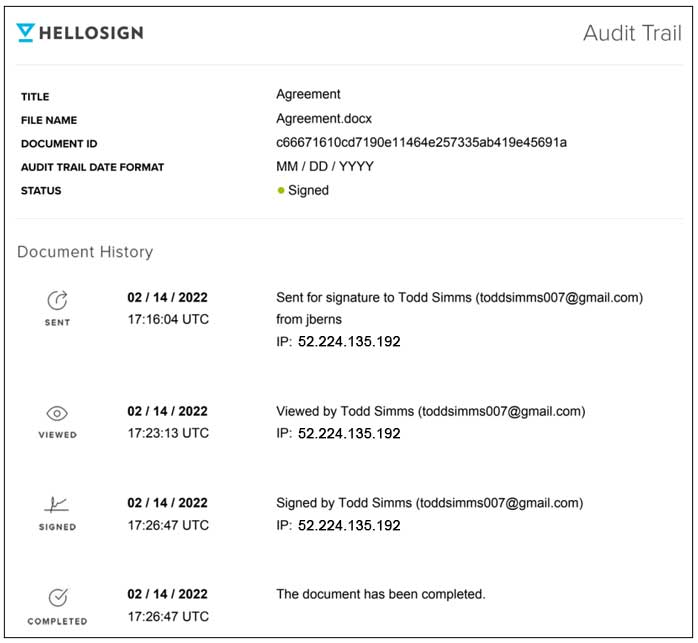
At the bottom of the document, you will have an audit trail which shows the signature process from start to finish.
As you can see, using the eSignature service to have documents signed is a fairly simple process for obtaining legally binding signed documents. If you like the service and plan on using it more than three times per month, you can sign up for one of their monthly plans.


