Backing up your computer is one of those tasks that should be done on a regular basis yet ignored by many people until it’s too late. There are many reasons to perform backups such as having a safe place for your files in case your computer is stolen or stops working altogether. They also come in handy if you accidentally deleted a file and need to get it back or want to restore a previous version of a file or folder.
There are two main types of backups you can use to keep your data safe. There is the file level backup that backs up your personal files and folders. Windows even has a built in tool to do this called File History. There are also many free and effective third party backup tools you can use to get the job done. Then you have system image backups that back up your entire computer including Windows, applications and your files. This can be done once in awhile to have a way to restore your system in case of a non-recoverable crash. In this article, we will be showing you how to create and restore Windows system image backups for free with Foxclone.

Foxclone does not run inside Windows and is actually more of a Linux tool that can be used to clone hard drives and do system image backups in Linux. But you can use it in Windows for your backups and also to clone your hard drive.
Create a Windows System Image Backup
The first thing you need to do is download the Foxclone ISO image file from their website here. Then you can use your favorite USB flash drive image creator tool or even burn it to a CD\DVD if you still have one of those. Here are some free bootable flash drive creator tools you can use.
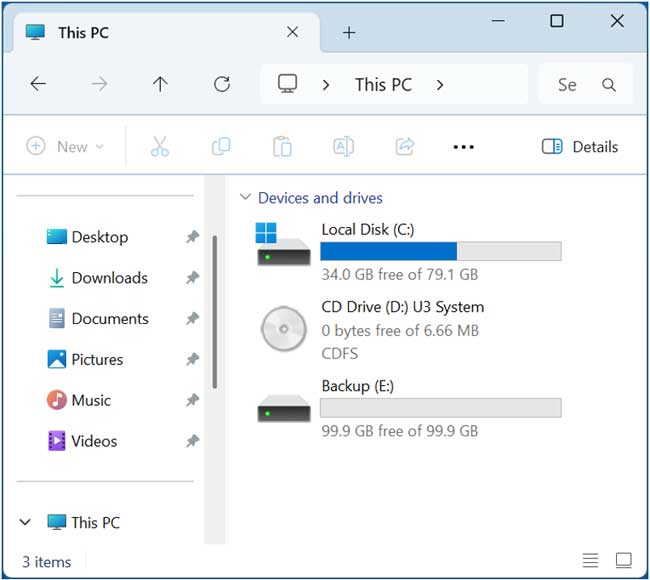
The image below shows our Windows drive that we want to backup and then our secondary hard drive that we will be backing up to.
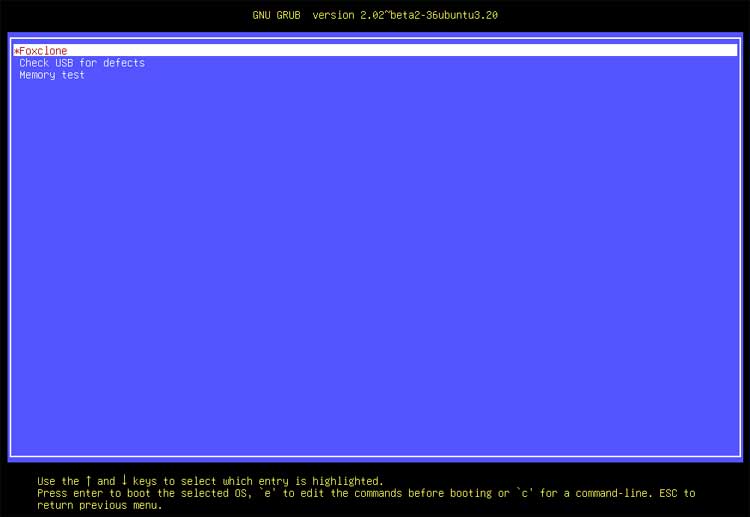
Once you have your Foxclone flash drive ready, you will need to boot your computer to it in order to run the software so you may have to go into your BIOS\UEFI and change the boot order, or you may also have the option to press a certain key on your keyboard on bootup to choose a different boot device.
Once Foxclone is loaded, you will see the main screen where you can start Foxclone, check your USB drive for defects, or run a memory test. You will want to choose the first option to start Foxclone.
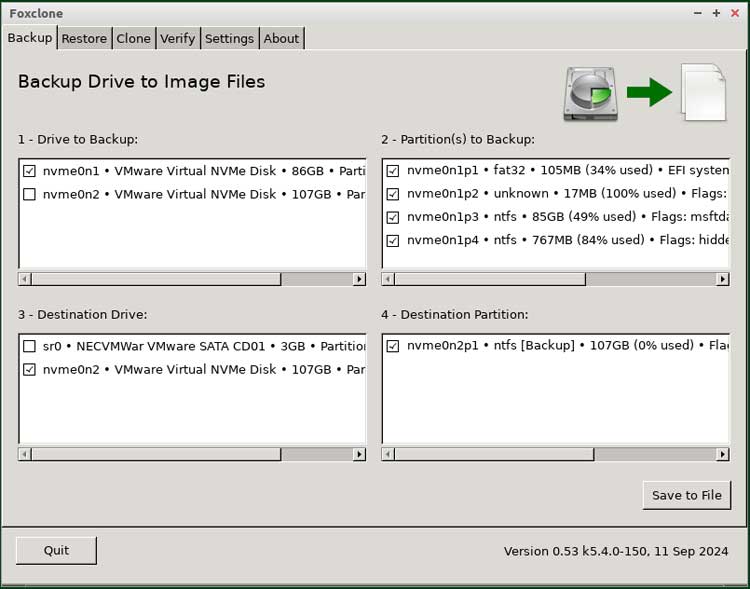
Then you can double click the Foxclone icon on the desktop to start the program itself. The app will then read the hard drives configured on your computer.
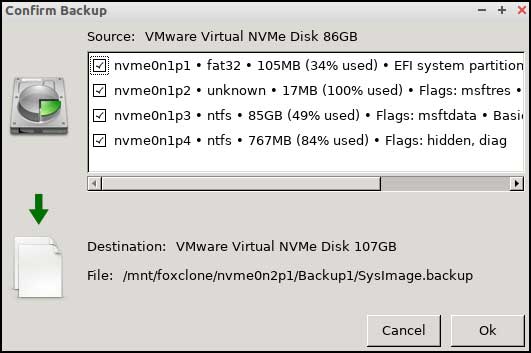
You will then want to be sure you are on the Backup tab and will need to choose the drive you want to back up (Your Windows drive). Once you select the drive, it will list all the configured partitions on that drive, and you will most likely want to keep them all selected. Then for box 3, you will need to choose your destination or backup drive. Then once you do that, box 4 will show you all the partitions on that drive and you can choose the one you want to use if you have more than one configured. Once you have made your selections, click the Save to File button to continue.
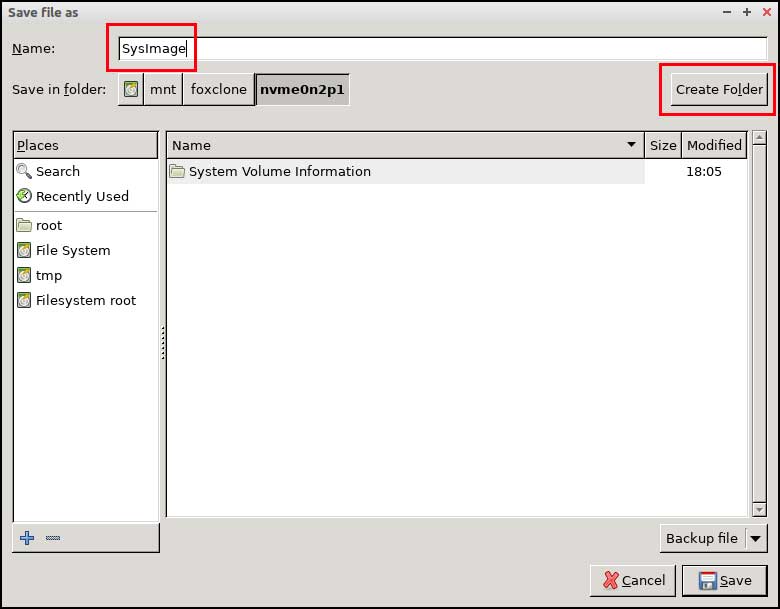
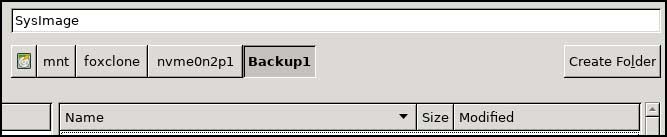
Now you can give your backup file a name if you do not want to use the one that Foxclone assigns to it. You can also click the Create Folder button to create a folder to store the backup files if you do not want them to be stored in the root of the drive.
Once you have everything configured, click the Save button to move to the next step. You will then be shown a confirmation screen and if everything looks correct, click the OK button start the backup.
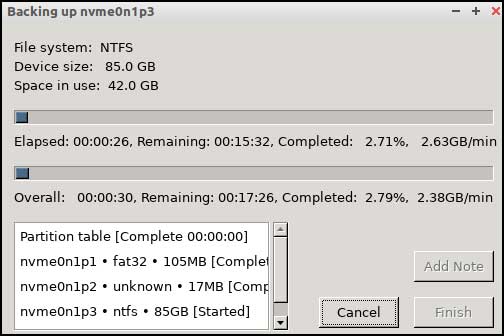
The backup job will take several minutes and can vary based on the size of your hard drive and the number of files on it. When it’s complete, you can click the Finish button.
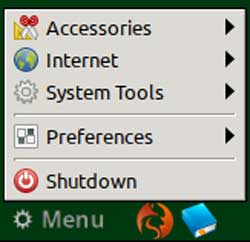
You can then click the Quit button in Foxclone to exit the program. Then you can click the Menu button and Shutdown to either shutdown or restart your computer.
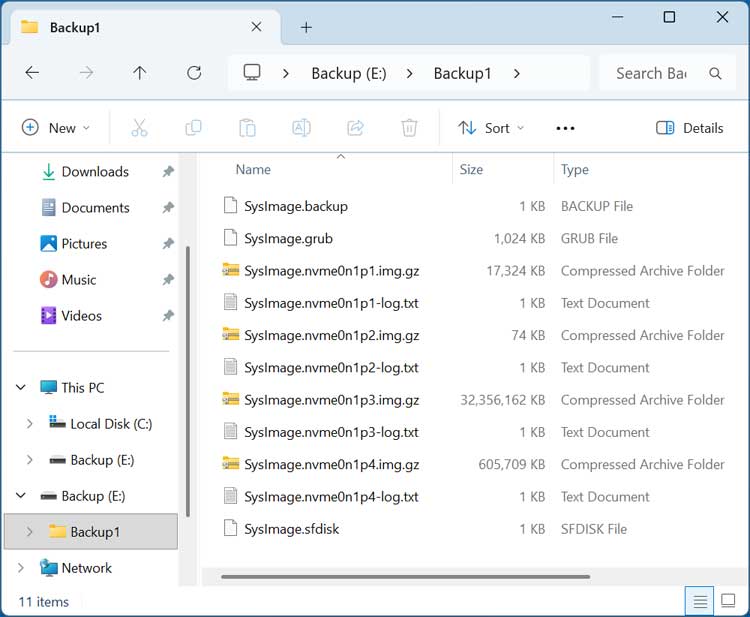
When we go back into Windows and look at our backup drive, we can see our backup folder and the backup files contained within it.
Restore a Windows System Image Backup
If you have a reason to restore your system image backup, the process is very similar to the one used to create the backup. One thing you need to keep in mind is that if you restore your computer using your system image backup, then Windows and all your apps and files will be restored back to the date that the backup image was created. This is another reason to do file level backups as well. That way, you can restore Windows and your programs and then restore your personal files from your file level backup.
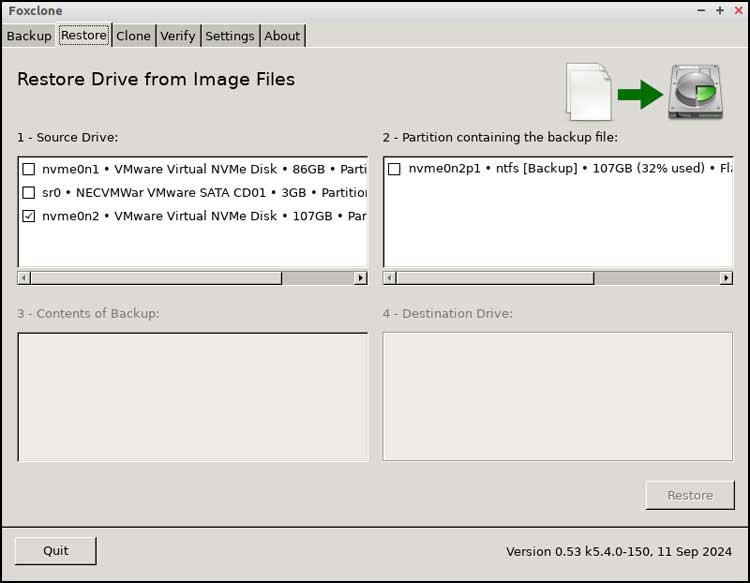
To restore a system image backup, you will need to boot to your Foxclone flash drive once again and open the Foxclone software. This time we will go to the Restore tab rather than the Backup tab.
This time we will need to choose the drive that contains the backup image files for the source drive. Then on step 2, we will choose the partition containing the backup files.
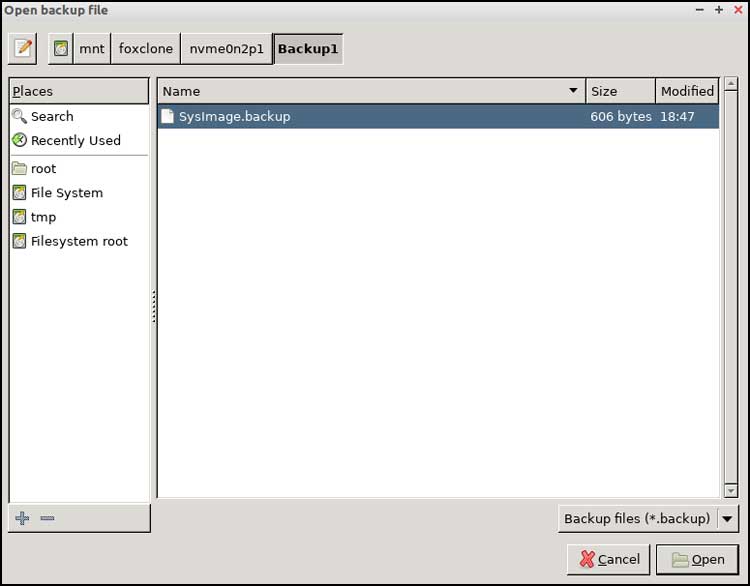
Once you check the box next to the partition, a new window will open asking you to choose your main backup file. You may need to browse to the folder you created during the backup process to find it. Once you find the file, select it and click the Open button.
Foxclone should then populate the other sections for you based on what it reads from your backup file.
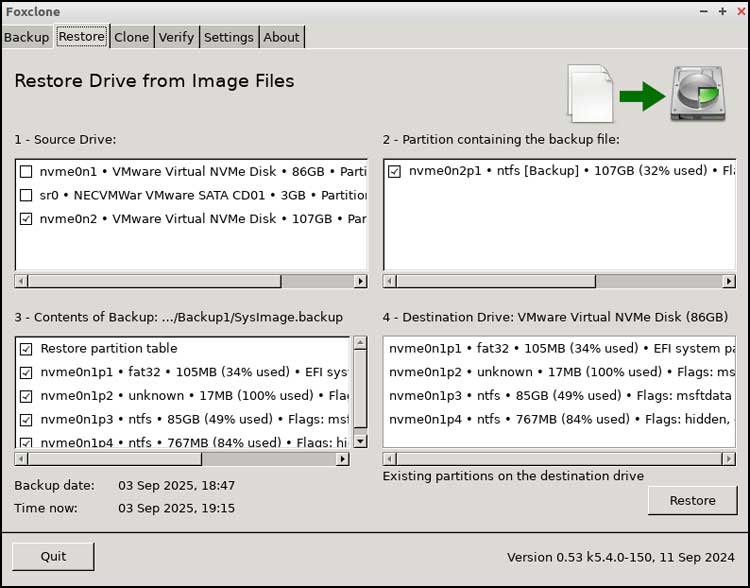
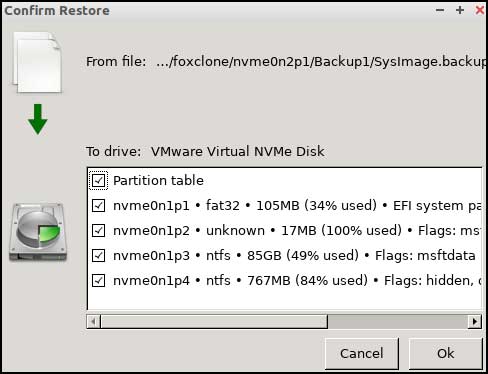
You will then be presented with another confirmation box and if everything looks good, click the OK button to start the restore process.
Once the restoration is complete, you should be able to restart your computer, and it will be back to the state it was in on the date you created the backup image.
For additional training resources, check out our online IT training courses.
Check out our extensive IT book series.