
Last Updated on April 3, 2026
Google’s Gmail application is one of the most popular email services in use today. It’s used across the world by millions of people for personal and business email accounts. You can use Gmail via the Gmail website or add your Gmail account to email clients such as Outlook or even the Gmail desktop client app, which is not made by Google FYI.
There are many software developers who create add-ons for Gmail and other Google Apps. These addons will add extra functionality to Gmail such as the ability to create a custom table in an email or create links to a specific email for sharing purposes. You can check out our Gmail training videos here.

In this article, we will be showing you how to add polls or surveys to Gmail Emails for free using a browser extension called Cloud HQ Gmail Free Online Polls & Surveys. With this extension, you can add preconfigured or custom polls to an email. The recipient of that email can take the poll and you will then be notified of their response.
Installing and Using the Cloud HQ Extension
1. Install the Extension and Find the Button
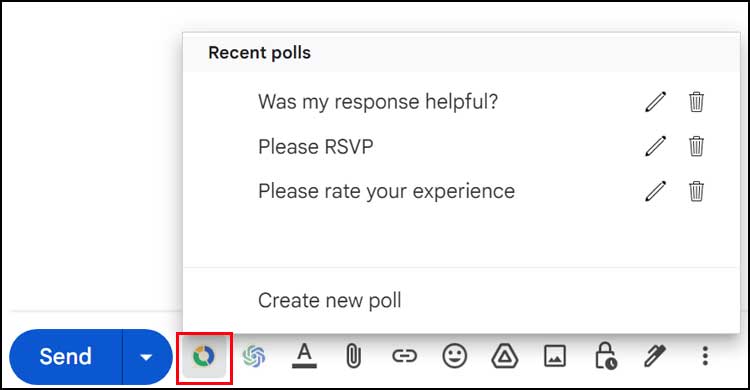
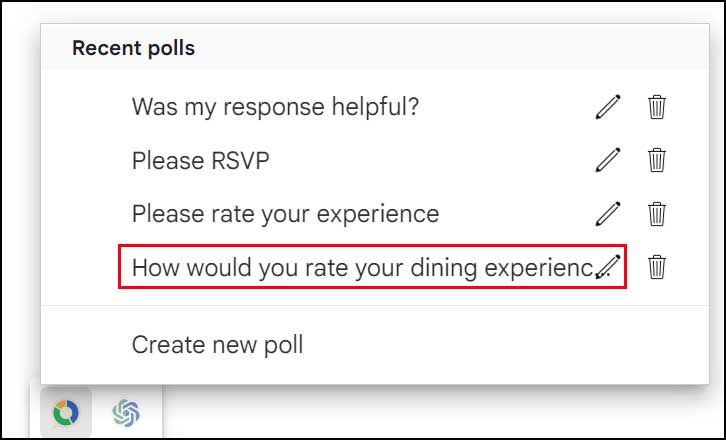
Once you install the extension from the website here for Google Chrome or Microsoft Edge, open your inbox. You will then see a new button in Gmail when you compose a new message called Add polls to your emails. When you click on this button, you will be given some built in poll topics as seen in the image below.
2. Edit a Suggested Poll
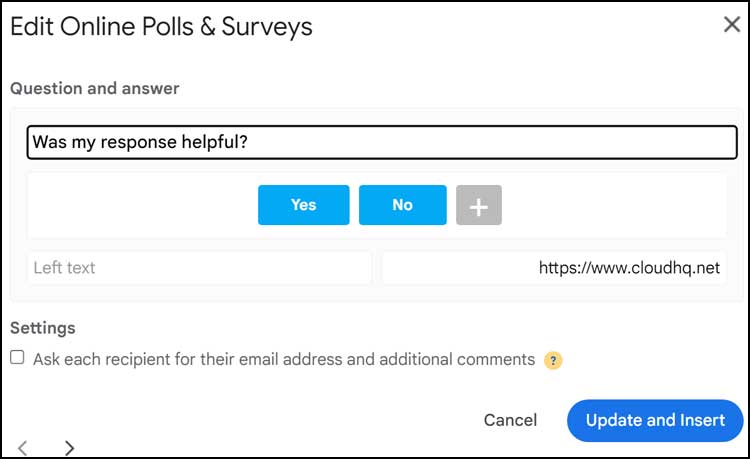
The app provides several pre-made templates to save you time. You can click on the pencil button next to one of these suggested polls to customize it to your needs. This allows you to quickly modify the default text without starting completely from scratch.
3. Create a Brand New Poll
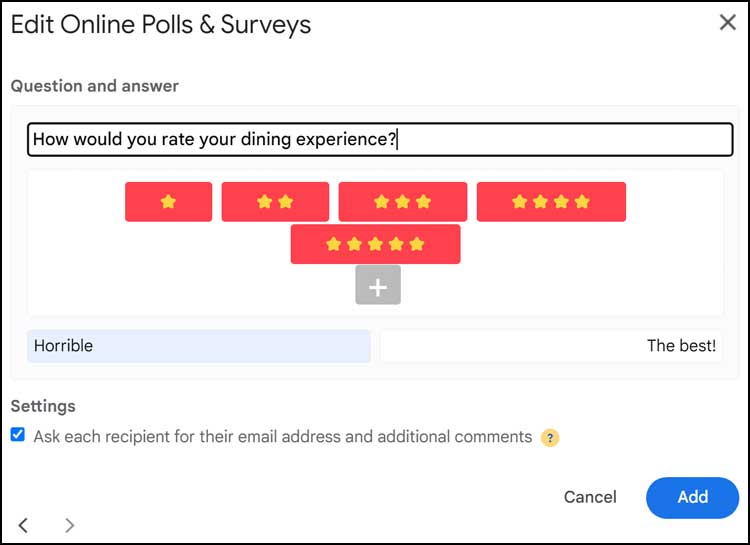
You will most likely find yourself creating a new poll from scratch for specific questions. When you do so, you will be able to write your exact question in the box at the top. You can then add text to the left and right side of your poll to illustrate the range of the answers.
4. Configure Poll Settings and Add to Email
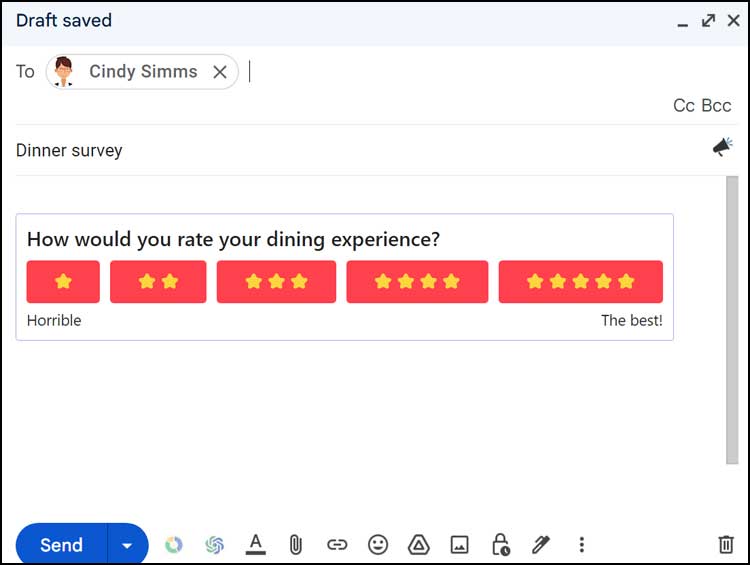
The poll shown above uses the default star rating system. You can use actual answers instead if that works better for your specific poll. You can also check the box requesting for the recipient’s email address and comments if desired. Once you click the Add button, your new poll will be added to the body of the email. You can then add additional text if needed and send it off when ready.
5. Reuse Your Custom Polls
The software automatically saves your creations for future use. Once you create a poll, it will be added to the suggestion list. It will appear the next time you click on the new poll button in case you would like to edit it or reuse it.
Taking the Poll and Viewing Results
1. The Recipient Experience
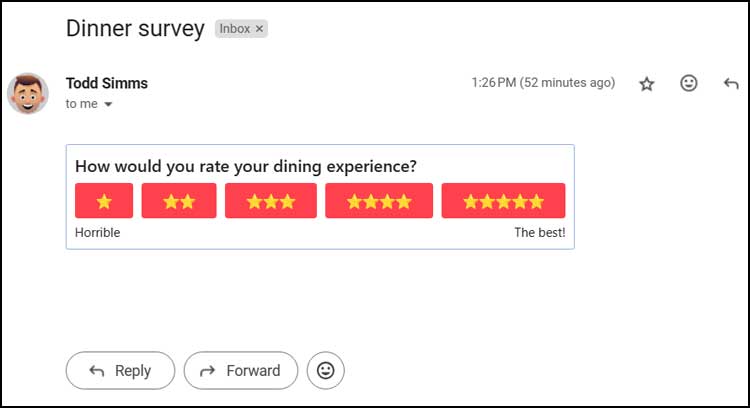
The person receiving your message gets a seamless voting experience. Once the recipient receives the email, all they need to do is click on their response directly inside the message body. They do not need to install any special software to cast their vote.
2. Submit Additional Comments
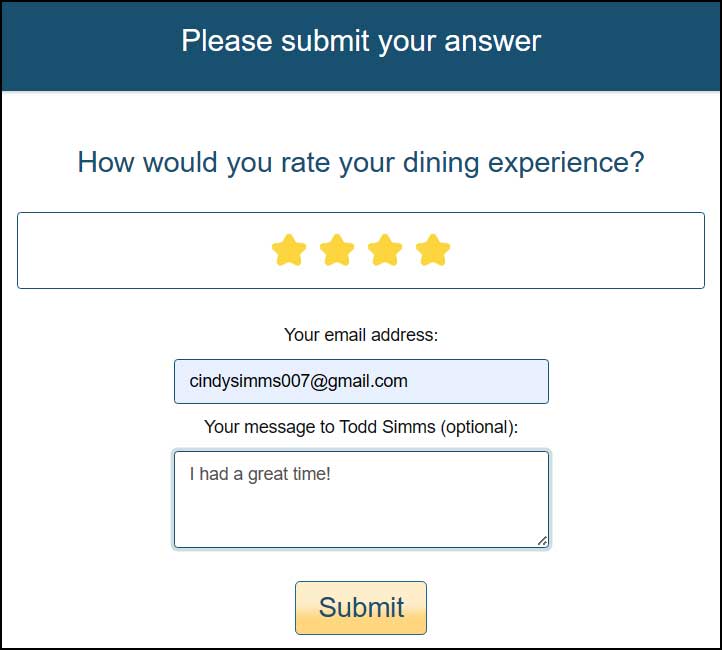
After clicking their choice, they will then be taken to a secure webpage. Here they can add their email address and any specific comments regarding their vote. They just need to click on the Submit button to finalize their response.
3. Receive the Notification Email
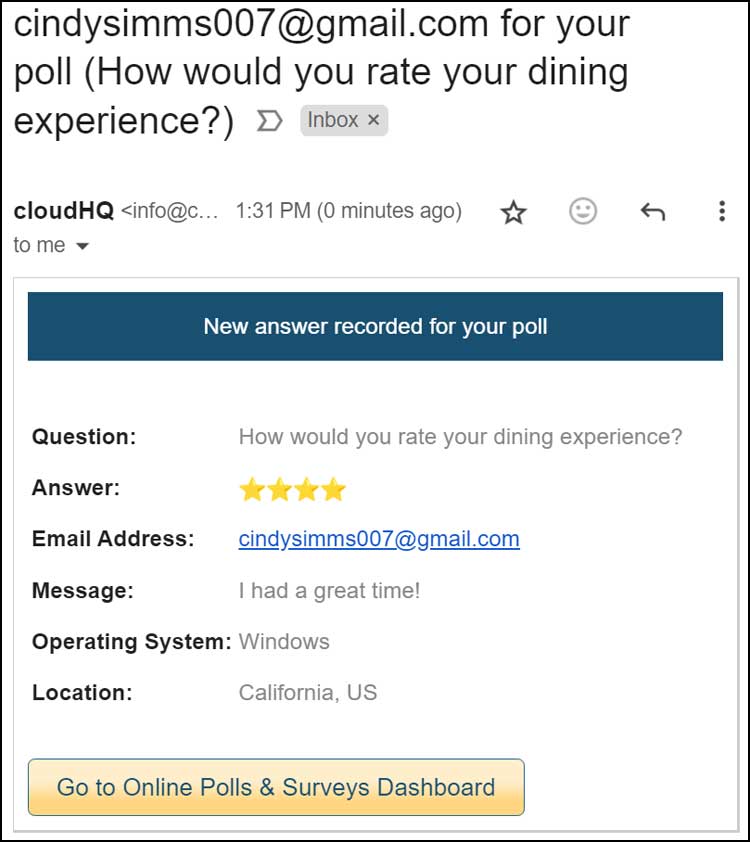
The system works incredibly fast. You will then get an automated email with their response sent back to you. This alert includes their exact vote, email address, and any optional message they typed.
4. Access the Cloud HQ Dashboard
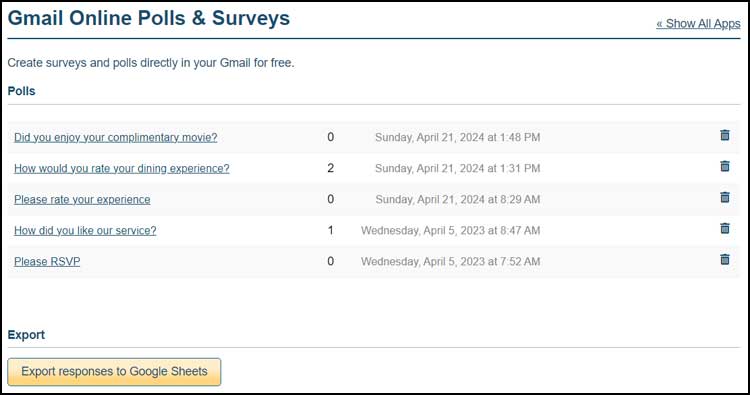
If you click on the button that says Go to Online Polls & Surveys Dashboard, you will load the main analytics page. Here you will be able to see a comprehensive listing of your polls and their results. You can also export them to Google Sheets if you want them stored in a new spreadsheet. One thing to keep in mind is that you will need to make a free Cloud HQ account to use this feature. There is a free version of the Gmail Online Polls & Surveys app as well as a paid version with additional features.
Creating Polls with Specific Custom Answers
1. Remove the Default Star Ratings
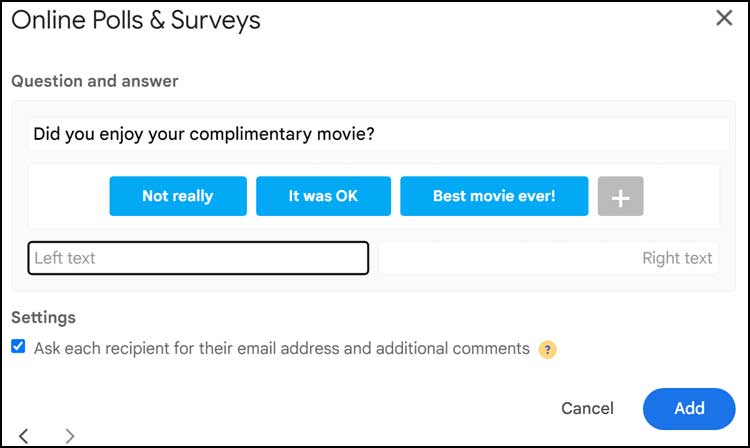
Another type of poll you can create is one with specific text-based answers. To configure this type of poll, simply click on the X next to each of the star rating icons to remove them. This clears the board for your custom text options.
2. Add Your Custom Answers
Now you can build out your specific multiple-choice questions. You can click on the + button to add new answers to your poll. Type your exact phrases into the blue boxes before inserting the poll into your message.
For additional training resources, check out our online IT training courses.
Check out our extensive IT book series.






