Don’t limit yourself to booting from ISO files!
Virtualization software such as VMware, Hyper-V and VirtualBox allow us to create multiple virtual machines (computers) that run on one physical computer so we can do things such as test operating systems and software or create virtual networked computers to run our business applications on. This type of technology allows us greater flexibility that if we were using only physical computers in our environments.
One procedure that is commonly used with virtualization is the installation of operating systems from ISO files and this is generally a pretty simple process and not too complicated. But sometimes we want to install operating systems or boot up with recovery software that is not in an ISO format but rather on a USB flash drive. Unfortunately, VirtualBox doesn’t have a really simple way to do this like they do for ISO files but that doesn’t mean it can’t be done.
In this tutorial we will show you the process for booting a VM from a USB flash drive so you will know how to accomplish this for when you need to perform this task for yourself. For our example we will boot up with a flash drive that has a bootable version of Windows 10 on it. If you would like to know how to create a bootable flash drive then check out our article on the free Rufus bootable flash drive utility.
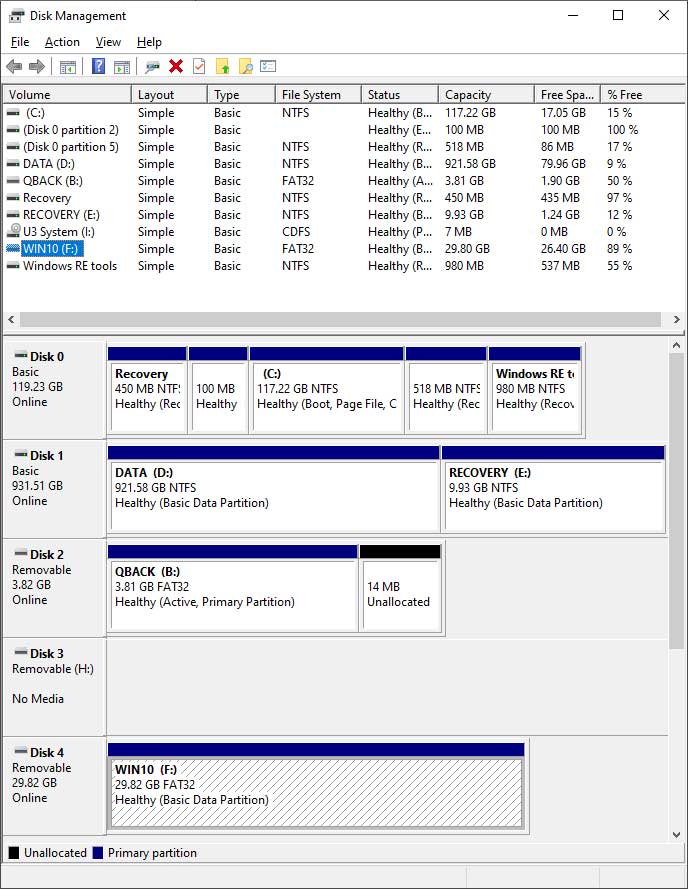
Once you have your bootable flash drive configured and connected to your computer you will need to find the disk number that goes along with that drive. The easiest way to do that is to go into Disk Management and find the USB drive and look for the disk number that goes along with it. The easiest way to get to Disk Management is to type in in the search box or in Cortana. In our case it is Disk 4 as seen in the image below.
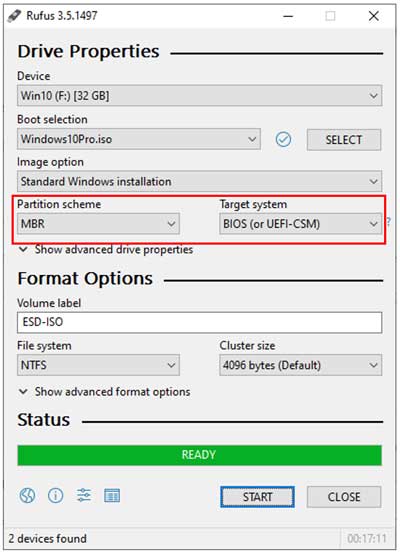
NOTE: If you are planning on booting a Windows 10 flash drive then make sure your settings in Rufus are MBR for the partition scheme and BIOS for the target system.
The next step involves opening a command prompt as an administrator. If you don’t know how to do this then you can simply type in cmd in the searchrun box and when you see cmd.exe in the list you can then right click on it and choose Run as administrator.
Next you will want to type in the following line in the command prompt box and press enter to take you to the default VirtualBox installation location. If you installed VirtualBox somewhere else then you will need to navigate to that location instead.
cd %programfiles%OracleVirtualBox
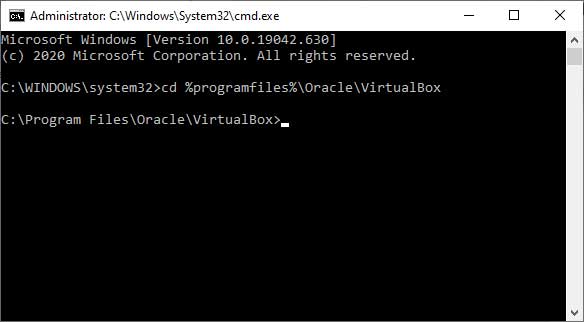
The next step involves creating a virtual disk that points to your USB drive and you will need to specify where you want this disk to be created and the disk number of your flash drive that you identified in the previous step. For our example we will create the virtual disk in the root of the D drive, and we know that its disk #4 from what we saw in Disk Management. You can customize the location folder to be anywhere you like on your computer. So here is what our command will look like when we run it.
VBoxManage internalcommands createrawvmdk -filename D:usb.vmdk -rawdisk .PhysicalDrive4
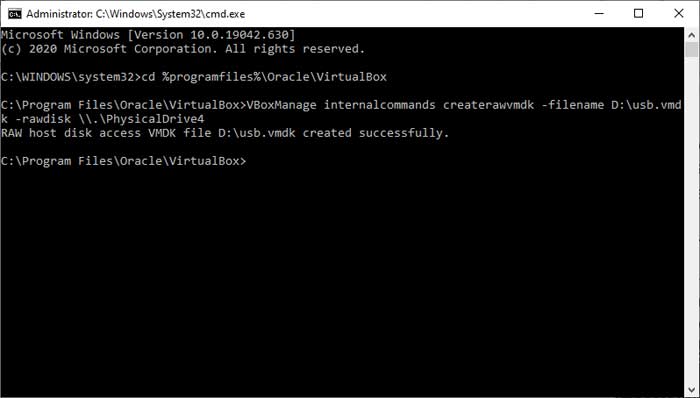
If you did everything correctly you should get a message that says something similar to “RAW host disk access VMDK file D:usb.vmdk created successfully.”
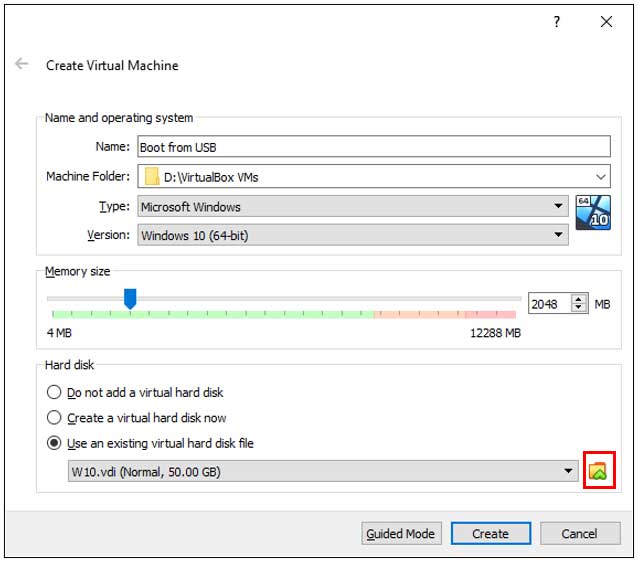
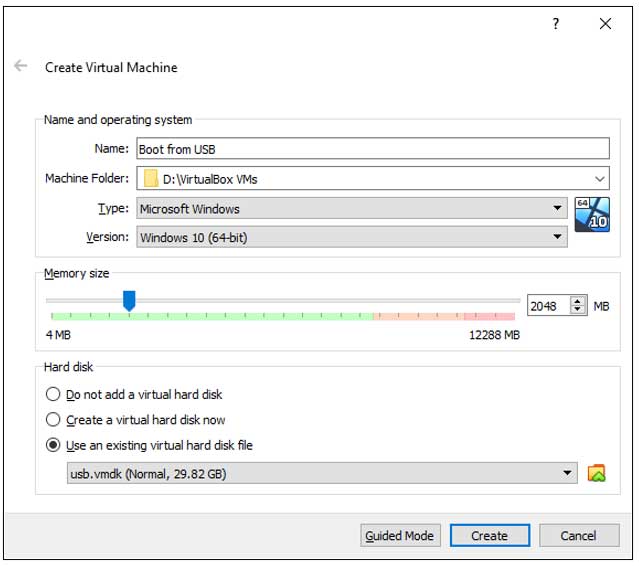
Next we will open our VirtualBox Manager software but instead of opening it like you normally would, you will need to right click the icon and choose Run as administrator like you did for the command prompt. Now its time to create a new virtual machine and attach the USB drive so we can boot from it. You will go through the new VM creation process just like you would for any new VM but when it comes to the hard disk creation you will want to choose the Use an existing hard virtual disk file option. Then click the browse folder icon to open the Hard Disk Selector box.
From here you will click on the Add button and browse to the location that you saved your USB disk file in from the previous step. For us it was in the root of the D drive and the file is called usb.vmdk.
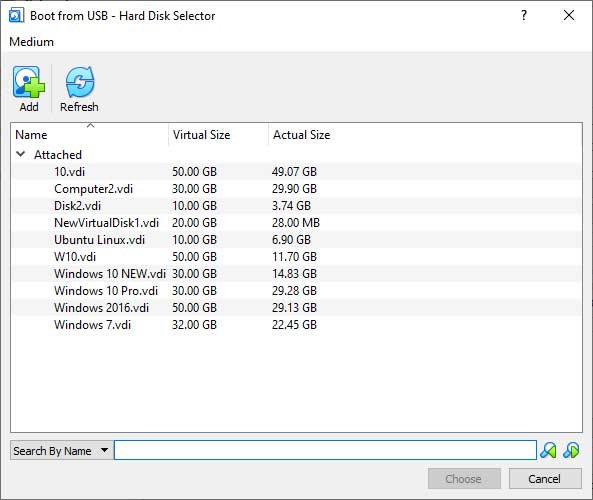
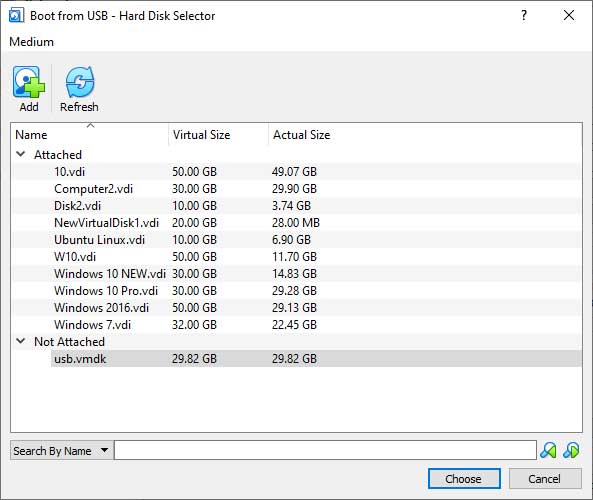
Once you click on the Choose button you will be brough back to the Create virtual machine box where you can then click the Create button to finish the process.
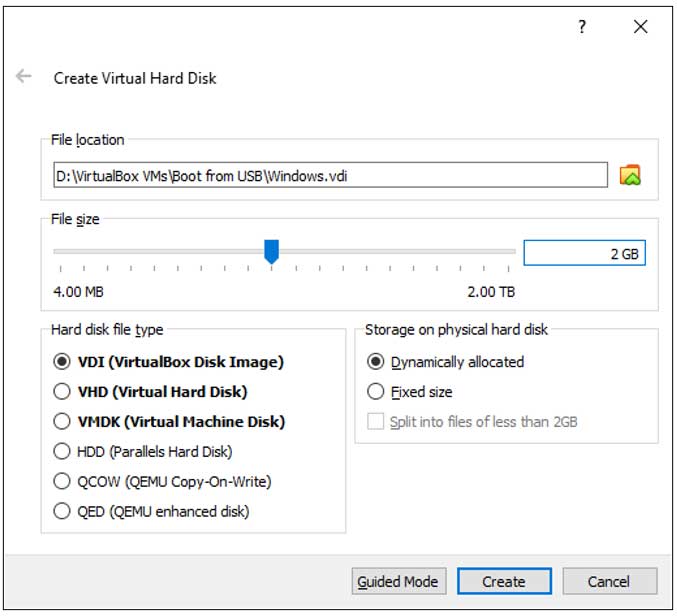
One thing to keep in mind is that this will only let you boot from your USB drive so if you want to install an operating system you will need to add another virtual disk, so you have something to install it on. To do this you will need to go into that virtual machine’s settings and then to the Storage section and add create a new virtual disk like you would do when you create a new VM.
Just make sure that the USB disk is at the top of the list after you create your new virtual hard disk as seen below.
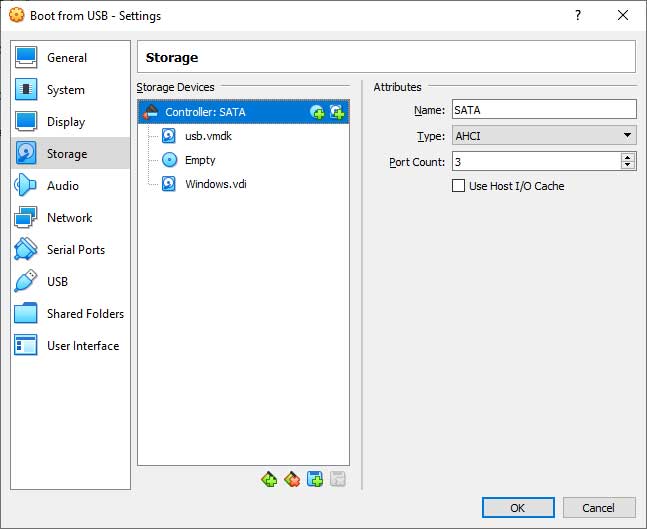
Now when you start your computer it should boot from your USB flash drive and load the operating system or utility that you have configured on that flash drive. If you get an error similar to the one shown below then you can try to go to your storage settings as seen above and check the box that says Use Host I/O Cache for the controller and see if that fixes it for you.
The I/O cache encountered an error while updating data in medium “ahci-0-0” (rc=VERR_ACCESS_DENIED). Make sure there is enough free space on the disk and that the disk is working properly. Operation can be resumed afterwards.
You can also remove this USB virtual disk from one VM and then attach it to an existing VM if you would like to be able to boot up an existing VM from your USB flash drive. This can be done from the storage settings on the VMs.


