
Last Updated on April 28, 2026
Boot With Your Windows Installation Media to Repair Windows Problems
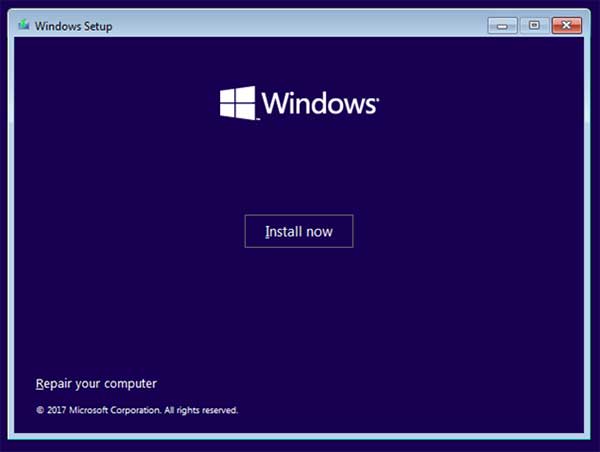
Windows can be hard enough to troubleshoot when things go wrong most likely because there are so many things that can possibly go wrong! Sure you can surf the web looking for answers but when things really go bad with Windows you will need to use a bootable USB installation drive. Since most modern PCs no longer include DVD drives, creating a “Windows Installation Media” USB on another working computer is the standard way to access these tools. Once you boot from the USB, you will see the Windows Setup screen. Instead of clicking “Install Now,” look for the “Repair your computer” link in the bottom-left corner. This opens the Windows Recovery Environment (WinRE).
For Windows 11, you need to go through a couple of screens to get to the Repair my PC option.
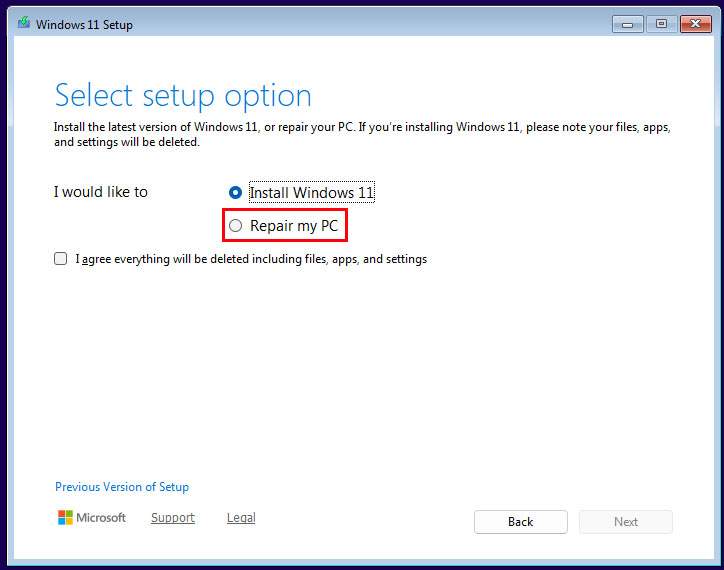
After clicking on Repair your computer/Repair my PC you will be given a list of options to choose from.
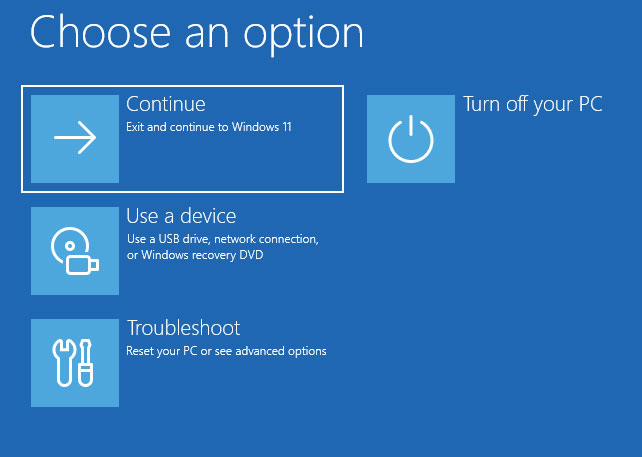
On the first screen you will have several options to choose from. If you choose the Continue option then the repair process will exit and continue booting into Windows, or at least try to. So it’s safe to assume you don’t want to use this option unless you change your mind about trying to fix your computer and want to see if you get lucky by trying to boot it again.
Choosing the Turn off your PC option will obviously just shut your computer down you would once again only use this if you decided you don’t want to try any of the repair options at the moment.
Then there is the Use a device option. This choice can be used to try and boot to another device installed on your computer such as a USB device, CDDVD or to boot from the network.
The option that you really want to use is the Troubleshoot option because once you go into this section there are a lot of things you can do as you can see in the Advanced option section.
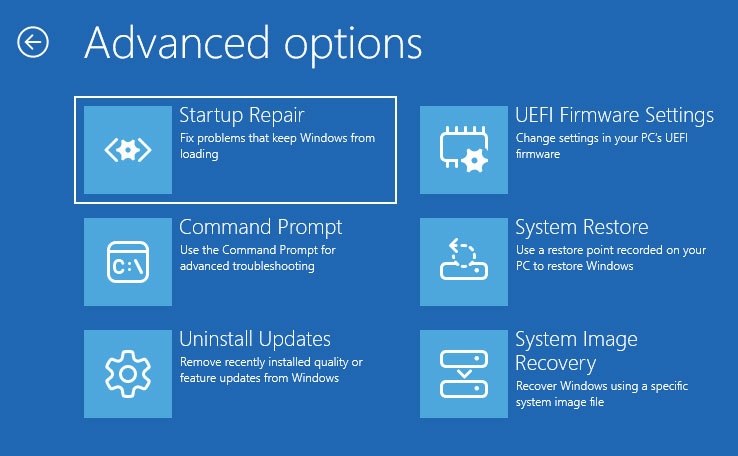
Here is what each of the options will do:
- System Restore – This will restore your computer’s system configuration back to a point in time of your choosing. But the catch is that there had to be a restore point made at that time. By restoring your system you are putting Windows back to the way it was at that time but it won’t affect any of your personal files that were created since the restore point was made.
- System Image Recovery – This is a “legacy” tool used to restore a full snapshot of your drive. While still available, Microsoft has largely replaced this with Cloud-based resets. Now this option is mostly used by IT professionals who have saved an image to an external hard drive using the “Backup and Restore (Windows 7)” utility still found in the Control Panel.
- Startup Repair – When you run the Startup Repair, Windows will reboot itself and run some diagnostics to see if it can figure out why your computer will not boot into Windows.
- Command Prompt – Many times there are specific tools that you can use for troubleshooting that can only be run from a command prompt. Use this option to open a command prompt to run those types of commands.
- UEFI Firmware Settings – Use this option to make changes to your UEFI firmware which can be thought of as an updated version of the old BIOS (Basic Input Output System) that has been in use for decades. UEFI is a software specification program that connects a computer’s firmware to its operating system.
- Uninstall Updates — In modern Windows 10 and 11, this is now split into two choices: Uninstall latest quality update (for monthly security patches) and Uninstall latest feature update (for major yearly version changes). This is the best first step if your computer started blue-screening immediately after a Windows Update. Unlike the old “Windows 7/8” rollbacks, this usually keeps your personal files intact, though it will remove any apps installed after the update.
As you can see there are several options to choose from that you can try to get your computer back up and running. If you need to rescue your files before a clean install, you can actually use the Command Prompt option right here in the recovery menu. Type notepad.exe and press Enter. Once Notepad opens, go to File > Open. Change the “Files of type” to All Files, and you can now use this window as a basic File Explorer to copy and paste your documents from your hard drive onto a USB flash drive.
What to do if “Startup Repair” fails?
It is very common for the “Startup Repair” option to say it couldn’t fix your PC. If this happens, don’t panic. Usually, it’s because the Boot Configuration Data (BCD) is corrupt. Your next step should be to use the Command Prompt option and run the chkdsk and bootrec commands
If for some reason nothing you try works and you feel the need to format and start from scratch but want to get your files backed up first you can try to boot to a live Linux CD and copy them to a flash drive within the Linux operating system.

For additional training resources, check out our online IT training courses.
Check out our extensive IT book series.


