Last Updated on March 27, 2026
Microsoft changed the look and feel of the entire Office suite with the release of Office 2007. This left many people in the dark when it came to doing their normal tasks in programs such as Word and Excel. Word 2007 and up now use the “Ribbon” rather than the traditional toolbar many people were used to in Word 2003 and earlier. The change was meant to make things easier to do but to many people it made things even harder. Even after the Ribbon being out for awhile now a lot of people are still not used to it and have trouble finding the things they used to be able to do with the simple menu driven setup that the older versions of Word used.
For long‑time Office users, the transition to the Ribbon often required relearning habits that had been built over many years. Commands that once lived in familiar menus were reorganized into tabs and groups, which could feel overwhelming at first. This learning curve led many users to search for ways to make the newer interface feel less disruptive and more aligned with how they already worked.
By customizing the Quick Access Toolbar, users can regain some of the simplicity they miss from earlier versions of Word. Instead of navigating through multiple Ribbon tabs, commonly used commands can be placed in a single, always‑visible location. This small adjustment can significantly reduce frustration, speed up repetitive tasks, and make the newer interface feel more familiar and efficient, especially for those who rely on the same tools day after day.
Once users realize how flexible the Quick Access Toolbar is, it often becomes one of the most valuable parts of the interface. Because it stays visible regardless of which Ribbon tab is selected, it provides a consistent workspace that adapts to individual workflows. Over time, customizing this toolbar can make Word feel faster and more intuitive, especially for users who perform the same actions repeatedly throughout the day.
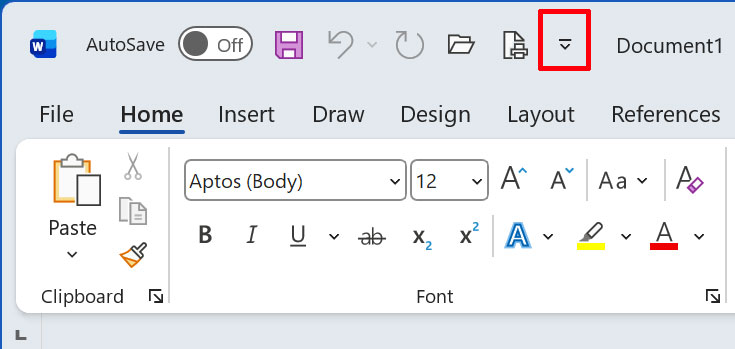
Fortunately you can use the Quick Access Toolbar to add your most often used features for easy access without having to hunt around trying to find them. The Quick Access Toolbar is located at the top left of the window. You can add and remove buttons from this toolbar to suit your needs.

For basic customization you can click on the down arrow to the right of the Quick Access Toolbar and choose to add basic icons such as Save, Open and New Document.
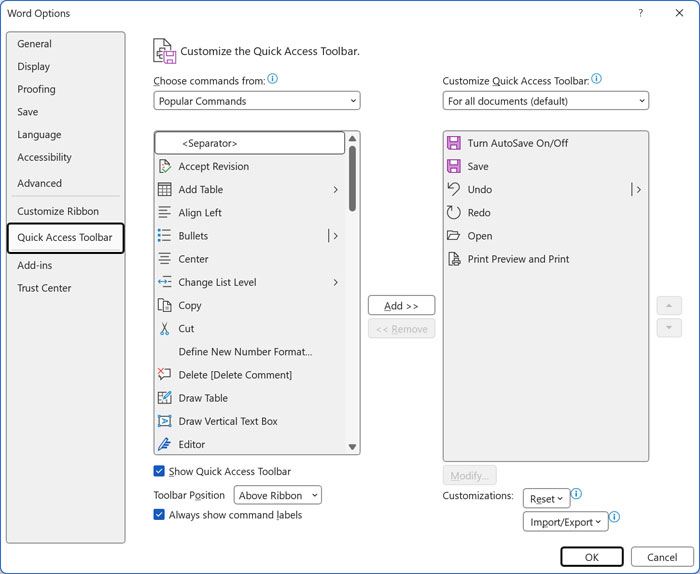
To change more advanced Quick Access Toolbar buttons in Word 2007 click on the Office Button (Round button at the top left) and then click the Word Options button at the bottom. Go to the Customize section on the left side and you will see all the buttons that can be added to the toolbar. For Word 2010 and up click the File tab and then and then Options and go to the Quick Access Toolbar section. From there simply choose the ones you want and click on Add to put them in the right hand column. After you click Ok you will notice that your Quick Access Toolbar now has the options you added. This will also work for the other Office programs.
Although the Ribbon interface introduced in Office 2007 changed how many users interact with Word and other Office programs, customization options help bridge the gap between old and new workflows. By taking advantage of the Quick Access Toolbar, users can place their most frequently used commands in a consistent, easy‑to‑reach location. This simple customization reduces the need to search through tabs, restores a sense of familiarity, and allows Word to better adapt to individual working habits, making everyday tasks faster and more comfortable to complete.