Last Updated on August 30, 2026
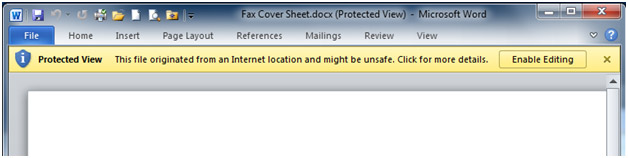
Office has some new security features built in that are supposed to keep your computer safe from malicious Office documents that you may open on your computer. One of these security features is called Protected View. If you open a file from an unknown source such as the Internet then Office will warn you that it is unsafe and disable certain features of that document.
Protected View opens the document in read only mode which keeps your computer safer from potential security threats. You will notice a yellow bar on the top of your document notifying you that it may be an unsafe file and its being opened in Protected view. If you want to edit the document you then have to click on the Enable Editing button on that same yellow bar.

If you know your documents are safe and don’t want to see this message when you open certain files then you can disable it from the Office options.
Disabling Protected View Settings
1. Open the File Menu
To disable this feature go to the File tab located in the top left corner of your application window. This opens the backstage view where all the primary program configurations live. You must have a document open to access this specific menu.
2. Access the Options Panel
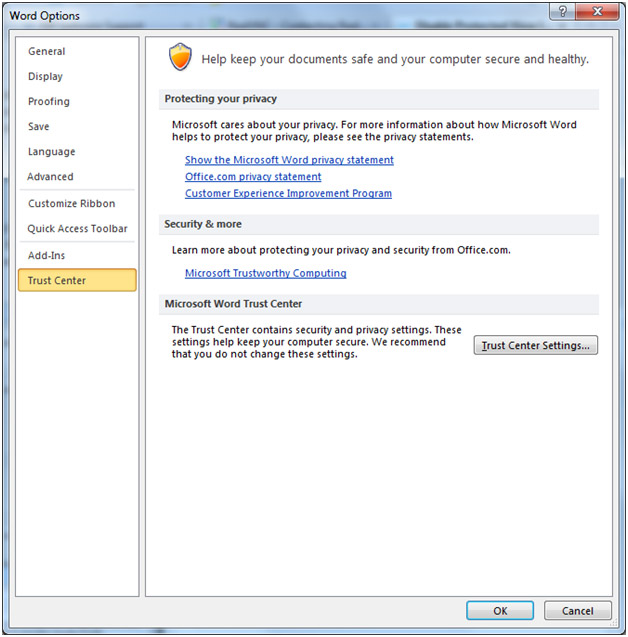
Click on Options at the very bottom of the left-hand navigation pane. A new settings dialogue box will appear in the center of your screen. This box contains all the advanced customization tools for your specific Office program.
3. Open the Trust Center
Next, click on Trust Center on the left side of the new options window. This section handles all the privacy and security protocols for Microsoft Office. Click the Trust Center Settings button on the right side to proceed.
4. Navigate to Protected View
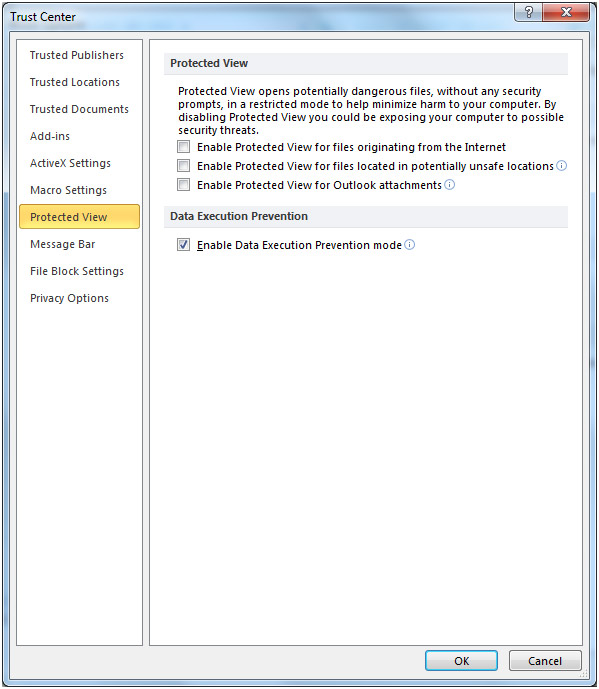
Next click on Protected View from the left-hand menu inside the Trust Center. You will see three distinct checkboxes controlling how the program handles downloaded files. These settings dictate exactly when the yellow warning banner triggers.
5. Disable the Security Prompts
Uncheck any boxes under the Protected View section that you no longer want active. Unchecking all three completely disables the feature across the board. Click Ok to save your modifications and close the dialogue box.
6. Repeat for Other Applications
Keep in mind that this will only disable Protected View for whichever Office program you are in at the time you change the option. You will have to do this exact same procedure for each of your other Office programs like Excel and PowerPoint if you want to disable it for them as well.
For additional training resources, check out our online IT training courses.
Check out our extensive IT book series.