Last Updated on March 27, 2026
People use passwords for just about everything these days such as website logins, computer logins and email logins. Many people use Microsoft Outlook for their email client and may not know that you can password protect Outlook so only you have access to it.
What many users don’t realize is that email often contains far more personal information than they would ever store in a single document. From password reset links to private conversations and financial notifications, your inbox can quickly become a central hub of sensitive data. Protecting access to Outlook isn’t just about convenience, it’s about reducing the risk of someone casually opening your email and gaining insight into your digital life.
If you are concerned about someone looking at your Outlook email while you are away from your desk in case you forgot to turn off or lock your computer then there is a way to assign a password to your Outlook PST file. This will add an extra layer of security to your email in case you have sensitive or private emails in your inbox.
This type of protection is especially useful in shared environments such as offices, home workspaces, or laptops that travel with you. Even if someone gains access to your computer account, a password‑protected PST file helps ensure your email data remains inaccessible without authorization. It’s a simple safeguard that works quietly in the background while giving you added peace of mind.
Accessing Your Data File Settings
1. Open the Account Settings Menu
If you have more than one PST file then you can assign the same or different passwords to those files as needed. To do this you need to go to your data files settings within Outlook. For newer versions of Outlook, go to the File tab and click on Info and then Account Settings.
2. Highlight Your Target PST File
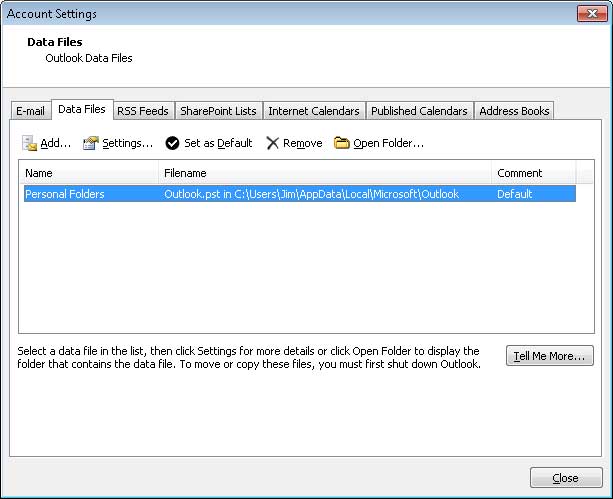
Next you will go to the Data Files tab and highlight the exact data file you want to assign a password for. You most likely will only have one file in this list unless you use archiving or multiple email accounts.
3. Open the File Settings
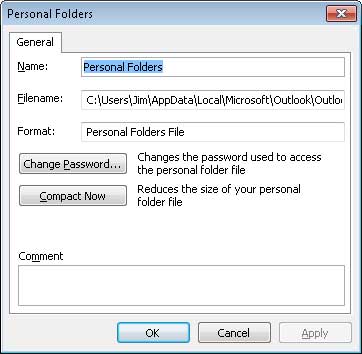
After you choose your data file click on the Settings button to bring up the settings dialog box for that data file. Click on Change Password to assign a password to this data file.
Configuring Your New Password
1. Enter and Verify the New Password
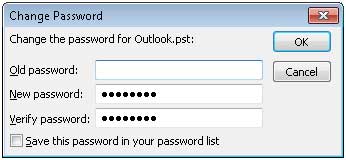
If you don’t have a password assigned to the data file you would leave the Old password section blank and type in the new password and then type it in again to verify it. Make sure you use a secure password that you can actually remember!
2. Do Not Save the Password
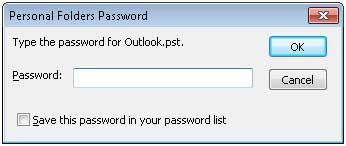
Checking the Save this password in your password list will make it so you don’t have to type in the password when you open Outlook. This completely defeats the entire purpose of using a password in this situation. Leave that box unchecked.
3. Test Your New Security
Now the next time you open Outlook you will be prompted to put in your password before being allowed to check your email. If you decide you don’t want an Outlook password anymore simply go back into the settings and make the password blank.