The Windows 11 Storage Spaces feature is a storage virtualization feature that allows you to group multiple physical drives into a single logical pool of storage, which can then be divided into virtual drives (called storage spaces). These storage spaces can be configured for performance, redundancy, and scalability, making it easier to manage large amounts of data and protect against drive failures. This feature is also available in Windows 10.
There are three main types of storage spaces you can create once you configure your storage initial storage pool. Here is a description of what each type offers.

Types of Windows Storage Spaces
Simple Spaces
- Single Drive Pooling: Simple Spaces combine multiple physical drives into a single logical storage pool. This means that instead of managing each drive individually, users can treat the combined space as one large drive.
- No Redundancy: Unlike other storage configurations (such as mirrored or parity spaces), Simple Spaces do not provide any form of redundancy. Data is striped across the drives, meaning that it is written in blocks distributed across all drives in the pool. If one drive fails, the data on that drive is lost because there is no duplication or parity to recover from.
- Increased Performance: By striping data across multiple drives, Simple Spaces can improve read and write performance. This is because multiple drives can be accessed simultaneously, allowing for faster data transfer rates compared to a single drive.
- Efficient Use of Space: Simple Spaces allow for efficient use of the combined storage capacity of multiple drives. Users can create a large volume that spans all drives, maximizing the available space without the need for complex configurations.
Mirror Spaces
- Data Redundancy: Mirror Spaces keep multiple copies of your data. If one drive fails, you still have access to your data from the other drive(s). This is similar to RAID 1 (mirroring) in traditional RAID setups.
- Fault Tolerance: By duplicating data across different drives, Mirror Spaces ensure that your data is protected against hardware failures. This is crucial for maintaining data integrity and availability.
- Performance: While Mirror Spaces offer redundancy, they also provide good read performance. Since data is read from multiple disks, read operations can be faster compared to single-disk setups. However, write performance might be slightly impacted due to the need to write data to multiple disks.
Parity Spaces
- Data and Parity Distribution: Parity Spaces work by distributing data and parity information across multiple disks. Parity information is a form of error correction that allows the system to reconstruct data in the event of a disk failure.
- Striping with Parity: Data is striped across the disks in the storage pool, meaning it is broken into chunks and spread out. Alongside the data chunks, parity information is also distributed. This parity information is used to recreate the data if a disk fails.
- Fault Tolerance: If one of the disks in the storage pool fails, the parity information can be used to reconstruct the lost data, ensuring that no data is lost. This provides a level of redundancy similar to RAID 5.
Creating a Storage Pool
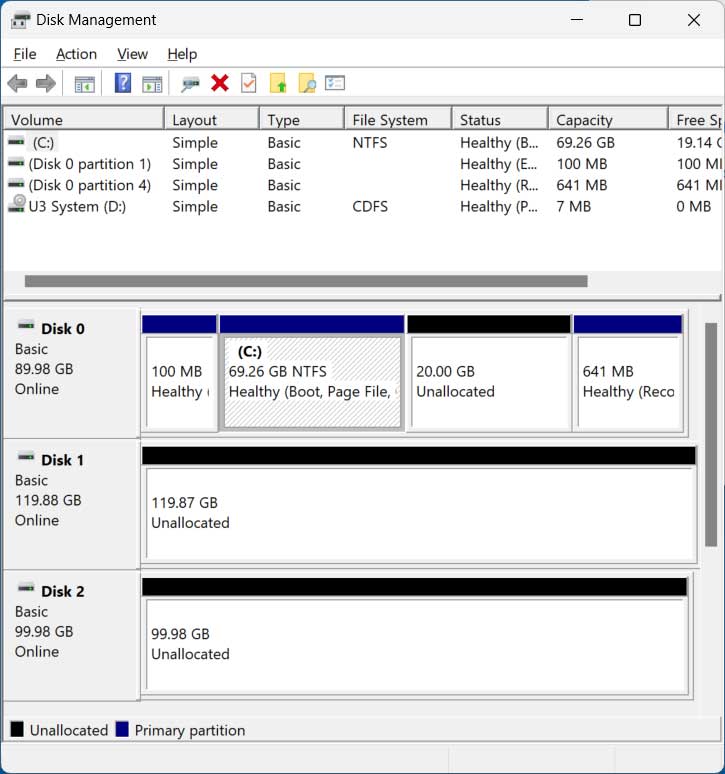
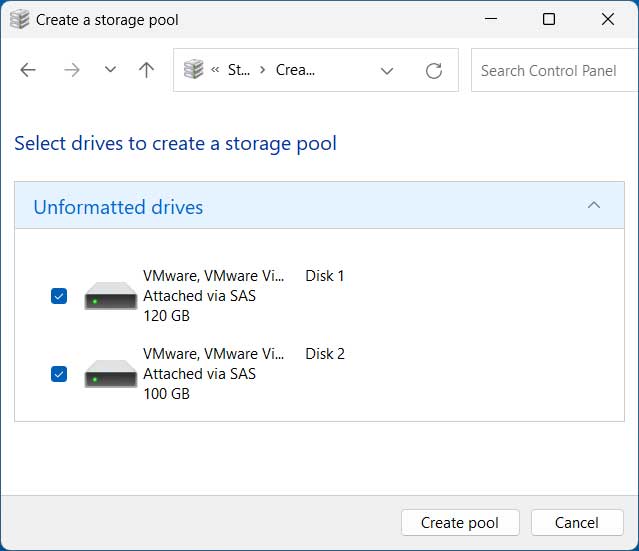
In our example, we will be using a Windows 11 computer configured with a physical disk dedicated to the operating system and then two other physical disks that are installed but do not have any volumes created on them. One is 100GB and the other is 120GB. The image below shows how they appear when viewed in the Windows Disk Management tool.
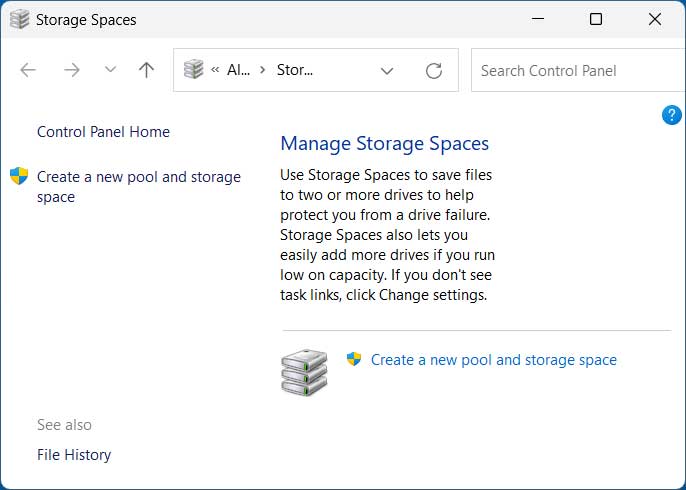
You can open the Storage Spaces tool from The Windows Control Panel or by searching for it from the taskbar search box.
The first step in the process involves adding your hard drives to your storage pool so that they can be used to create a storage space. To begin, click on the link that says Create a new pool and storage space.
You will then be shown what drives you can use for your new storage pool. You will need to add at least two drives to take advantage of the features Storage Spaces has to offer. Once you select your drives, click on the Create pool button. If you have any data on these drives that you want to keep, you should back it up somewhere else before starting the process.
Creating a Storage Space
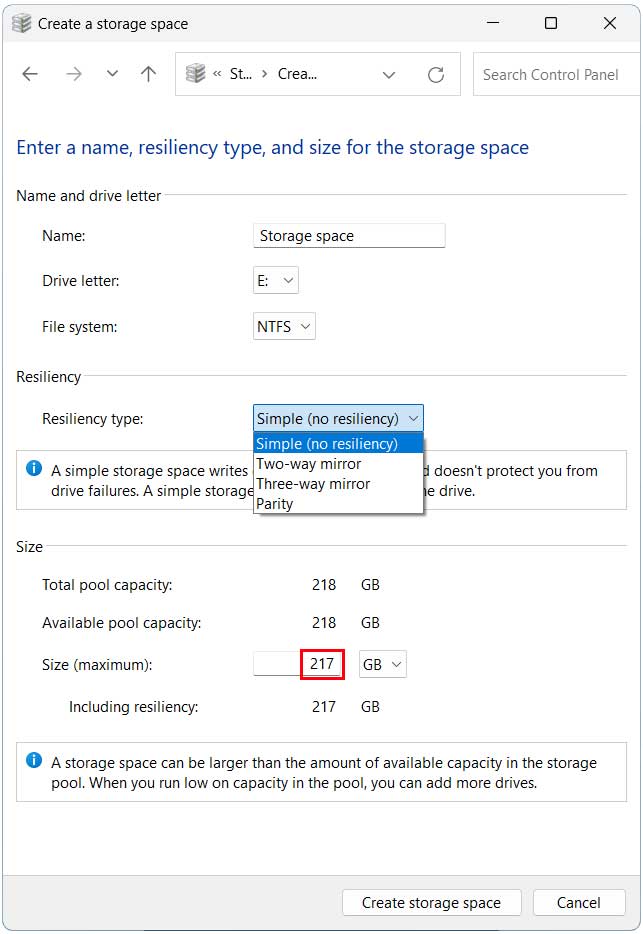
Once you have your storage pool created, you can then decide what type of storage space you want to create. You can give this space a name if you do not want to use the default name of Storage space. You can also change the drive letter that will be assigned to this new space if desired.
In the Resiliency type section, you can choose which type of storage space you want to configure. As you switch between types, you will be shown how much space you will have for this new storage space.
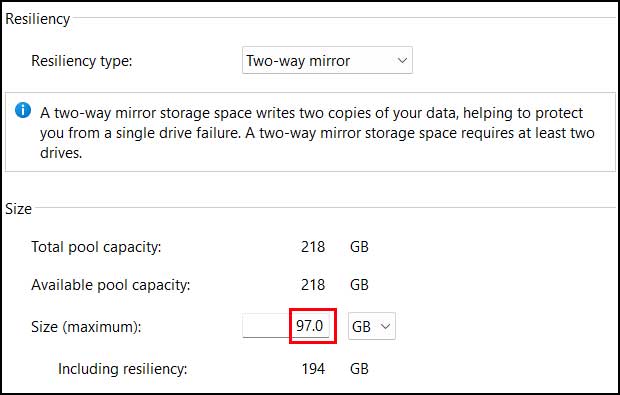
The image below shows how much space you will have when you configure a two-way mirror. As you can see, it’s about half as much as the simple space option gives you. To create a three-way mirror, you will need at least five drives in your storage pool.
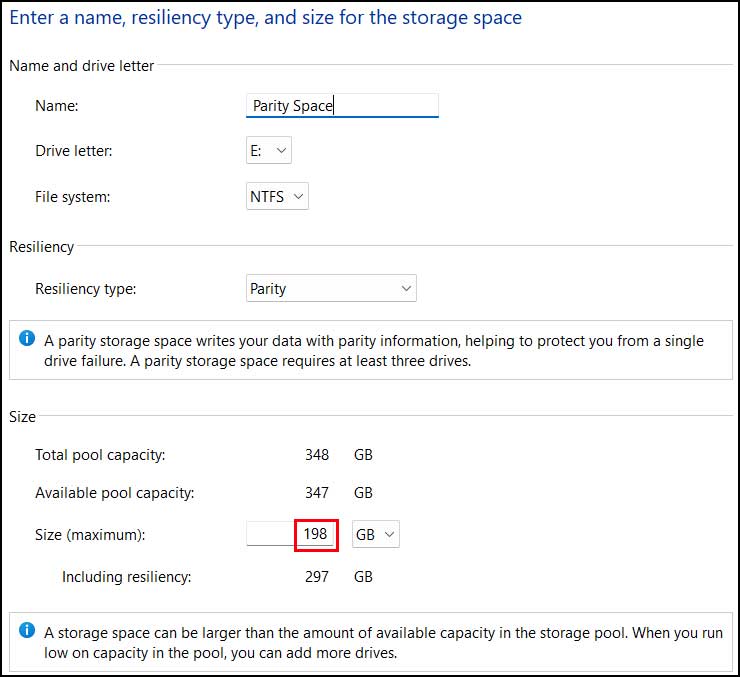
The image below shows that you need at least three hard drives to create a parity type storage space and if you do not have enough drives, your maximum size will show as 0.

We will now add another hard drive to the computer and go back to the Storage Spaces configuration screen and add this new drive to our pool.
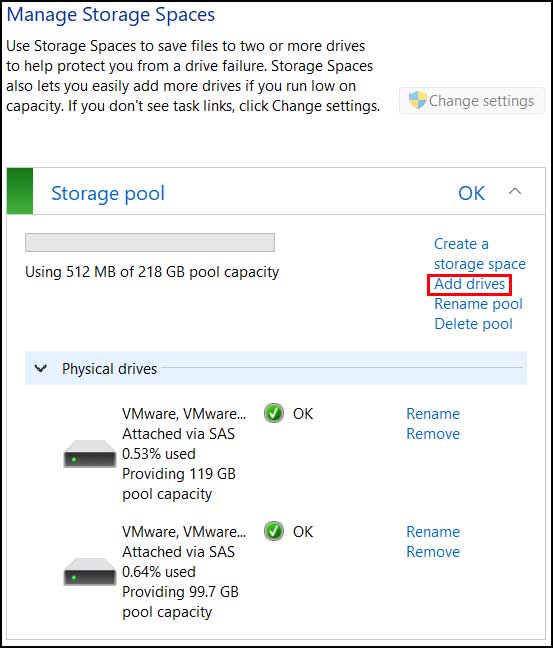
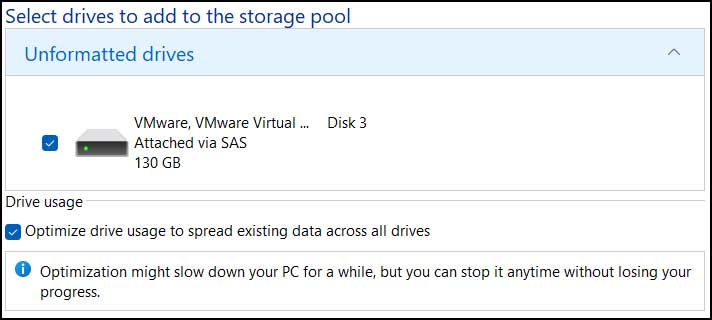
Then we will select the new drive to have it added to the pool.
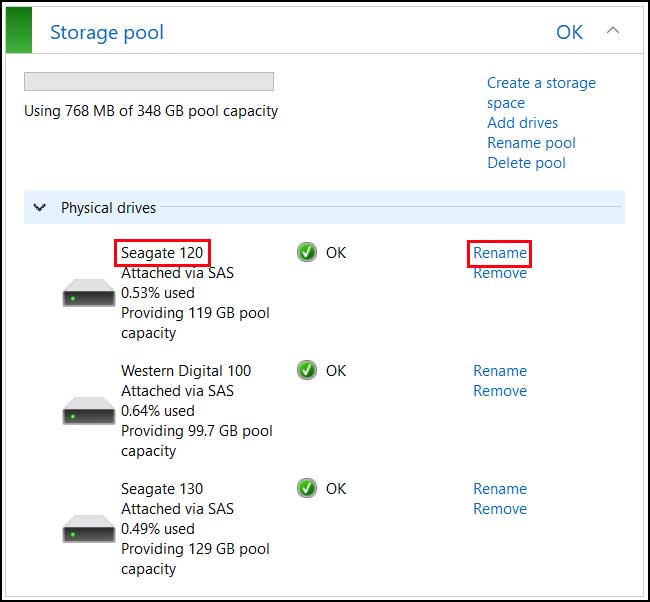
Now you can see that we have three drives in our storage pool and have also clicked on the Rename link to change the names of these drives to make them easier to manage.
Now that we have the minimum number of hard drives to create a parity space, we will choose that from the list and now we can see how much available space we will have for this new storage space.
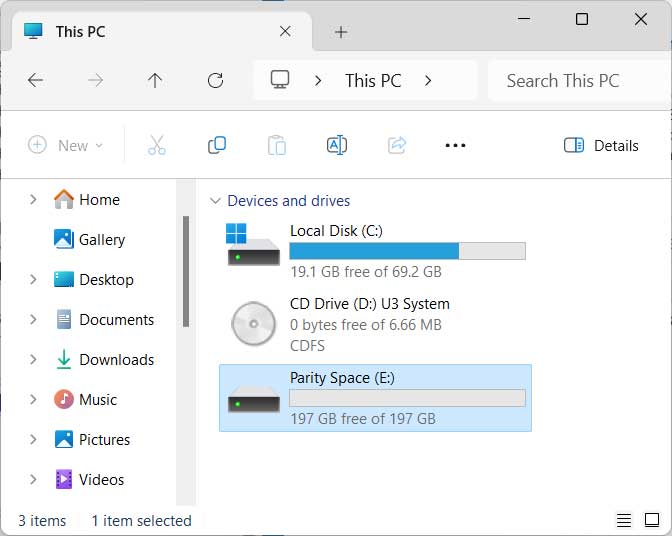
One the storage space has been created, we can go to File Explorer and see the new drive along with its name and capacity.
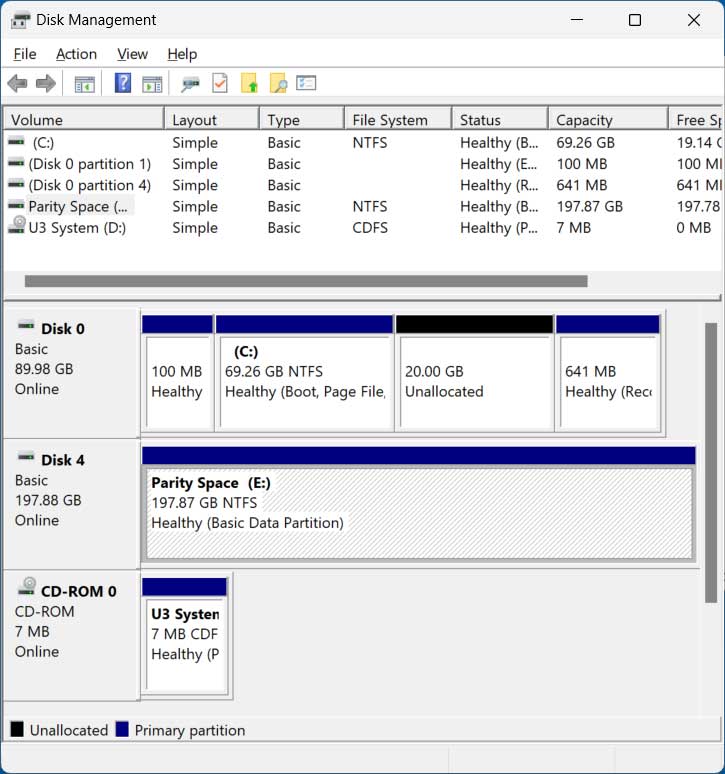
If we go back to Disk Management, you will notice that it only shows the storage space as a single drive and no longer shows the individual drives. You can use a third party partition manager app such as NIUBI Partition Manager to view the physical drives as well as the logical storage space. Be sure to check out the video from the link at the top of the page to see how that works.
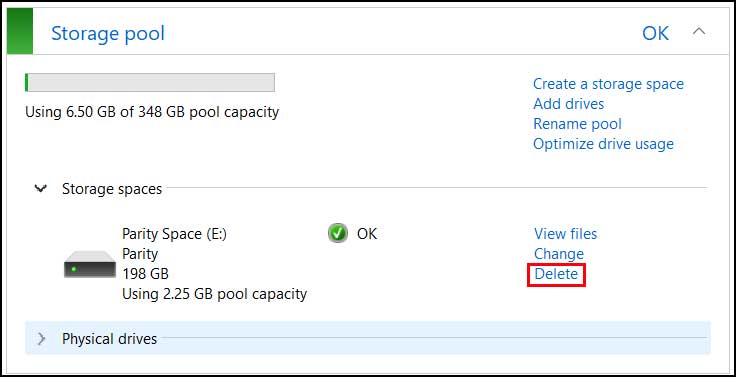
To remove a storage space, simply go back to your storage pool and click on the Delete link next to your storage space name.
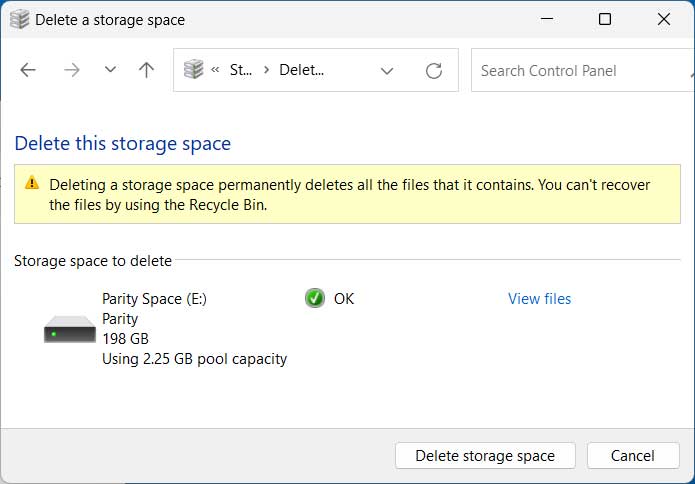
You will receive a message telling you that all of the files used on this storage space will be deleted and not sent to the Recycle Bin so be sure to back them up before deleting your storage space.
Once the storage space has been deleted, your drives will appear in Disk Management as individual drives until you create a new storage space.
For additional training resources, check out our online IT training courses.
Check out our extensive IT book series.