Last Updated on July 19, 2026
In order for your computer to turn on and run, it needs some sort of power being sent to its components. This is where the power supply comes into play. The power supply is the component that supplies power to all your devices in your computer. From the motherboard the hard drive to the CDROM. Most electronic devices that plug into the wall for power have some type of power supply.
Like everything else in your computer, power supplies don’t last forever. You may get many years out of your power supply or you may only get a few months out of it if you are unlucky. When the power supply goes bad you will have to replace it with a new one to get your computer going again.
1. Recognize the Physical Components
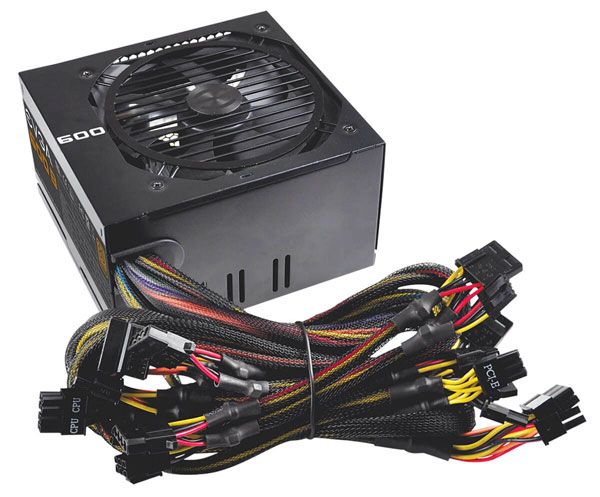
Here is a picture of a typical power supply. It consists of the power supply unit itself as well as the power cables that connect to the different components inside your computer. Modern units often feature modular cables so you only plug in exactly what you need.
2. Locate the Unit Inside Your Case
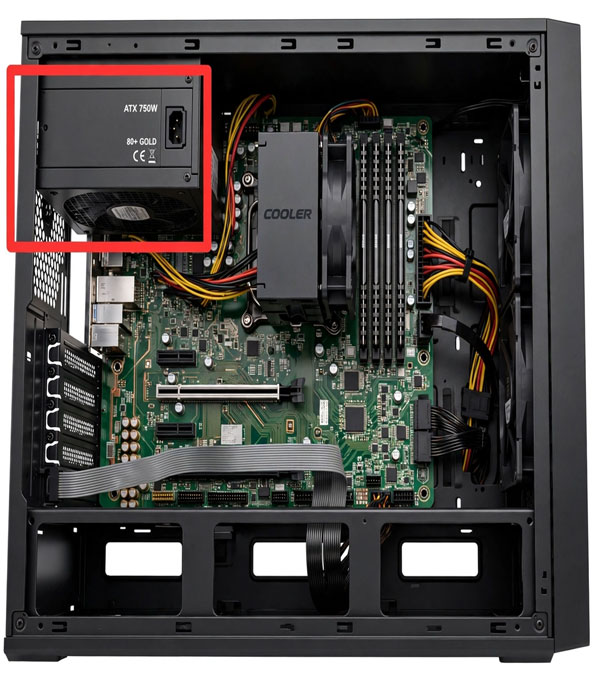
The power supply is almost always located at the very top or bottom rear corner of the computer chassis. You can easily spot it by looking for the heavy power cord plugging directly into the back of the metal box. It usually has a dedicated cooling fan exhausting hot air out the back.
3. Watch for Common Failure Symptoms
Symptoms of a power supply going bad can include random crashes, random reboots or the PC not coming on at all. You might also hear loud whining noises coming from the internal fan bearings. Sometimes you will literally smell burning electronics right before the unit completely dies.
Buying a Replacement Power Supply
1. Match the Form Factor
When replacing your power supply there are a couple of things to take into consideration. The most important is getting the right one for your motherboard. Newer motherboards use the ATX form factor and need a power supply with the matching connection.
2. Calculate Your Wattage Needs
You also need to make sure you get a power supply with enough power to handle all your components. 500-600 watts is sufficient for most basic home users today. However, if you are running a high-end dedicated gaming graphics card, you will likely need an 850W or 1000W unit to handle the massive electrical spikes.
3. Verify the Power Connectors
Another thing to consider is extra connections for your devices. Make sure the power supply has enough power connections and the right types. For example you may want to get built in Serial ATA connectors because SATA hard drives have completely different types of power connections than older IDE drives do.
4. Check the Physical Dimensions
Finally make sure the power supply size is approximately the same as the old one so it will fit in your case. Some name brand computers tend to have odd sized proprietary cases and use smaller than standard power supplies. You cannot easily swap a standard ATX unit into a slimline Dell or HP chassis without major modifications.
Installing the New Power Supply
1. Disconnect the Main Power
Replacing the power supply is a fairly simple job. First of all you need to unplug the power cord before doing anything! Press the power button on the front of the case a few times to drain any residual electricity left inside the motherboard capacitors.
2. Remove the Internal Cables
Then you can open the case and take the power connections off of the hard drives, video card, CD-ROMs, and motherboard. Follow each wire from the old power supply box directly to its destination. Gently squeeze the plastic retention clips to pull the connectors free without damaging the delicate circuit boards.
3. Extract the Old Unit
Then you can take out the four screws on the outside back of the case and pull the power supply out from the inside. Support the heavy metal box with one hand so it does not drop directly onto your expensive graphics card.
4. Install the New Hardware
To install the new one just do the reverse. Slide the new unit into the empty slot and secure it tightly with the four screws. Reattach the main 24-pin motherboard cable, the CPU power cable, and the individual SATA power cables to your drives.