There is more to making a computer work than just installing an operating system such as Windows for example. There are settings and configurations that need to be done correctly on your system before you can even install an OS. If these settings are incorrect then you will run into problems such as your computer not recognizing your hard drive or reading your processor speed incorrectly.
The BIOS (Basic Input/Output System) runs at the startup of your computer and it configures devices and then boots the operating system. The BIOS is stored on a ROM chip. It contains the hard coded instructions that the CPU uses to boot up and to control I/O devices. It basically makes it possible for a computer to boot itself.
The BIOS runs off the onboard PROM, EPROM or flash memory when the computer is powered on and it initializes and may perform diagnostic tests on the hard drive, memory, video and other hardware. You can tell the BIOS which device to boot to first such as the CDROM, hard disk or floppy disk.
Many computer manufacturers design systems so that BIOS is copied from ROM to RAM each time the computer is booted. This is known as shadowing.
BIOSes that can handle Plug-and-Play (PnP) devices are known as PnP BIOSes.
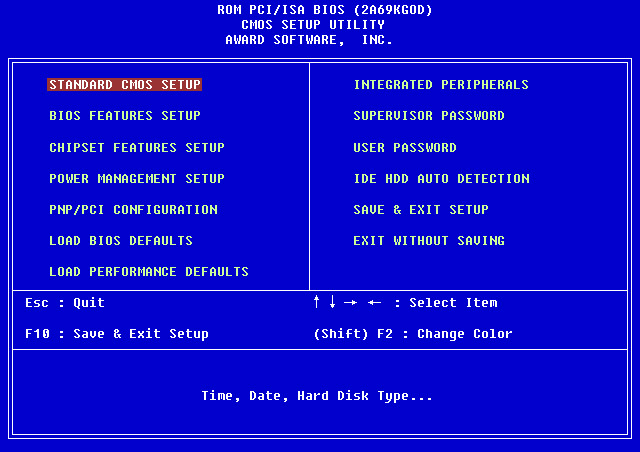
Here is a picture of a typical BIOS configuration screen with the available menus to choose from to change BIOS settings.
There are several BIOS manufactures providing BIOSes for motherboards. Here are the main manufactures:
American Megatrends (AMI)
Phoenix Technologies
Award Software International
General Software
Insyde Software
MicroID Research
Upgrading your BIOS (flashing)
Flashing your computer bios can be a very easy or dangerous process. Sometimes the BIOS needs to be updated in order to understand new hardware. Many users are unfamiliar with this type update and are afraid of ruining their computer and they should be! Because of the risk of damaging your computer and making it inoperable it is recommended that you flash your BIOS only if needed. If everything is working fine as is, just leave it as is.
Most BIOSes these days are flash upgradeable which means you can wipe them out and then upgrade them using software you download and then run. Newer computers may have removable BIOS chips, so if you mess up the process you may be able to order one from the manufacturer.
The first step is to identify your motherboard and BIOS. To do this, restart the computer and look for the BIOS ID string, which will be located at the bottom left corner of the screen during startup. You usually can press the Pause key during the memory test to pause the startup process and allow more time to copy the ID string.
You may also be able to identify the motherboard manufacturer and BIOS identification number by going into the BIOS itself. At startup press the appropriate key to get into the BIOS. Here are some of the more common key combinations to get into the BIOS:
AMI BIOS: Del key
DTK BIOS: Esc key Award BIOS: Ctrl-Alt-Esc
Misc BIOS: Ctrl-Esc
Phoenix BIOS: Ctrl-Alt-Esc or Ctrl-Alt-S
IBM PS/2 BIOS: Ctrl-Alt-Ins after Ctrl-Alt-Del
Next you need to download the upgrade (usually a .bin file) and the utility program (usually an .exe file) from the manufacturer’s website. Sometimes the utility and update are combined in a single file to download. You will need have a formatted floppy disk and copy the BIOS update and utility to the disk. Then you will boot the computer from the floppy instead of the hard drive. At the A: prompt, enter the utility name, then the BIOS name, and begin the flashing. Do not turn off or reset your computer during this process or you will corrupt the BIOS. After its done you need to shut down the computer. You may have to reset the CMOS jumper (check the motherboard manual) and then restart.


