Last Updated on October 7, 2026
There may come a time when you will need to format your hard drive for some reason or another. These reasons may be because you are installing new operating system from scratch, or you want to wipe out a secondary drive to start fresh with new data or maybe even if you want to delete the partitions on a hard drive itself.
Whatever the reason you are choosing to format your drive it’s very easy to do and there are several ways to do it. You can even format things like external hard drives and USB flash drives. Just keep in mind that with whatever drive you choose to format you will lose all the data on that drive so be sure to back it up first if you care about it!

Format a Drive Using File Explorer
1. Open the Format Menu
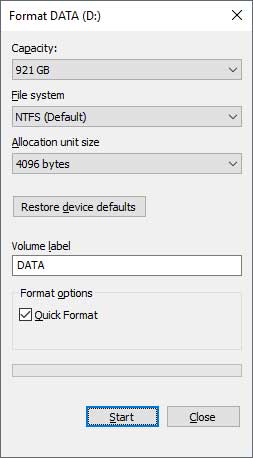
The first and easiest way to format a drive is to open File Explorer and find the specific drive you want to format. You can simply right-click on it and choose Format from the context menu list. You will then be presented with a dialog box showing you detailed information about the drive. This menu also gives you several formatting settings that you can manually change.
2. Choose the File System
The first section labeled Capacity shows the total size of the drive. It will usually be displayed in gigabytes or terabytes depending on the size of your modern storage device. Next is the File system drop-down which is a crucial option that you can change. Usually, you will have the choice of NTFS, FAT32, exFAT, or ReFS depending on what type of drive you are formatting. If it is an internal hard drive, you should stick with NTFS or ReFS for newer versions of Windows. Flash drives should be formatted as either exFAT or FAT32 depending on exactly what devices you are plugging them into.
3. Select the Allocation Unit Size
Next is the Allocation unit size which dictates the block size on your hard drive when it gets formatted. For most everyday cases the default 4096 bytes setting works the absolute best. With today’s massive hard drives and NVMe SSDs, tweaking this specific setting is not as important as it used to be. You can safely leave this on the default allocation size for standard file storage.
4. Name the Volume Label
The Volume label is the exact name shown when you look at the drive in Windows Explorer or This PC. You can easily change this to whatever you want as long as it is not more than 32 characters. This character limit will vary slightly based on exactly what file system type you are currently using. Naming your drives clearly helps prevent accidental data wiping in the future.
5. Execute the Quick Format
For the Format options section, you can use Quick Format for the most part. The only exception is if it is a brand-new drive and you want to actively scan for bad sectors. If you want a deep scan, simply uncheck the box and the format will take significantly longer to complete. Once it finishes, you will see your empty drive with its new volume name in Windows Explorer ready to be used.
Format a Drive Using Disk Management
1. Open the Disk Management Tool
Another excellent way to format a drive is straight from the Windows Disk Management utility. This is where you go to manage all your connected drives in Windows. You can easily add and remove them, create new volumes, and extend existing partitions.
2. Format the Selected Volume
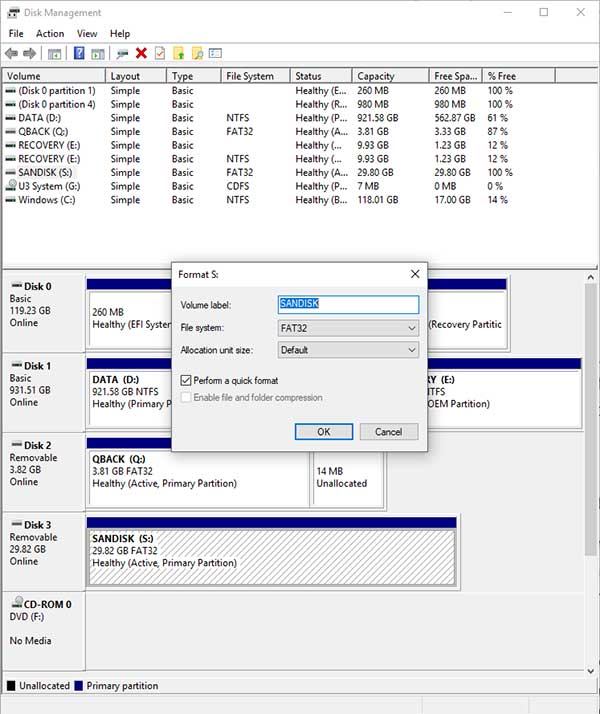
Once you are inside Disk Management, simply find the specific drive you want to format. Right-click directly on the target volume and choose Format from the menu. You will immediately see that you have similar configuration options just like you did with the first File Explorer method. It works exactly the same way under the hood.
Format a Drive Using the Command Prompt
1. Launch the Command Prompt
One last powerful method to discuss is formatting a drive using the Command Prompt. To get to the Command Prompt, simply type cmd in the Windows Start search box. Hit enter to bring up the black command line window. You must run this application as an administrator to execute disk commands successfully.
2. Review the Format Switches
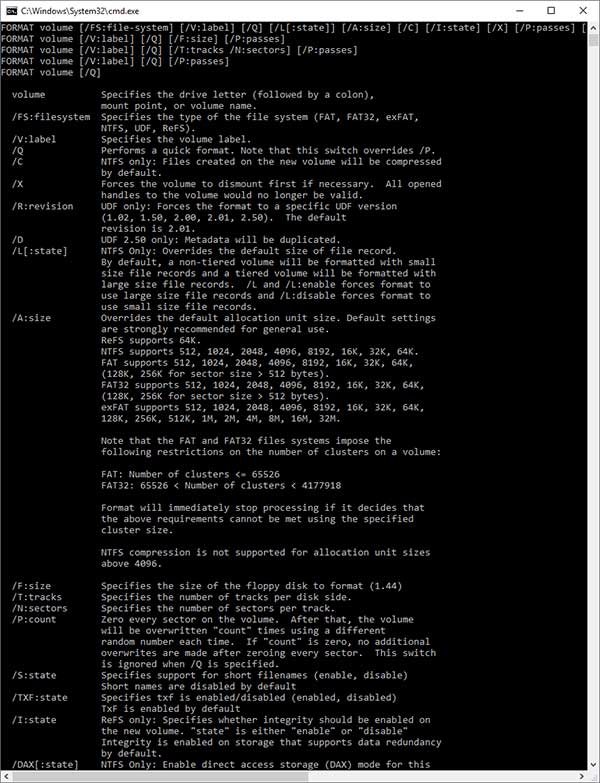
As you can see in the image below, there are a massive amount of options to choose from when formatting a drive via the terminal. In fact, they will not even fit on a single page. These switches allow advanced users to force specific file systems and cluster sizes without using a graphical interface.
3. Execute the Format Command
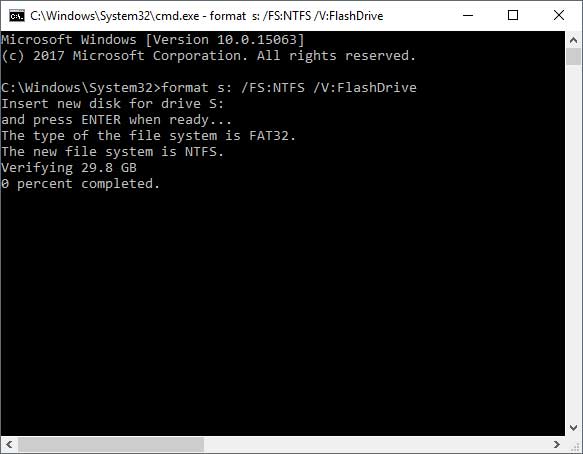
After you choose the correct drive letter and your required switches, you can format your drive instantly. For example, you can type in format s: /FS:NTFS /V:FlashDrive to format the S drive as NTFS with a volume label of FlashDrive. Press enter and wait for the percentage indicator to reach completion.