
Last Updated on June 3, 2026
Using virtualization to create virtual machines is a great way to do things such as test software, learn a new operating system or even run legacy applications that wont run on your modern OS. Desktop virtualization software such as VMware Workstation, VirtualBox and even Hyper-V allow you to create VMs at home without the need for expensive servers.
VMware Workstation is one of the best virtualization platforms you can use on your home computer and offers a lot of built in features. When it comes to networking and internet connections, your VMs will use the built in network connection from your host computer. This can be from the Ethernet or wireless adapter on the host. This should be fine for most situations, but you may have a need to configure an actual wireless connection on a virtual machine, you can do so with a few simple steps. In this article, will be discussing how to use a host Wi-Fi adapter to connect a VMware Workstation VM to a wireless internet connection.
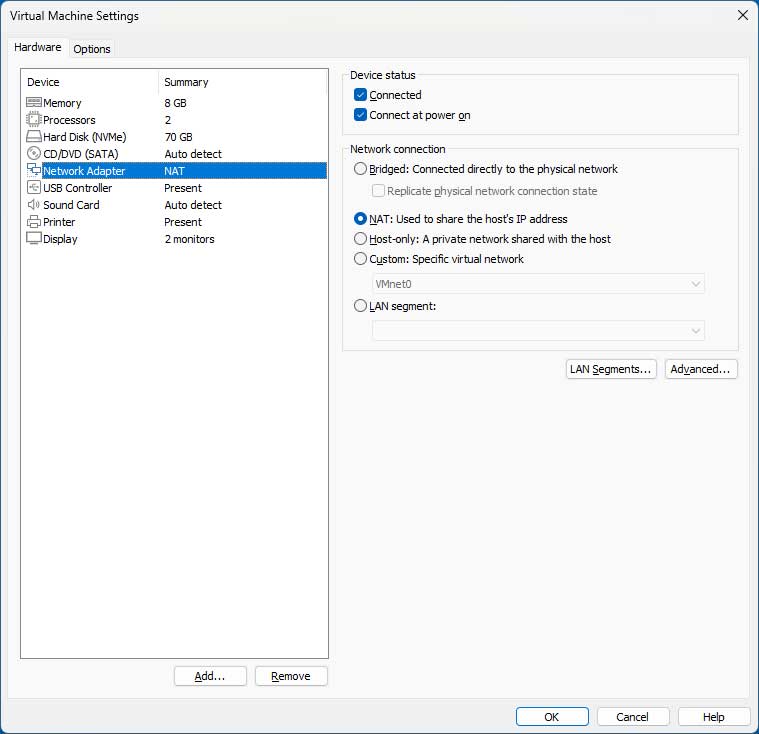
When you go to the network adapter settings of a virtual machine, it is most likely using the NAT (Network Address Translation) network. NAT is a technology used in networking to allow devices on a local network to share a single public IP address to access the internet. It operates by translating private IP addresses used within a local network into a single public IP address assigned by the ISP. This allows multiple devices on the local network to access the internet using the exact same public IP address safely.
Connecting the Hardware to the VM
1. Procure a Dedicated USB Wi-Fi Adapter
If you need to use a dedicated Wi-Fi adapter on your VM for its internet connection, you can easily use one that you have connected to your host. This specific hardware must be a USB Wi-Fi adapter. You absolutely cannot attach the built in Wi-Fi adapter hardwired onto your host motherboard directly to your VM.
2. Connect the Hardware to a Running VM
To begin this process, make sure VMware Workstation is fully open. Verify your target virtual machine is actively running on the screen. Plug your USB Wi-Fi adapter directly into an open USB port on your physical computer chassis.
3. Route the Device to the Guest OS
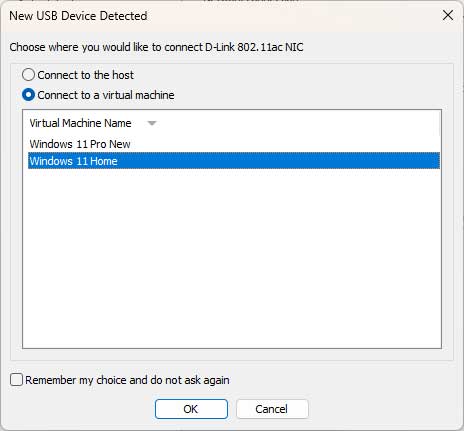
When you connect your USB Wi-Fi adapter to your computer, you should get a sudden popup from VMware Workstation. It asks if you want to attach the USB adapter to the host machine or to one of the running virtual machines. You will need to choose the Connect to a virtual machine option. Pick the exact VM you want to use this adapter on from the dropdown list.
4. Manage the Automatic Connection Prompt
If you check the box that says Remember my choice and do not ask again, the USB drive will be connected automatically every time. This might not be the best idea in case you want to use the USB Wi-Fi adapter with a completely different VM later on. You will then need to manually disconnect it from the VM and connect it to another VM or the host computer through the deep system menus.
Configuring the Guest Operating System
1. Connect to Your Wireless Router
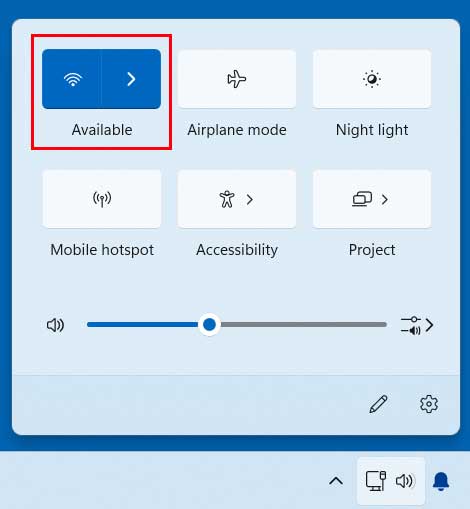
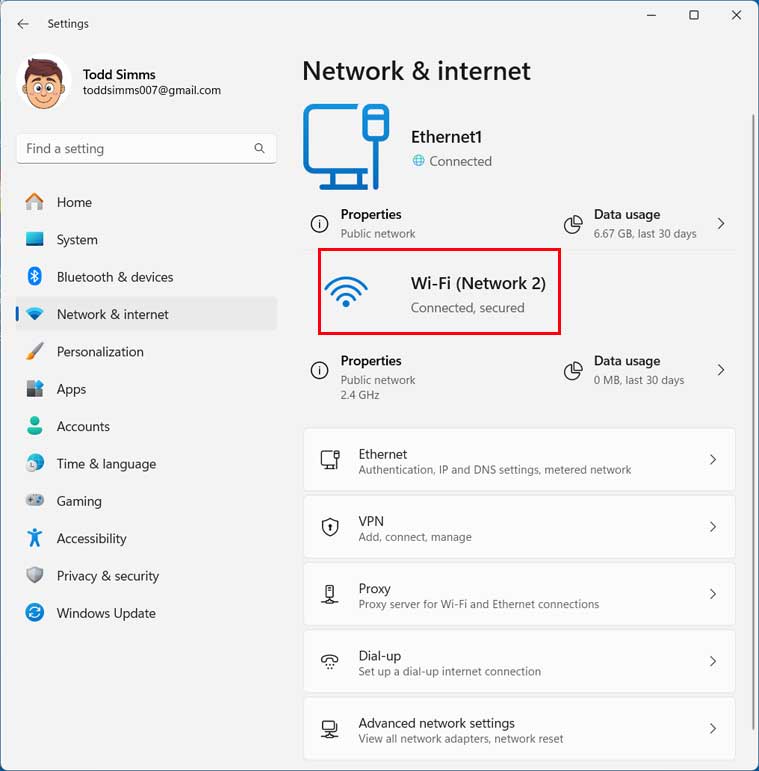
Once the adapter is connected securely to the VM, you should then be able to go to your standard Windows wireless connections menu. Connect to your local wireless router exactly like you would on your physical host computer. Type in your Wi-Fi password and verify the connection establishes successfully.
2. Disable the Virtual Ethernet Adapter
When you go to the network settings on the virtual machine, you will now see that you have both the Ethernet and Wi-Fi connections actively running. You can completely disable the Ethernet connection if you want to force the system to use just the Wi-Fi connection on its own. Just remember to enable the Ethernet connection again when you eventually remove the Wi-Fi adapter from the VM.
Removing the USB Wi-Fi Adapter
1. Use the VMware System Tray
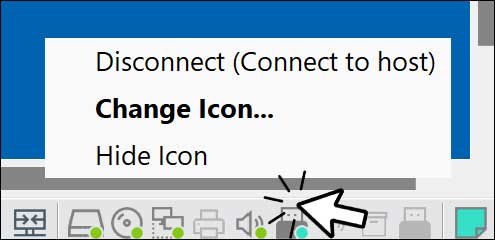
To remove the Wi-Fi adapter from the VM, you can simply pull it physically from the USB port on the host machine. You can also find it in the VMware Workstation tray located at the bottom right corner of the hypervisor window. Right click the specific hardware icon and choose Disconnect (Connect to host) to sever the virtual link safely.
(Image: Remove adapter when finished)
.
2. Restore Your Normal Network Settings
After you eject the physical hardware, your virtual machine loses its dedicated internet connection immediately. You must go back into your guest operating system network settings. Re-enable your default virtual Ethernet adapter to restore normal NAT internet routing back to the virtual machine.
For additional training resources, check out our online IT training courses.
Check out our extensive IT book series.






