Creating virtual machines using Virtualization software is a great way to do things such as test new software, learn a new operating system, run legacy software applications, test Windows patches and so on.
Watch video: Create Virtual Machines for Free Using VMware Player.
There are many desktop virtualization platforms available including Hyper-V, VirtualBox, Parallels and VMware Workstation. Some of these programs are free while others will cost you up to $200 for a license. If you want an easy way to create VMs, then we will be showing you how to create virtual machines for free using VMware Player.
VMware Player is a simplified version of VMware Workstation Professional and will allow you to create multiple virtual machines on your host computer. VMware Workstation includes advanced capabilities such as multiple snapshots, virtual networking customization, remote vSphere connectivity, and support for virtualization-based security features. VMware player on the other hand lacks some of the advanced features found in VMware Workstation, such as snapshot management, virtual networking customization, and remote connectivity options.
One downside to using VMware Player is that you can only run one virtual machine at a time. You can get around this by opening another instance of Player and then you can run another virtual machine at the same time.
Before you can create virtual machines using VMware Player, you will first need to install it. You can go to the VMware website and download Player for free here.
Once you have VMware Player installed, you will then need to launch the program and you will have an interface similar to the image shown below.
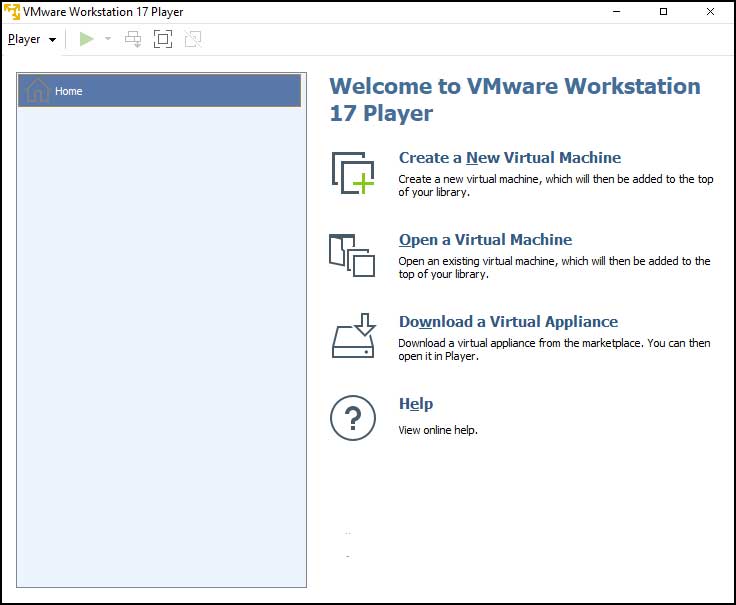
To begin the virtual machine creation process, simply click on the link that says Create a New Virtual Machine.
You will then need to tell Player where the operating installation files are located. For our example, we will be using Windows 11 for our OS. If you have a Windows 11 DVD, you can insert it in your drive and choose the Installer disk option. If not, you will need to have the Windows 11 ISO file available on your computer so you can attach it to the new VM.
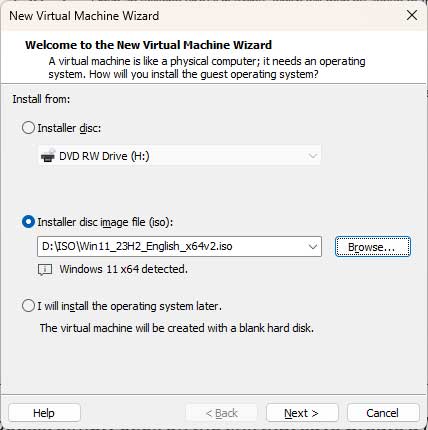
If you need to get a copy of the Windows 11 ISO file, you can download it for free from the Microsoft website.
You can also create your virtual machine and then attach your installation media later to install the operating system when you are ready.
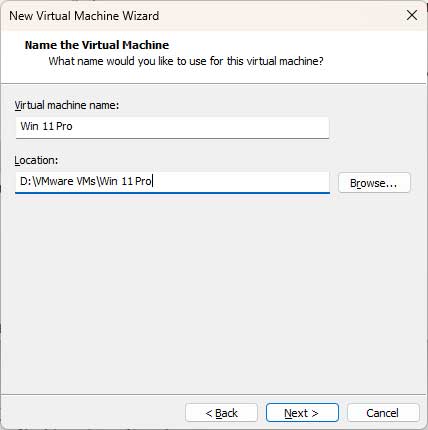
You will then need to give the new virtual machine a name if you do not want to use the default name that VMware Player provides. You can also choose a different location for the virtual machine files to be stored if you do not want to use the default location.
Since Windows 11 requires you to have an encrypted TPM (Trusted Platform Module) on your computer (and virtual machines), you will need to provide an encryption password for the VM. This password will be used when accessing the VM and making changes to its settings. It will not be used within Windows itself or for logon purposes.
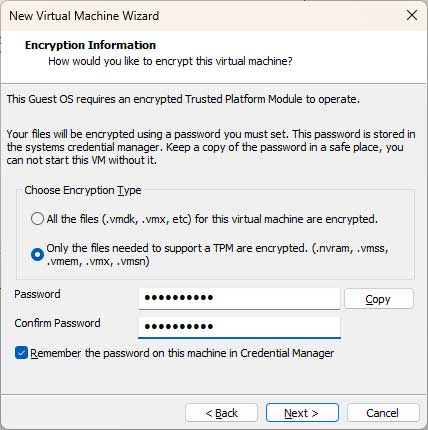
You can encrypt all of files or just the ones that are required. You can also have the password stored in the Credential Manager to have it remembered. You can also change this password from the virtual machine settings on the Options tab after the VM has been created.
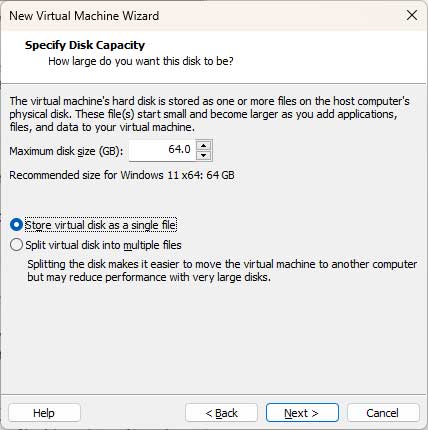
VMware Player will then suggest a size for the virtual hard drive that will be used for this virtual machine. You can change the size here if you want to make it larger or smaller. Just be sure you allocate enough space for the operating system, any programs you will be installing and your user files.
You can then decide if you want to store the virtual disk as a single file or multiple files. If you are not planning on backing up this VM, you might be better off storing the virtual disk as a single file to keep things simple. The virtual machine files will take up space on the hard disk of the host computer that has VMware Player installed, so be sure you have enough disk space there as well.
If you want to edit the hardware or for the virtual machine such as giving it more RAM or another CPU, you can do so by clicking on the Customize Hardware button.
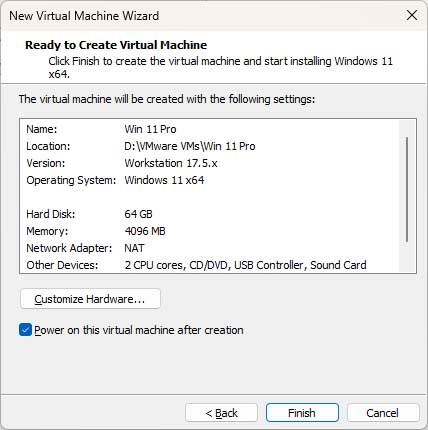
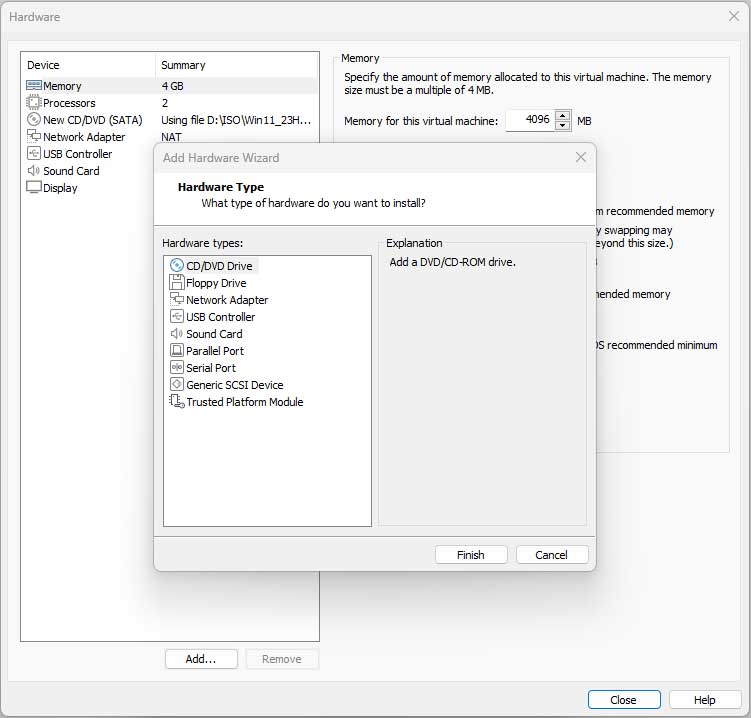
When you click on the Add button, you will be shown what additional hardware you can install for your VM. Even though it might not show in this screen, Player will add a Trusted Platform Module to your virtual machine and you can come back to the settings later to confirm it.
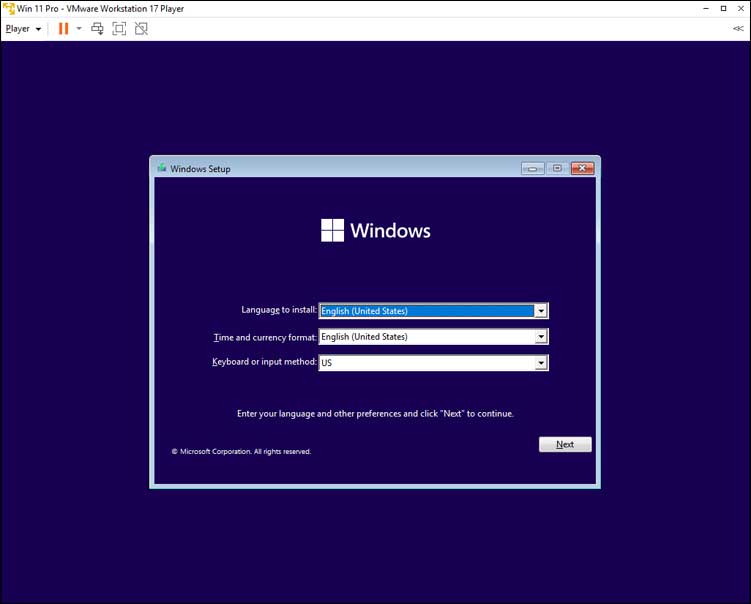
If you leave the box that says Power on this virtual machine after creation checked and have the operating system media mounted, the OS installation will then start and you can then install Windows or whichever other operating system you have chosen to use.
Once you have the operating system installed and running, you can then install the VMware Tools software on the virtual machine itself. VMware Tools is used to provide the necessary drivers, utilities, and optimizations to ensure optimal performance, functionality, and manageability of virtual machines.
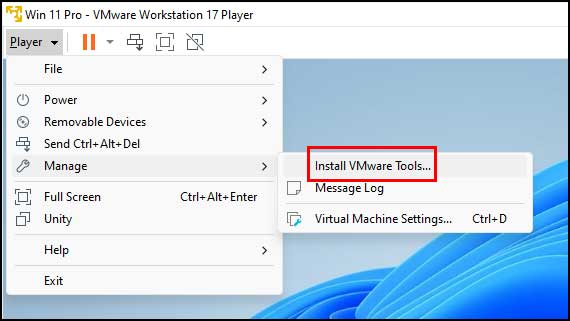
To install VMware Tools, click on Player > Manage > Install VMware Tools. If the installation doesn’t start automatically, you may need to open File Explorer and browse to the virtual CDROM and start the installation manually.
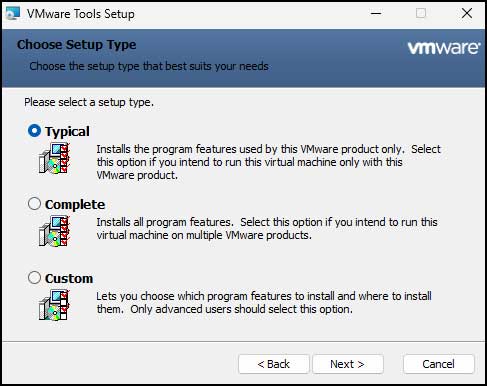
Then you can just go through the installation wizard and if you keep all of the default selections, you should be fine. You will then have to reboot your virtual machine for the changes to take effect.
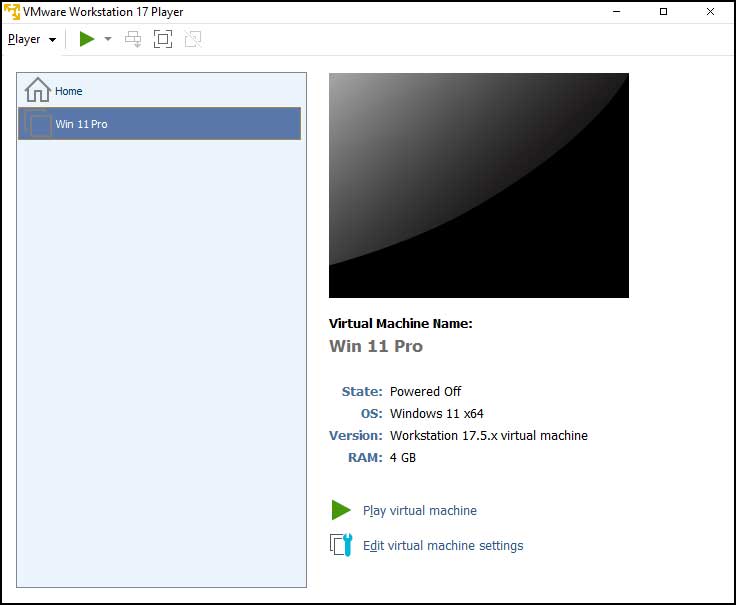
When the virtual machine is powered off, it will be shown in your inventory along with any other VMs you have configured. You can start any of your VMs by clicking the play button as well as edit their settings as needed.
For additional training resources, check out our online training courses.


