
Last Updated on April 21, 2026
Virtualization is a great way to do things such as test out new software, experiment with custom computer configurations, learn networking or even learn how to use a new operating system. It allows you to create complete standalone virtual computers (virtual machines) that act independently of the host computer (running Hyper-V), even though the virtual machines share the hardware of the host.
If you have been using Windows as your main operating system, you might want to try out Linux to see how it works and you might even find that you prefer it over Windows itself! Linux is a free to use open source operating system that comes in many versions, or flavors as they are commonly referred to. This means you can install any version of Linux you like as a virtual machine on a Hyper-V host.

In this article, we will be showing you how to install a Linux virtual machine on Microsoft Hyper-V. In order to use Hyper-V, you will need to be running a Windows Server operating system or a Windows Professional desktop OS such as Windows 11 Pro. You can run Hyper-V on a Windows Home version computer by following the steps outlined in this video.
Configuring the Hyper-V Virtual Machine
1. Launch the New VM Wizard
Once you have Hyper-V up and running on your host computer, you can start the process to create a new virtual machine (VM). We will be installing Ubuntu Linux since its very user friendly and has a nice graphical user interface (GUI). You can download Ubuntu here. With the Hyper-V host selected on the left pane you can go to the Action menu and choose New > Virtual Machine.
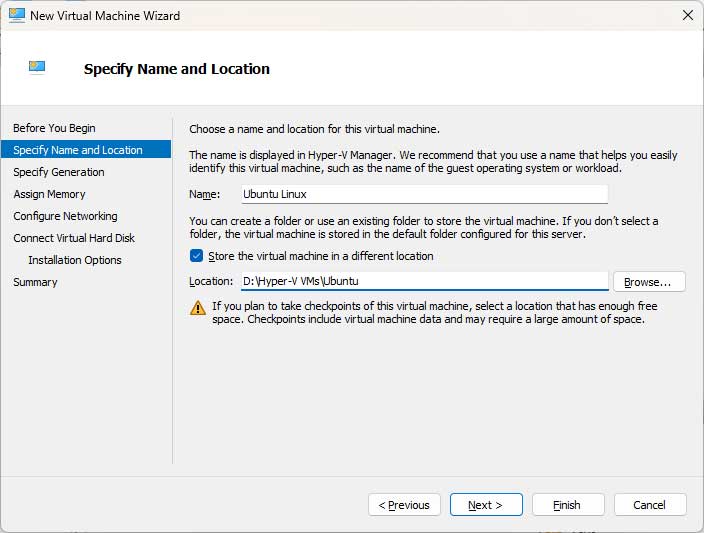
2. Name the Virtual Machine
You will then see an introduction screen but on the Specify Name and Location screen you can enter the name you want to use for your new virtual machine. This name will only be used in Hyper-V to label the configuration files. It will not be the actual internal hostname of the VM itself.
3. Choose the Storage Location
Hyper-V will use your default storage location for this new VM, but you can change it if you want to place the virtual machine files elsewhere. You might want to create a folder with the name of the VM in the location box, so it doesn’t get mixed in with your other virtual machines.
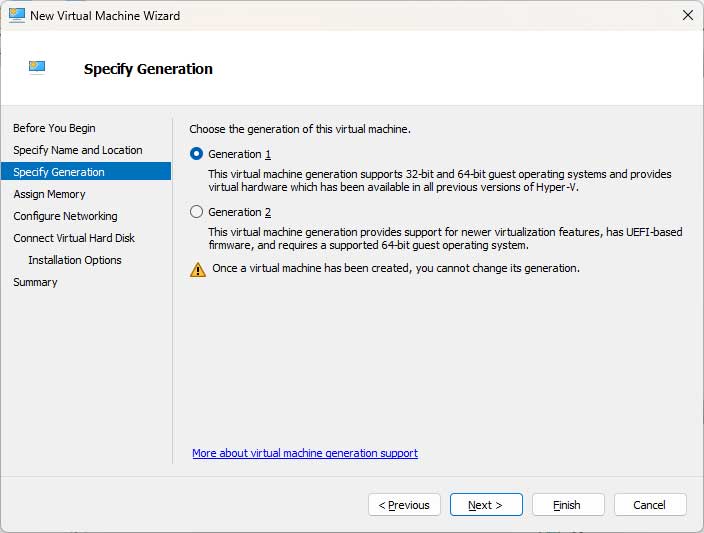
4. Select the VM Generation
On the next screen you will need to choose which VM Generation to use with your new virtual machine. We highly recommend selecting Generation 1. This older specification avoids common UEFI and Secure Boot compatibility issues with Linux distributions.
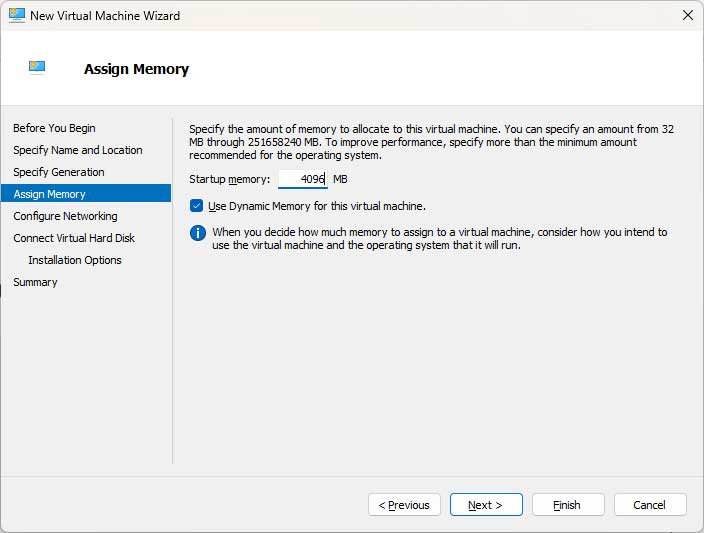
5. Allocate the RAM
On the next screen you can choose how much RAM you want assigned to your virtual machine. Linux does not require as much RAM as Windows does so you can get away with 4GB and be just fine. Or if your host has a lot of RAM, you can increase this number if desired.
6. Enable Dynamic Memory
You can also leave the Use Dynamic Memory for this virtual machine box checked. This allows virtual machines to dynamically adjust their memory allocation based on workload demands. When this option is enabled, Hyper-V allocates memory to the virtual machine as needed, increasing or decreasing it within specified limits.
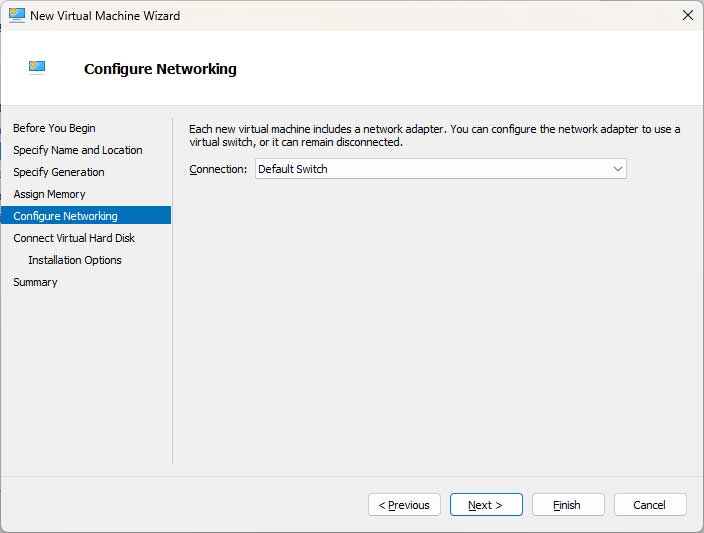
7. Configure the Network Switch
If you have not made any changes to your networking configuration, you can choose the Default Switch in the networking step. This will allow your VM to access the internet via the connection on the host computer running Hyper-V.
8. Create the Virtual Hard Disk
On the next step, you will need to create a new virtual disk. Hyper-V will name this virtual disk based on the name of the VM itself. You can then decide where to store this virtual disk and may want to store it in the same folder you used for the virtual machine files.
9. Size the Virtual Hard Disk
If you do not want to use the recommended disk size that Hyper-V suggests, you can change the number to make the virtual disk smaller or larger. Just be sure not to go too small, otherwise there might not be enough room to install Linux or any apps after Linux is installed. Ubuntu recommends 25 GB of free hard drive space.

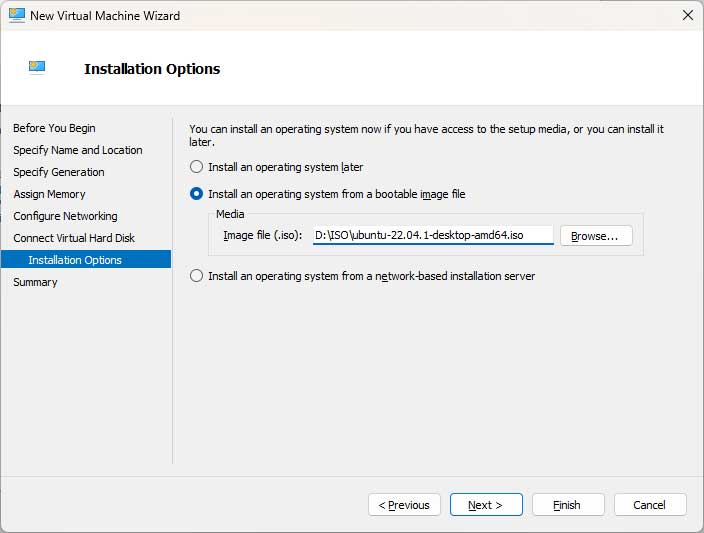
10. Mount the Installation ISO
For the Installation Options step, you will need to tell Hyper-V where you have the Linux ISO file downloaded. Select the Install an operating system from a bootable image file radio button. Click browse and locate the file so it knows where to boot from when you start the VM for the first time.
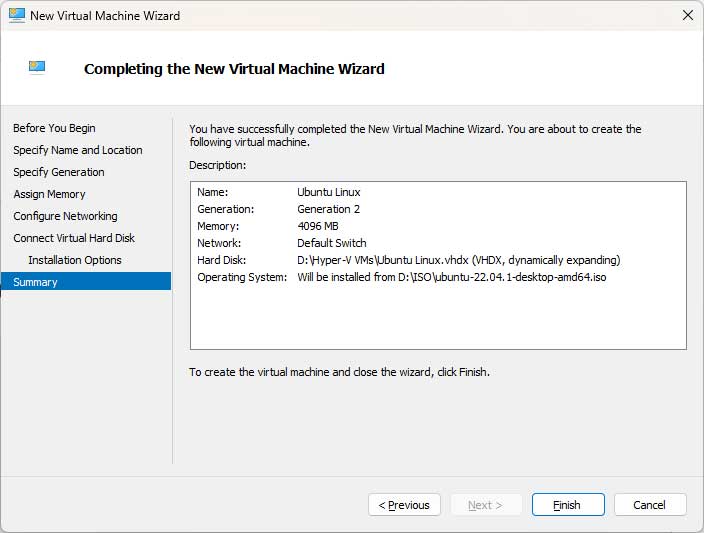
11. Review the Final Summary
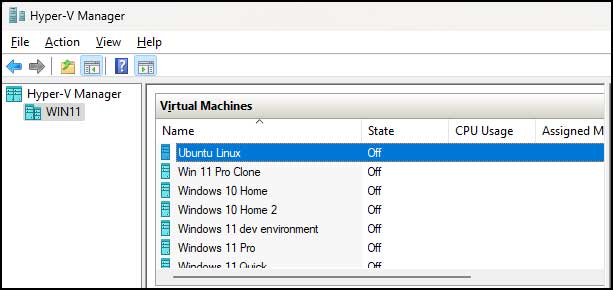
The final screen will show you a summary of your virtual machine’s configuration. If everything looks good, you can click on Finish to generate the files. Now you will have your new Linux virtual machine shown in your Hyper-V inventory along with any other VMs you had previously configured.
Installing Ubuntu Linux on the VM
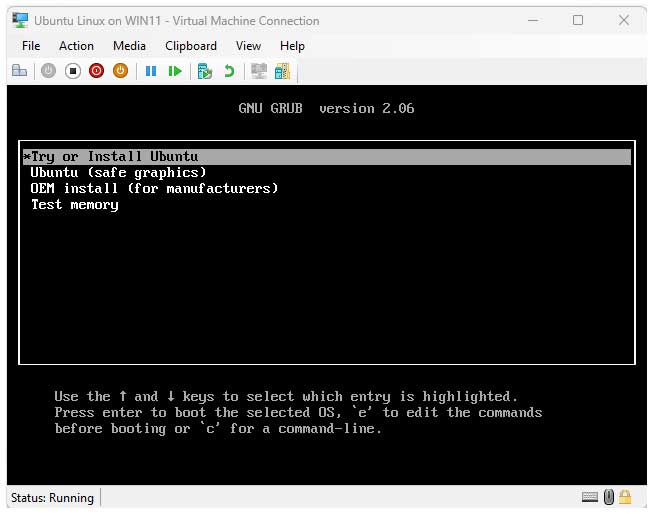
1. Boot the Virtual Machine
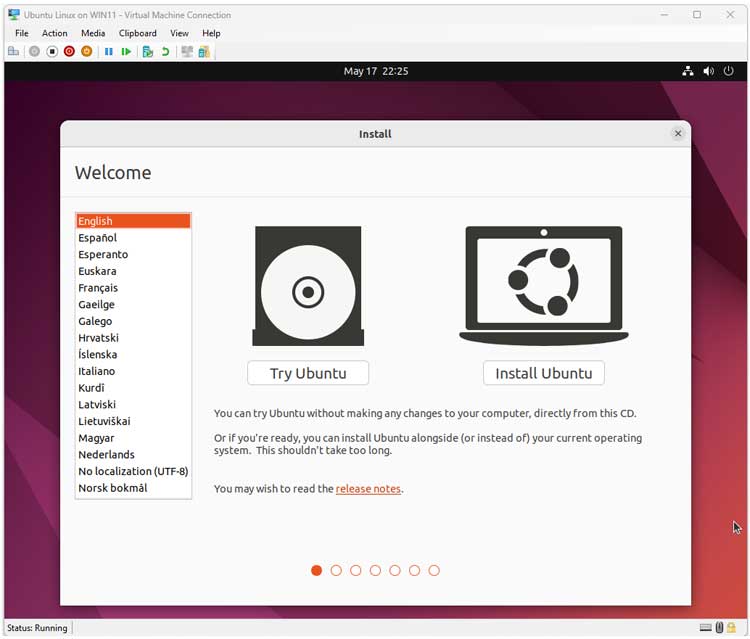
Now you can simply double click the VMs name and then click on Start. The following steps will vary depending on what version of Linux you are installing but we will go through the steps required to install Ubuntu. For the first screen, you will need to choose the Try or Install Ubuntu option using your keyboard arrow keys.
2. Choose the Install Option
Next, you will need to choose your language and then choose the Install Ubuntu option. The Try Ubuntu option is used to run Ubuntu in memory without installing it. Keep in mind that these screens may vary depending on which exact version of Ubuntu you are installing.
3. Select the Installation Type
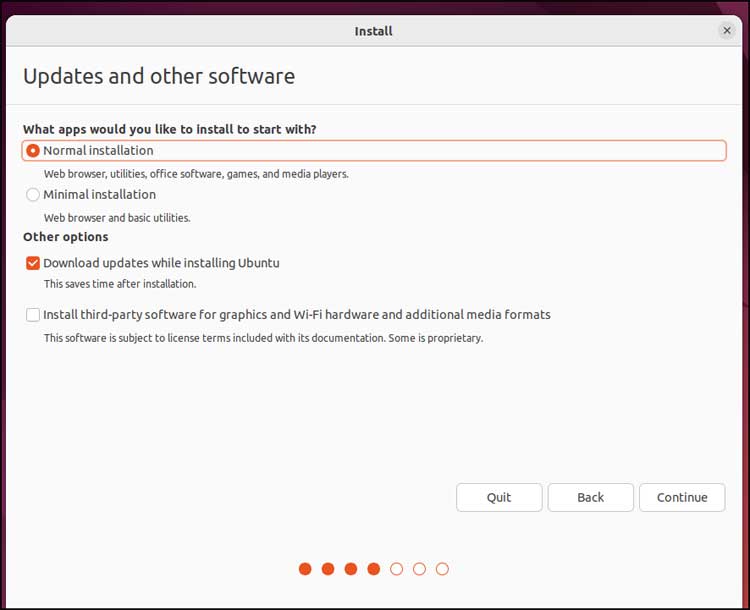
Then you will need to choose your keyboard layout which should be correct by default. The next screen allows you to choose which type of installation you want to use. If you really want to see all that Ubuntu has to offer, you should choose the Normal installation option.
4. Enable Update Downloads
You can also have it download any updates while installing so you do not need to do it after the installation is complete. There is still a good chance you will need to do more updates relatively soon, but this saves time.
5. Format the Virtual Disk
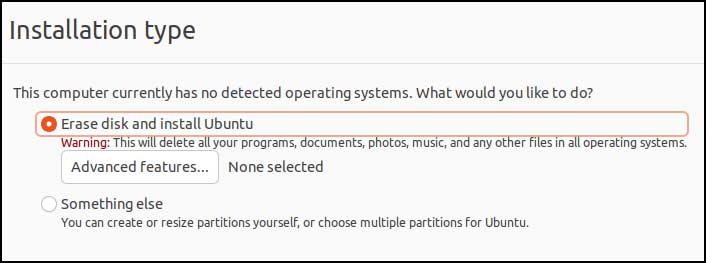
The next screen is where you can view or edit how Linux will partition your virtual disk. If you are new to Linux, you should go with the first option. Choose Erase disk and install Ubuntu which will wipe the blank virtual disk and then create all the needed partitions for you automatically.
6. Confirm the Disk Changes
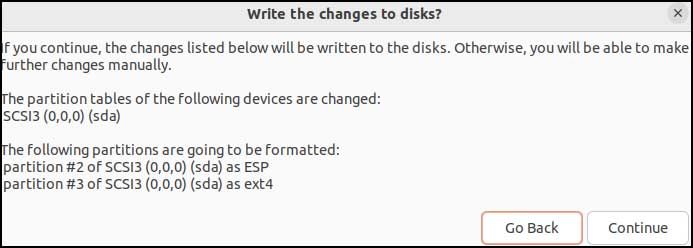
You will then be shown a summary of what will be created and written to the virtual disk. You just need to click on the Continue button to proceed. Then you will need to choose your time zone if Linux has not chosen the correct one for you.
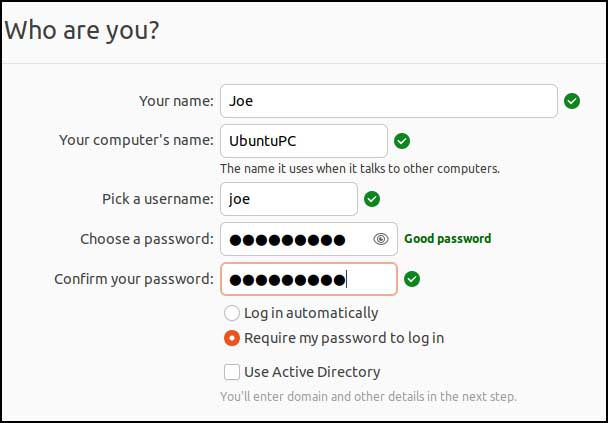
7. Configure the User Account
For the who are you section, you can type in the username you wish to use for your Linux VM as well as a computer name to go along with it. You will also need to come up with a password that will be used for logging into your VM. You can however choose the option to log in automatically so you will not need to type your password each time.
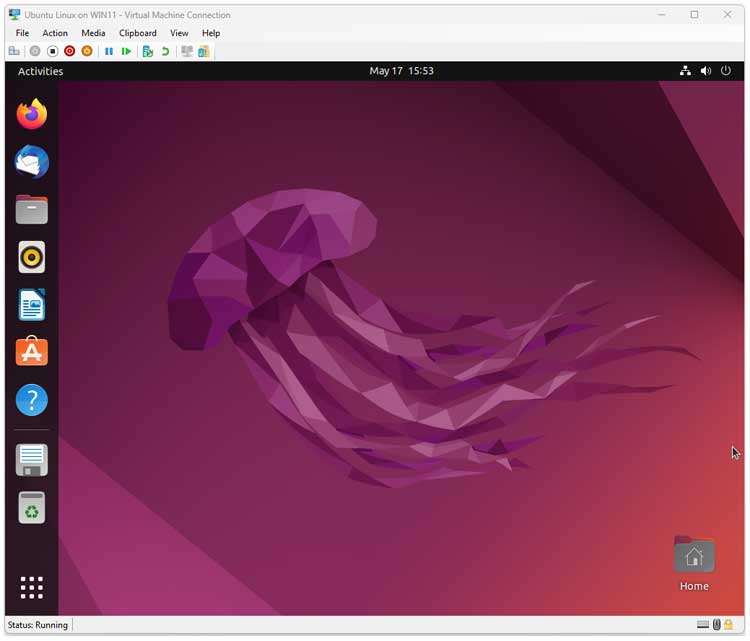
8. Finish the Installation
The installer will then continue to copy files to the virtual hard disk. When everything is complete, the machine will reboot. You will have your new Linux virtual machine ready to go on the desktop.
For additional training resources, check out our online IT training courses.
Check out our extensive IT book series.


