
Last Updated on April 3, 2026
Oracle VirtualBox is a free virtualization platform that you can run on top of another operating system such as Windows or Linux. It allows you to create virtual machines (VMs) that can run a variety of different operating systems. You can then use these virtual machines to do things such as test new software or updates, learn a new operating system, or even use them to run older legacy software.
One great thing about virtual machines is that you can export them to a file and then import them on another host computer or even into a different virtualization platform. In this article, we will be showing you how to export and import a VirtualBox Virtual Machine.

Exporting a Virtual Machine from VirtualBox
To begin the export process, you will need to have the VirtualBox Manager software open on your host computer. Next, go to the File menu and choose Export Appliance. You will then be shown a list of the virtual machines configured within your VirtualBox environment and will need to select the one you want to export.
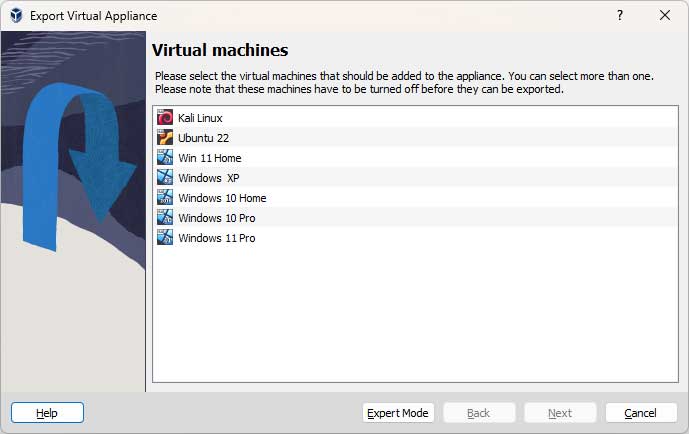
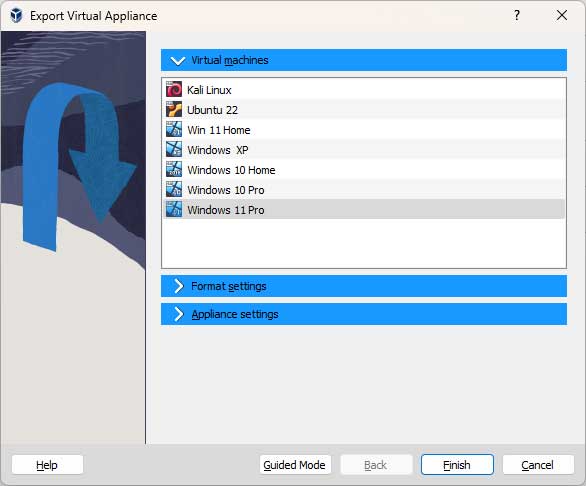
If you click on the Expert Mode button, you will have more control over how your virtual machine will be exported because you will be able to toggle between the export settings rather than have to use the Back button to change them. Otherwise, you get the same options for both methods.
For the Format settings, you will have several options for the format such as Open Virtualization 0.9, 1.0 and 2.0. There will also be an Oracle Cloud Infrastructure option if you are running your virtual machines in the cloud.
OVF 1.0 primarily focuses on packaging the virtual machine disk image(s) and a descriptive text file (descriptor) containing configuration details. It is an older but international standard (ISO/IEC 17203) ensuring compatibility across different virtualization platforms.
OVF 2.0 allows specifying network settings for the virtual machine during the import process. This simplifies deployment and streamlines the configuration of network interfaces. It also allows you to encrypt the VM for extra security.
The options for the MAC Address Policy that you can use are Include only NAT network adapter MAC addresses (default), Strip all network adapter MAC addresses and Include all network adapter MAC addresses. You can also change the MAC address of your VM from the command line in VirtualBox if you end up with a conflict.
The box that says Write Manifest file will be checked by default. The Manifest contains the VirtualBox settings of the VM being exported. If you want to include an attached ISO image, you can check that box as well. It will make your backup file larger and make the export time take a little longer.
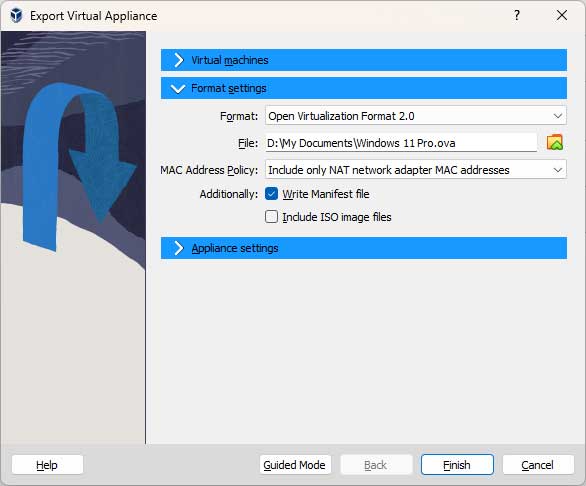
The virtual machine will be exported as a single OVA file. OVA (Open Virtual Appliance) files are compressed packages used in virtualization software to distribute pre-configured virtual machines. It is basically a single archive containing all the necessary files to run a virtual machine on your computer.
The Appliance settings area is where you can make adjustments to your virtual machine before it is exported. You can do things such as add a description, change hardware settings, disable hardware and so on.
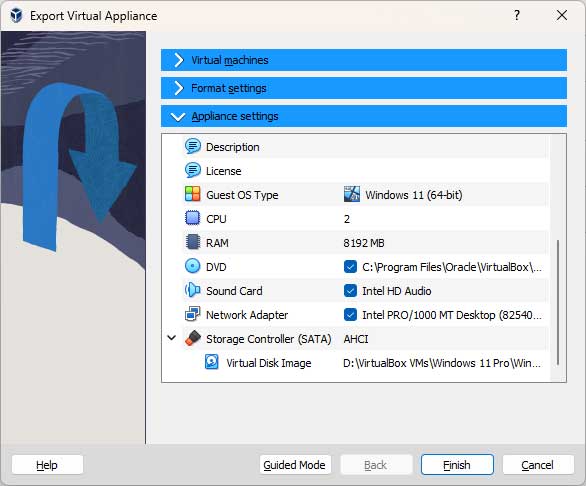
Once you click the Finish button, you will then see the export process in your notifications area. This can take a bit of time to complete depending on the size of the VM you are exporting.
Importing a Virtual Machine into VirtualBox
The process of importing a virtual machine into VirtualBox is similar to the export process. You will begin by going back to the File menu and this time choose Import Appliance. This time we will use the standard mode rather than expert mode.
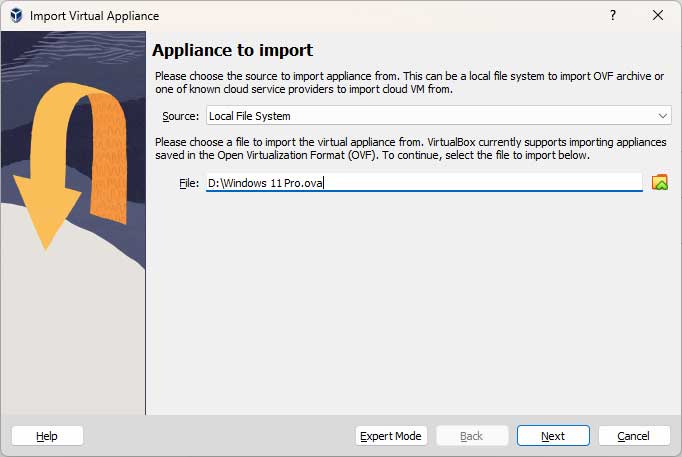
The source will be Local File System unless you are using the Oracle cloud infrastructure. You will then need to browse to the location of your exported OVA file.
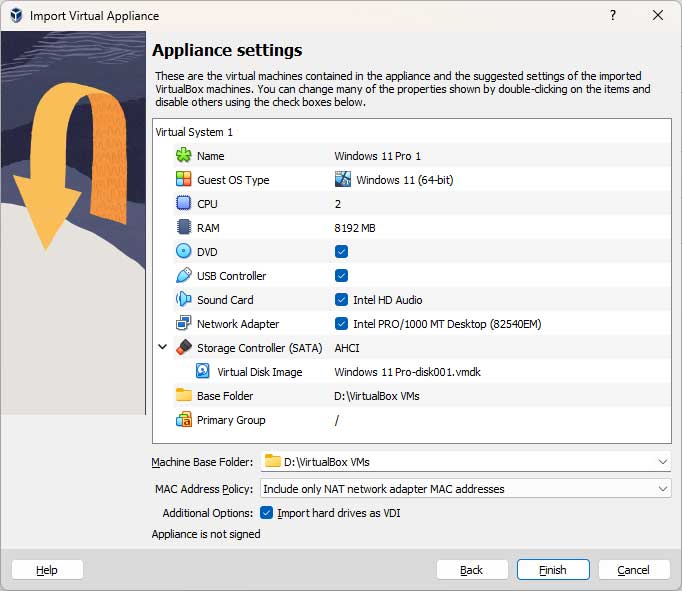
The Appliance settings screen is where you can make adjustments to the virtual machine before you import it into your environment. You will most likely want to change the Machine Base Folder location to match where you store your other virtual machines if it’s not set to the right location by default. You also have similar options for what to do with the MAC address of the VM when it’s imported. The option to import hard drives as VDI files is checked by default and it most likely they option you will want to use.
When you click the Finish button, your virtual machine will be imported into your VirtualBox environment, and you will see the status in the notification section.
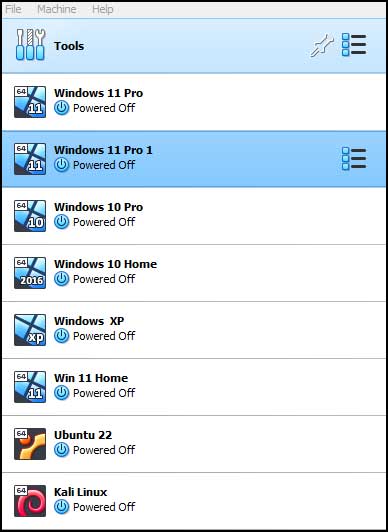
When the import is complete, you will have your virtual machine shown along with your other VMS. In our example, since we imported the same VM that we exported, VirtualBox gave it the same name but put a 1 at the end of it.
For additional training resources, check out our online IT training courses.
Check out our extensive IT book series.


