Backing up your computer is something that everyone should be doing on a regular basis and if you are not, you should start now! Many people will at least perform file and folder backups to make sure that their important personal data is backed up in case of a serious hardware or software failure.
One other type of backup that you can perform is what is known as a system image backup. This will backup your operating system, apps, settings and files. Then if your computer dies, you can restore this image and continue on as if nothing happened. In this article, we will be showing you how to create and restore Linux OS system image backups for free.

One key thing to remember when it comes to OS system image backups is that they are only as good as the date that they were created. So, if you restore a backup that is 6 months old, your computer will be reverted back to the state it was in 6 months ago, including your personal files. This is why you should be performing file level backups on a regular basis so if you do need to restore an older image, you can then restore current copies of your files. You should also keep in mind that system image backups are not the same as cloning your hard drive.
Creating a Linux OS System Image Backup
The first step in creating your OS system image backup is to make sure you have a place to back it up to. You will need to have a secondary drive of some type since you cannot backup your operating system to the same drive on which it resides. For our example, we will be using a dedicated drive with a folder called OSBackup that will be used to store our backup image files.

To create our system image backup, we will be using the free Rescuzilla software that can be downloaded here.
To use the Rescuezilla software, you will need to create a bootable USB flash drive or CD\DVD. There are plenty of USB media creation tools that you can use for free such as Rufus to create your bootable flash drive.
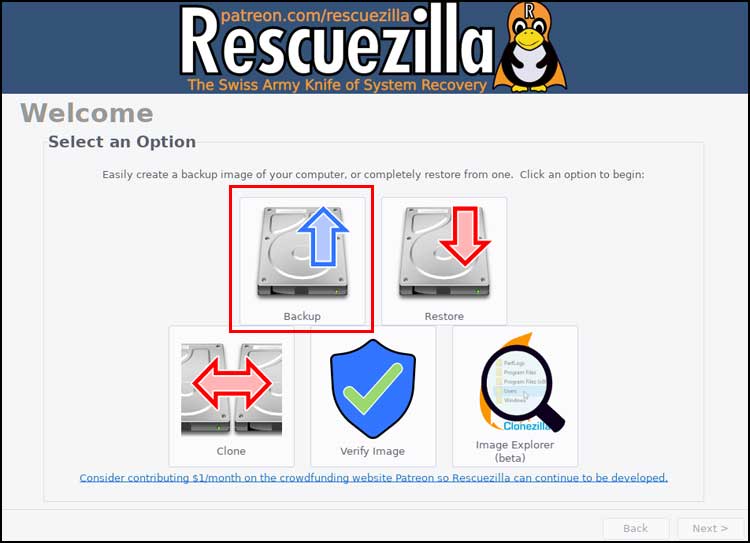
When you first boot into Rescuezilla, you will have 10 seconds to press a key to stop the countdown timer before it loads the software with the selected language.

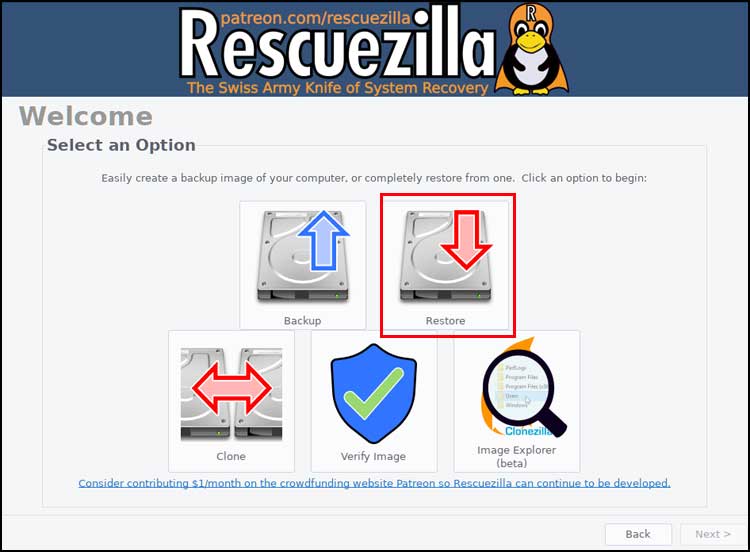
Next, you will need to choose the Backup option from the main screen.
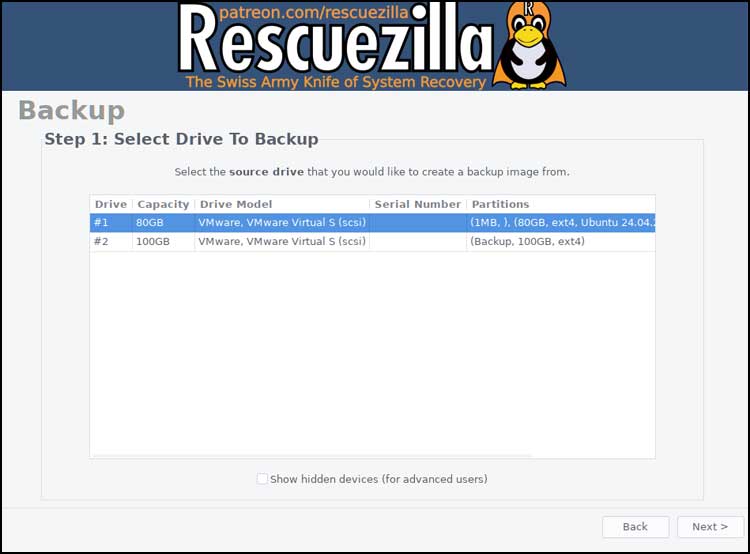
Then you will be shown the hard drives on your computer and you will need to choose the one that has Linux installed on it and click the Next button.
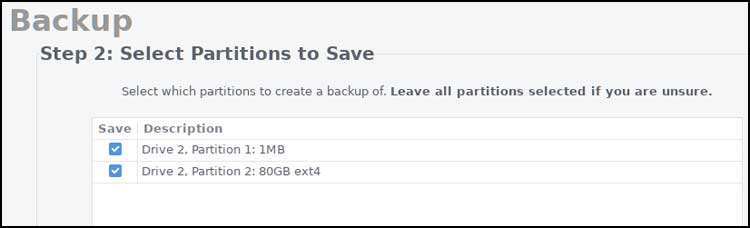
Then you will be prompted to select which partitions to save. You will most likely leave them all selected unless you have a custom partition not related to the OS that you do not want backed up.
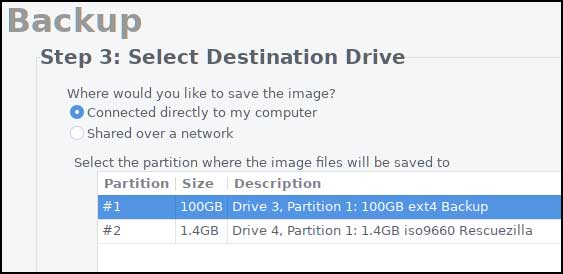
Next, you will need to choose a destination for your backup.
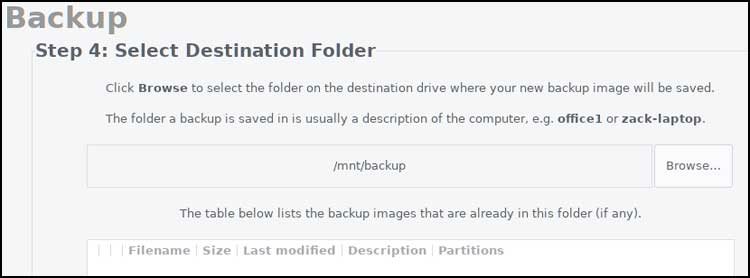
You can then click the Browse button to select the folder you have created for your backup files.
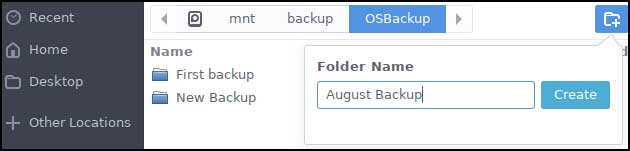
If you need to create a new folder, you can do so by clicking the new folder button at the upper right corner.
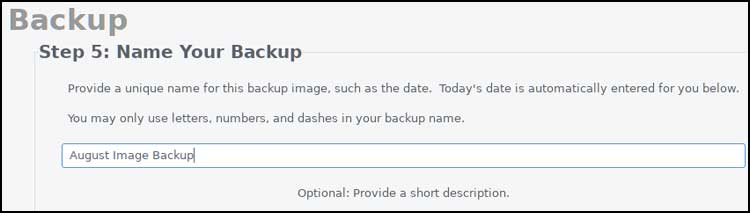
You will then be prompted to give your backup image a name.
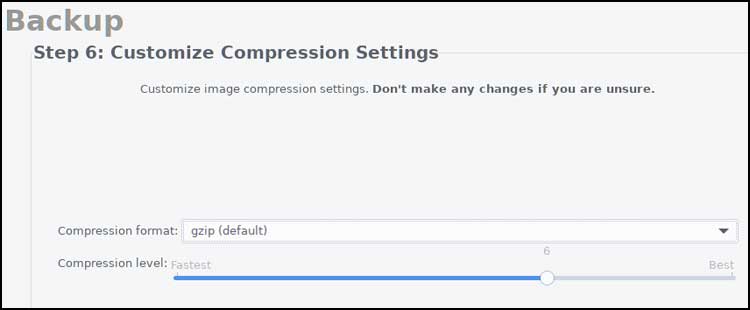
The next step involves choosing a compression method and level if you do not want to go with the default settings. You have options to use gzip, zstandard, bzip2 or keep the backup uncompressed. More compression makes for longer backup times but smaller backup file sizes.
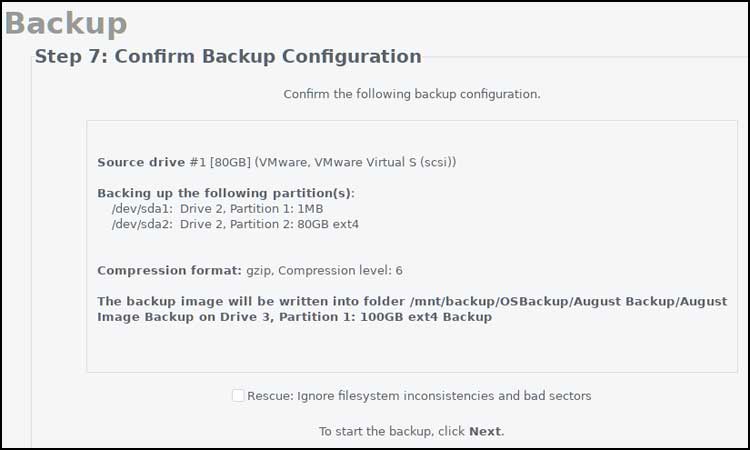
If everything looks good on the backup configuration screen, you can click the Next button to begin the backup process.
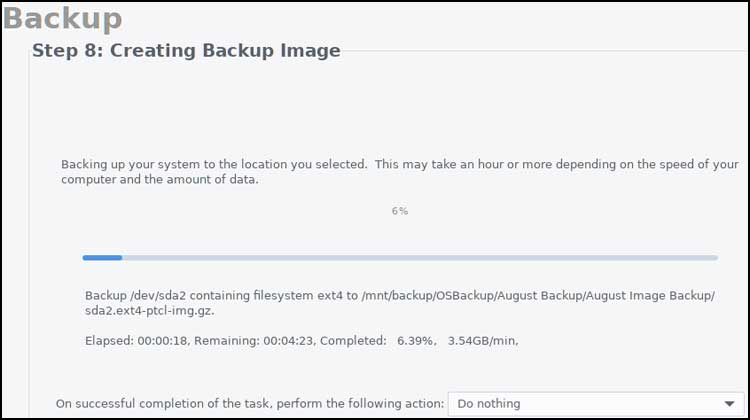
The amount of time that the job takes will depend on the size of your drive and how much data is on it. You can also choose to have the computer shut down, rebooted or left alone when the backup is complete.
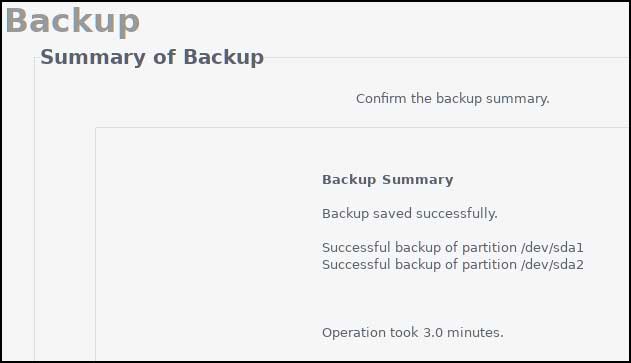
When the backup is complete, you will be shown a summary screen and you can click the Next button to be brought back to the next screen.
You can then reboot or shut down your computer from the button at the lower left corner of the screen.
Restoring a Linux OS System Image Backup
The process of restoring a Linux OS system image backup is very similar to how you created the backup image. You will need to once again boot your computer with the Rescuezilla ISO image like you did to create the backup image but this time you will choose the Restore option.
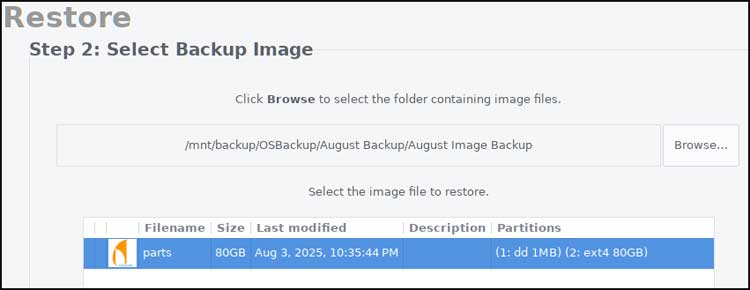
The next step involves choosing the drive that contains your backup image.
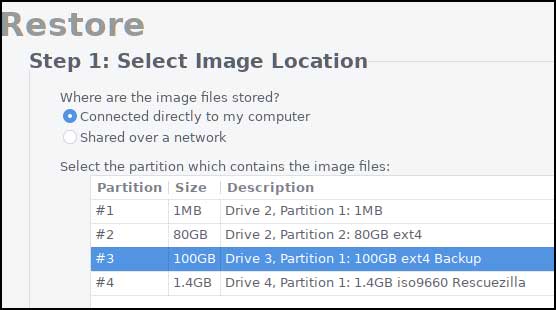
Once again, you can browse to the folder location where the backup resides.

You will then see the backup image listed along with any other backups in that folder.
Next, you will need to choose the restore location which will be the drive that contains the Linux operating system.
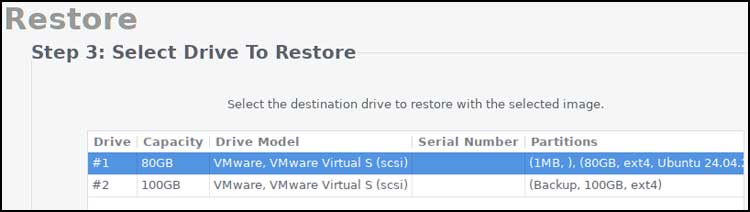
You will once again most likely leave all the partitions selected.
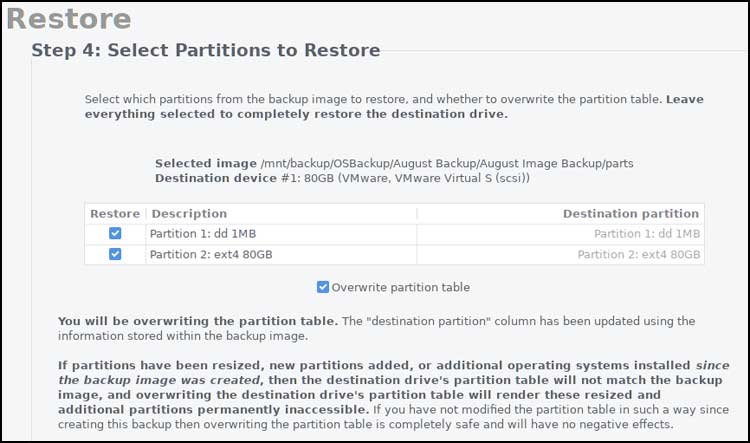
If everything looks correct, you can click the Next button to start the restoration process.
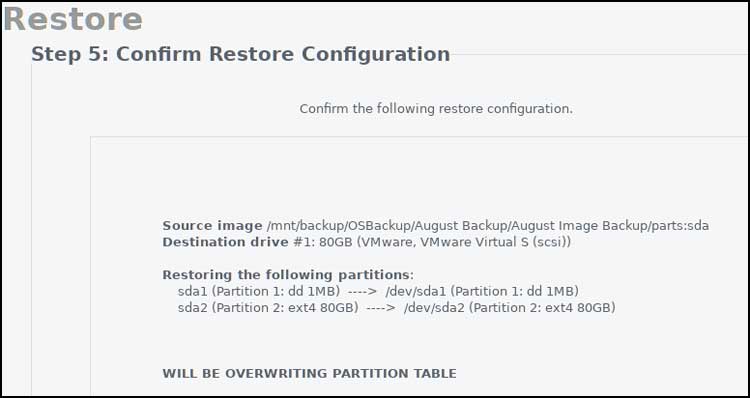
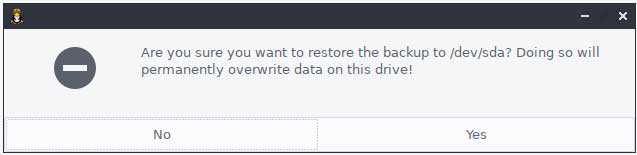
You will receive a warning telling you that all the data on your OS drive will be overwritten so be sure this is what you want to do.
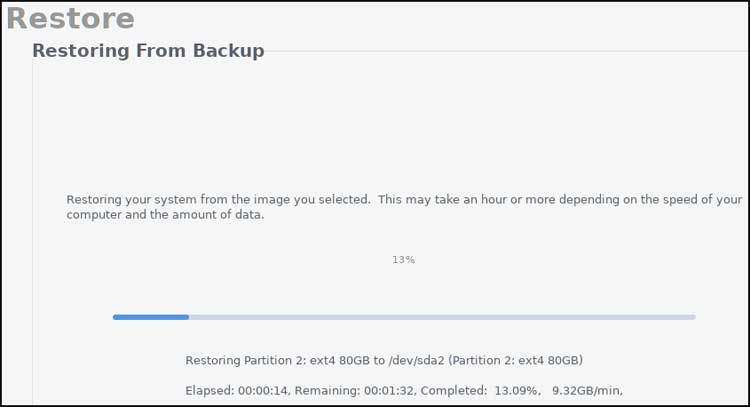
The restore process will begin and when it’s finished, you can reboot your computer and will have your OS restored to the date and time that the backup was made.
For additional training resources, check out our online IT training courses.
Check out our extensive IT book series.