
Last Updated on July 2, 2026
Gmail is one of the most popular email services in use around the world. It’s provided by Google and is one of their many free Google Apps that you use on your computer, tablet or smartphone. If you use Gmail on your smartphone, you most likely get notifications when a new email arrives. If you also use Gmail on your computer via a web browser, you may not get notifications unless you have gone into the Gmail settings and enabled them.
Even if you do get new email notifications on your computer, you may want to get notifications for only specific email people, and this takes a bit of configuring to setup. In this article, we will show you how to configure email notifications for specific email addresses in Gmail.

Enabling Desktop Notifications in Gmail
1. Access the Main Gmail Settings
To begin the process, you will need to go to the Gmail website and make sure you are logged in with your Google account. From the main inbox screen you will need to click on the settings gear icon at the upper right corner of the screen. Then choose See all settings from the drop-down menu.
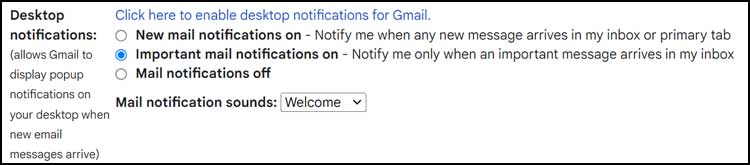
2. Configure the Notification Preferences
Then go to the General tab at the top of the settings page. Scroll down to find the Desktop notifications section. Select the Important mail notifications on option. You can also change the mail notification sound if desired.
3. Grant Browser Permissions
If you see a link that says enable desktop notifications above this setting, then that is most likely because this is the first time you have enabled Gmail desktop notifications on this specific computer. You can click on the link to enable the notifications and grant your browser permission to display them. Just be sure to scroll to the very bottom and click Save your changes after modifying the setting.
Creating a Filter for Specific Email Addresses
4. Build a New Filter
Next, you will need to go back to the main Gmail settings page. Click on the Filters and Blocked Addresses tab at the top. Click on the Create a new filter link in the middle of the screen.
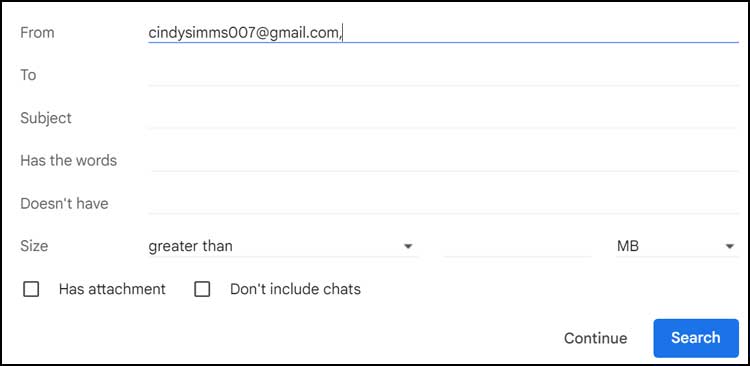
5. Input the Target Email Address
A small window will drop down from the search bar. Then you can type in the exact email address of the person you want to get notifications for in the From field. Click on Create filter at the bottom of the box.
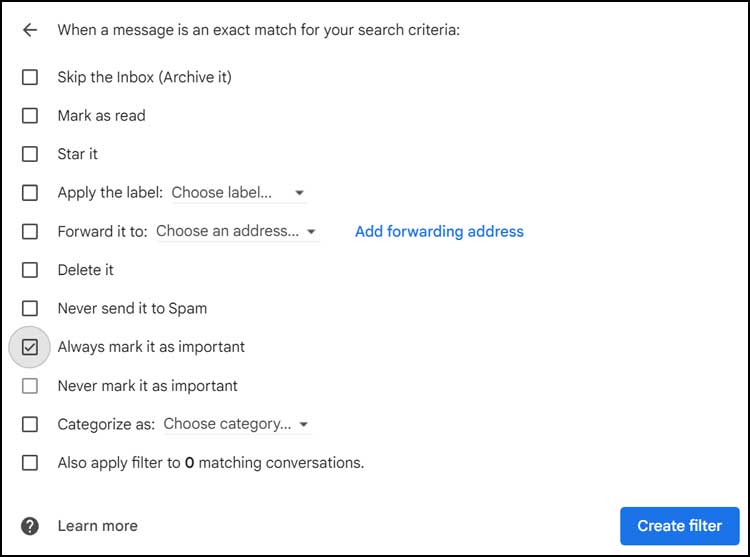
6. Mark the Filtered Emails as Important
On the next screen that appears, you will see a list of actions Gmail can take when it sees that specific email address. Check the box that says Always mark it as important and click the Create filter button. Doing this will also mark these emails as important in Gmail so be aware of that.
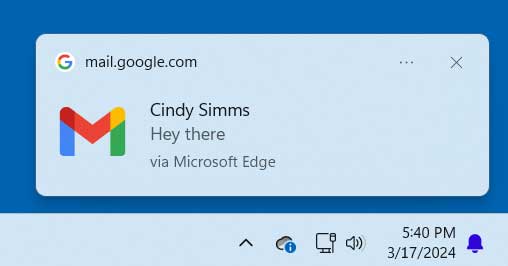
7. Review Your Active Filters
You will now see this new filter in your list of active Gmail filters. You can then come back here to edit or delete the filter as needed. Now when you get an email from that specific address, you should see a notification from Windows pop up from the lower right corner of your screen.

Troubleshooting Duplicate Notifications and Sounds
1. Identify Duplicate Alerts
One issue you may have is that you get a Windows notification with the sound you selected from the Gmail settings, and you may also get a notification from your web browser for the exact same email. This happens if you have browser notifications enabled in the global Windows settings.
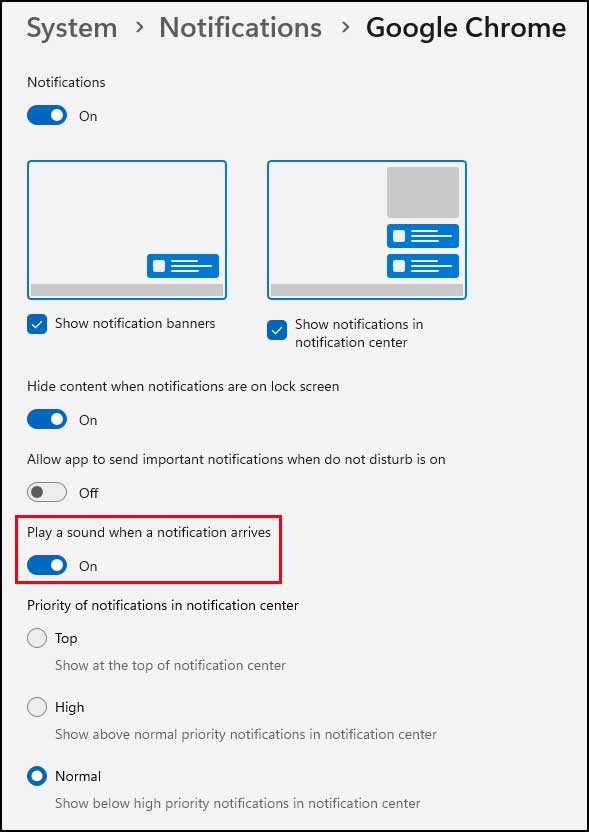
2. Mute the Browser Notifications
One thing you can do is disable browser notifications entirely, but if you rely on that for other types of browser related alerts, they will be disabled. You can however go to the Windows settings for the browser notifications and disable the sound if you do not want to hear two sounds each time you get an email from that person. But of course this will disable other browser notification sounds as well but at least you will still see them.
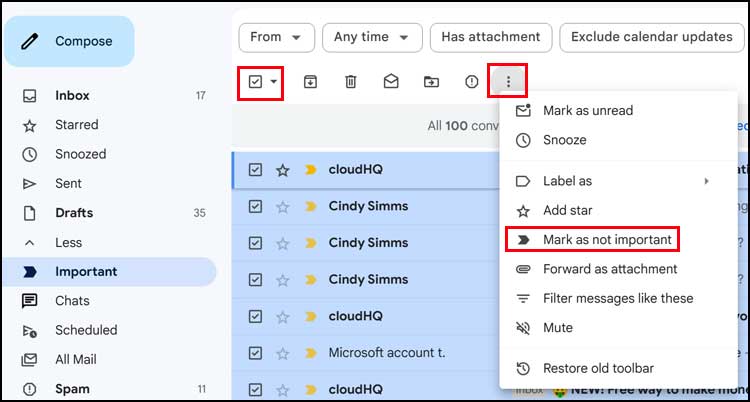
3. Clear Unwanted Important Labels
Another issue you may encounter is that Gmail will mark other email addresses as important based on its own internal algorithms. You will then get unwanted notifications for those as well. To get around this, you can go to your Important label in Gmail on the left side menu. Highlight everything in there and then choose Mark as not important. You may have to do this more than once for the changes to finally take effect.
For additional training resources, check out our online IT training courses.
Check out our extensive IT book series.


