
Last Updated on June 23, 2026
Create a Virtual Machine in Microsoft Hyper-V
If you have been in the IT field for any length of time you most likely have heard the term virtualization thrown around when talking with colleagues. What it boils down to is when you run computers within software that is running on another computer. For more details you can check out our article that explains how virtualization works.
There are many companies that provide virtualization platforms that allow you to create VMs (virtual machines) such as VMware with their vSphere and VMware Workstation products and Oracle with their VirtualBox product (which is free by the way). And of course you would expect Microsoft to get into the game with their Hyper-V software that runs on Windows servers and also on certain Windows 10 versions including the Enterprise, Professional, and Education editions.
The way you create a VM in Hyper-V is similar to the way you do it in the other virtualization platforms. We will walk you step by step through the process on how to get a VM up and running. Keep in mind the choices during the VM creation may differ slightly between Hyper-V running on a desktop operating system versus running on Windows Server.
Launching the New Virtual Machine Wizard
1. Open the Hyper-V Manager
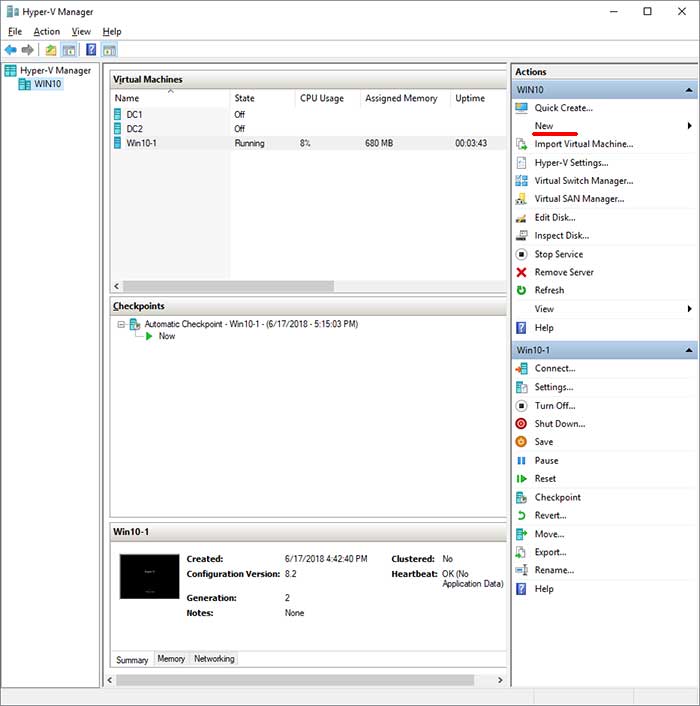
Once you have your Hyper-V software configured all you need to do is open the Hyper-V Manager. Connect to your local Hyper-V server if it’s not connected automatically. This is the main dashboard where all of your virtual machines will live.
2. Start the Creation Wizard
You can either right click on your server name on the left pane and choose New and then Virtual Machine. You can also click on New under the Actions menu on the far right side of the window and then choose Virtual Machine. Both options launch the exact same setup wizard.
3. Name Your Virtual Machine
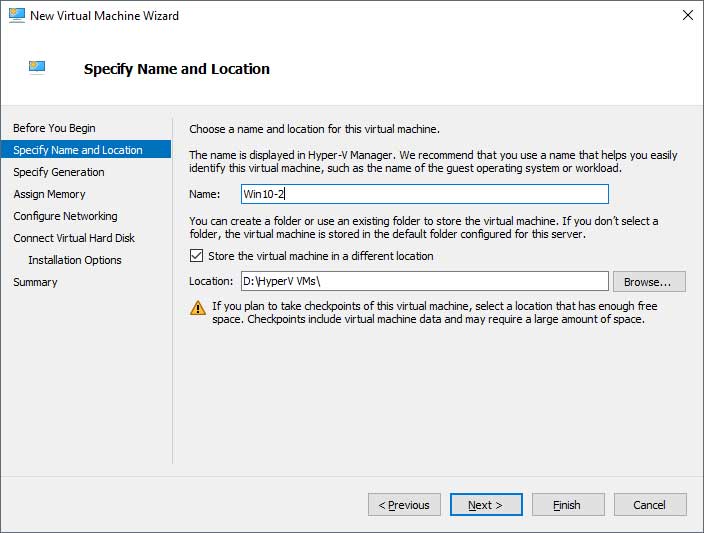
This will open up the New Virtual Machine Wizard. It will first ask you to name the VM so you can easily identify it later. Pick a descriptive name like “Windows 11 Test Machine” rather than just leaving it as the default.
4. Choose a Storage Location
You must decide if you want to place the VM in the default folder location or choose a specific folder of your own. This comes in handy if you have a different drive other than the main C: drive that you want to store your virtual machine files. Storing VMs on a separate, dedicated SSD will drastically improve their performance.
Configuring Virtual Machine Hardware Settings
1. Select the VM Generation
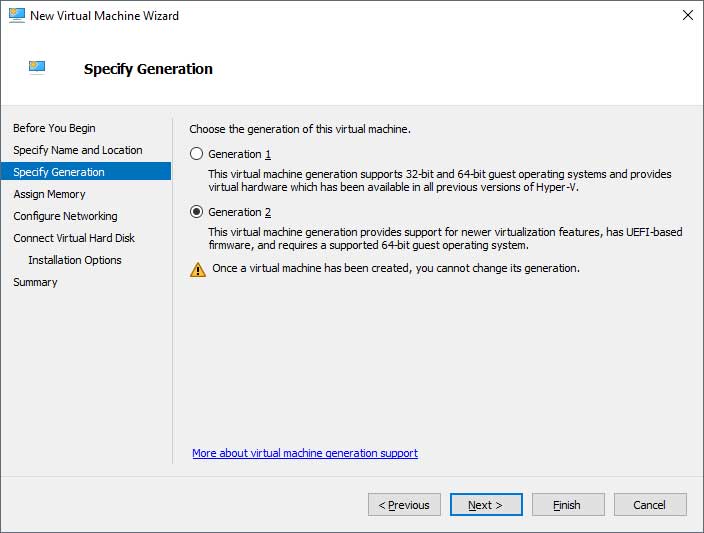
After clicking on Next you will need to choose a generation of VM to run. Choose Generation 1 if you are planning on using an older legacy operating system or one that only supports 32 bit hardware. Choose Generation 2 for newer modern operating systems like Windows 11 and Windows Server 2022. Once you choose a generation you are permanently stuck with that choice, so make sure it’s going to work with your VM otherwise you will be recreating it from scratch.
2. Assign the RAM
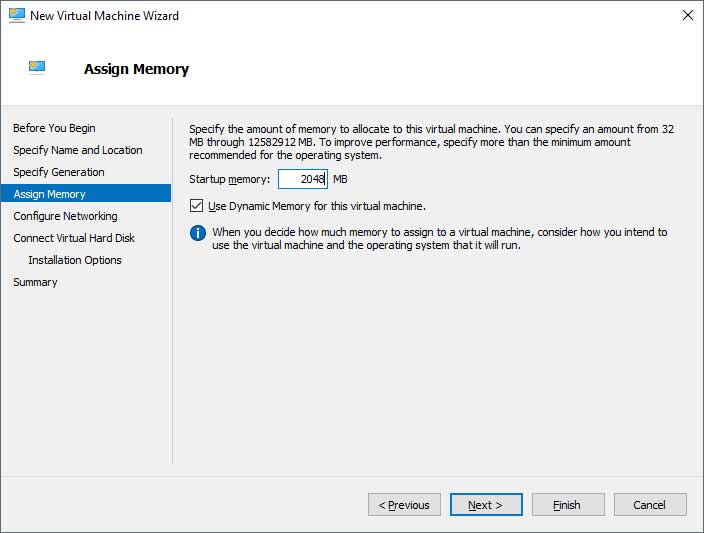
The next step involves assigning memory (RAM) to the virtual machine. The amount of memory to utilize will depend on what operating system you will be running and what you plan to do with that VM. One very important thing to remember is that the VM (guest) uses physical resources from the host (your computer). You can only utilize memory that you have physically available on your motherboard.
3. Enable Dynamic Memory
If your computer has 16GB of RAM installed you should not be allocating memory to VMs so that they take up more than the 16GB when running simultaneously. If they are not running they are not using the memory. You can have five VMs with 8GB of RAM each if you like as long as they are all not powered on at the exact same time. The Dynamic Memory option will automatically allocate more memory to the VM as needed to prevent system crashes.
4. Configure the Network Adapter
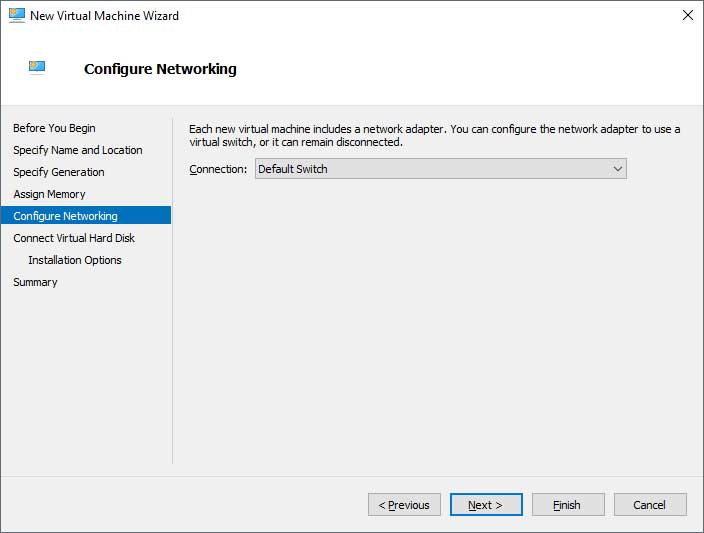
Next you will need to assign the VM a network connection so it can communicate on the network with other VMs as well as connect to the Internet. Hyper-V will have a Default Switch that you can use immediately for basic internet access. You can also connect to other custom virtual switches that have been preconfigured before setting up your VM.
Creating the Virtual Hard Disk and Installing the OS
1. Create a New Virtual Hard Disk
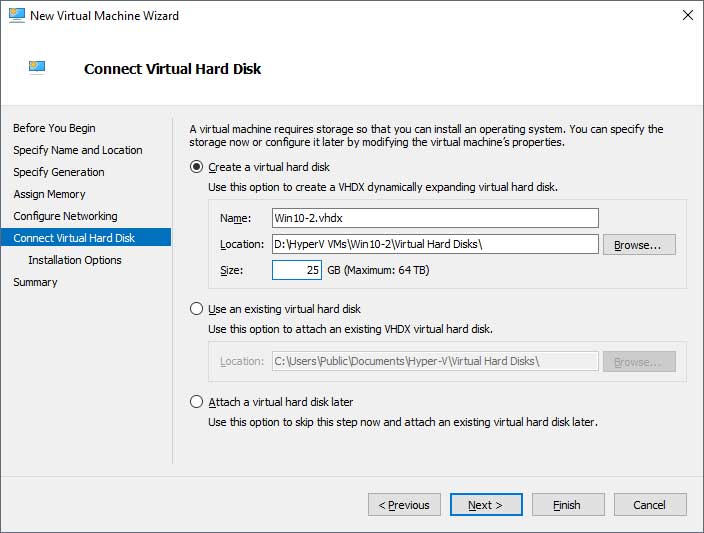
The hard disk for your VM will be stored on your local hard drive unless you have some network attached storage where you can keep these files. The default option is to create a new virtual hard disk. You can change things like its name, storage location and maximum file size.
2. Attach an Existing Virtual Disk
If you have an existing virtual disk from another VM that you aren’t using then you can attach it to the VM and run it from there. You can also skip this step entirely and go back to it later. However, you will definitely need to have some kind of storage attached before you can install your operating system.
3. Mount Your Installation Media
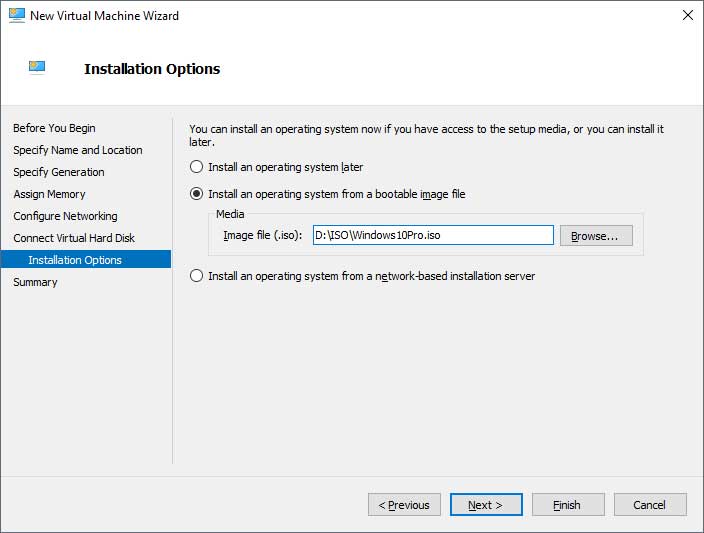
In order to install an operating system on your VM you will need to connect it to some sort of installation media. You can do this after the VM is created or choose a bootable image file (ISO file) to mount and boot from right now. If you have an installation server on your network you can point the VM directly to the files there.
4. Review the Final Summary
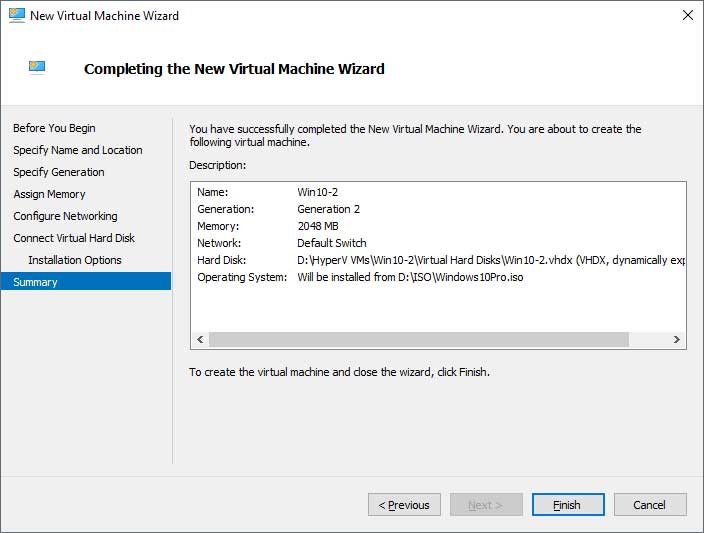
Finally you will see a summary page showing everything you have configured. If something doesn’t look right you can go back to the previous screens and make any changes. Click on the Finish button to generate the virtual machine files.
5. Start the Virtual Machine
After the VM is created it will show up under your Virtual Machines listing in the Hyper-V manager. From there you can either make changes to its hardware configuration or start it up. Once it boots, you can install an operating system and then start using the VM itself.
For additional training resources, check out our online IT training courses.
Check out our extensive IT book series.






