
Last Updated on April 15, 2026
Remove those unwanted Google Chrome extensions
We all know what a web browser is and most of us know there are different browsers out there to choose from such as Edge, Firefox and Chrome to name the most popular ones. Each one of these browsers has its own features and once you try a few you will usually stick with one that suits you the best.
If that particular web browser is Google Chrome then you might know that you can add what they call extensions to it to enable additional functionality or features. Some of these extensions are created by Google and others are created by third party developers. Some of the things these extensions can do are allow for screen captures or act as a PowerPoint file viewer and so on.
Many times you will have these extensions installed and not even know it because programs like Adobe Reader or Microsoft Office will install them without telling you. Most of the time this is ok but other times these extensions are looking to cause you harm and you will want to get rid of them.
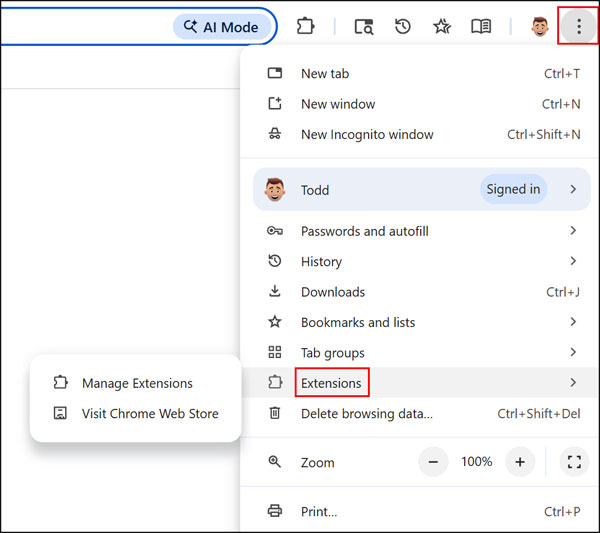
To see your extensions in Chrome go to the three dots on top of each other (or vertical ellipsis) to get to your menu items. From there click on More tools and then Extensions.
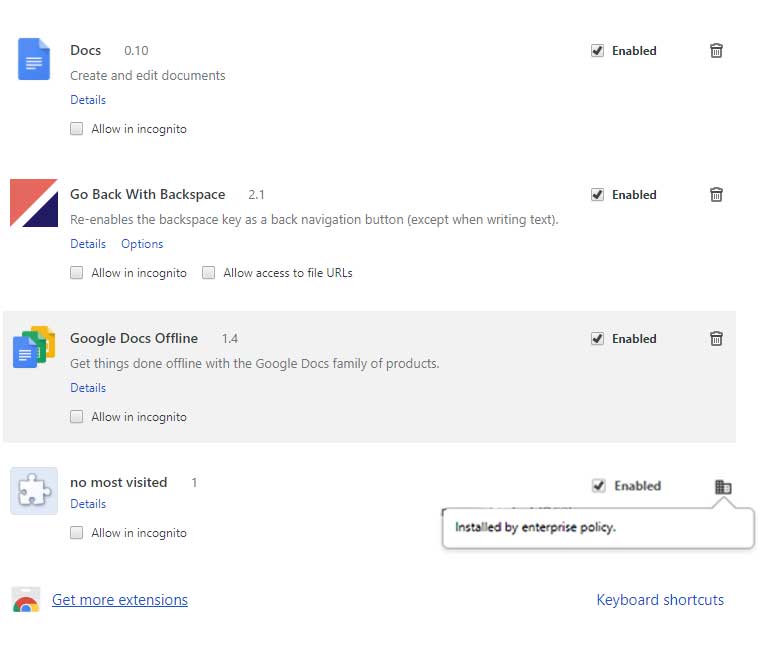
Now you will see the installed browser extensions on your computer. As you can see you have a choice of disabling them by unchecking the box next to Enabled or deleting them by clicking the trash can icon. If you see the “Installed by enterprise policy” (or “Managed by your organization”) message on a personal computer, it usually means a malicious program has modified your system settings to force the extension to stay active. To see exactly which policies are in effect, type chrome://policy into your address bar and press Enter. This page will list the specific policy names (like ExtensionInstallForcelist) that are blocking you from removing the extension. The installed by enterprise policy feature was created by Google for developers but it turns out that others are using this type of policy to install malicious extensions into Chrome. They do this because these types of extensions are managed and can’t be removed or disabled from the Extensions page.
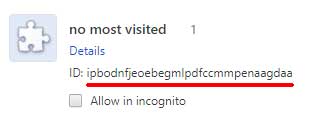
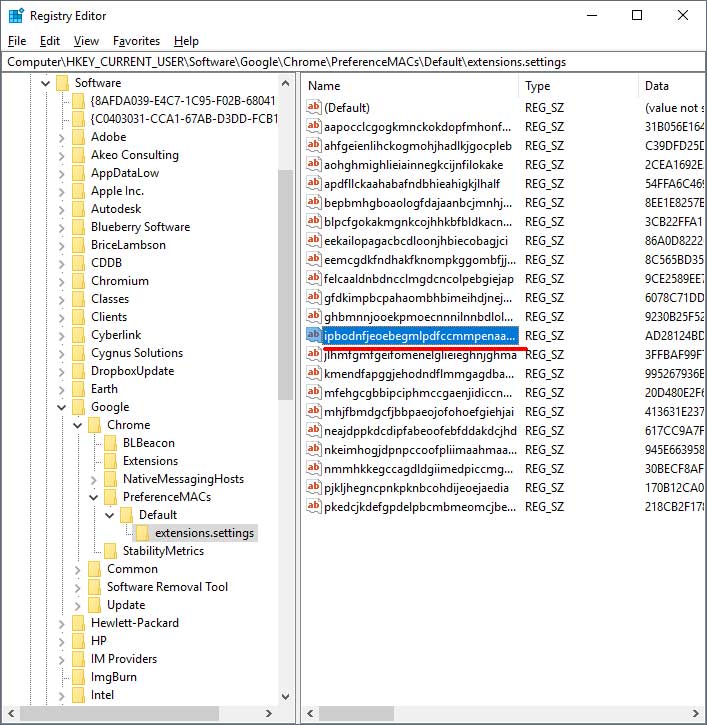
The first thing you should do when you have one of these extensions that you can’t get rid of from the Extensions page is to go to Programs and Features and try to uninstall it assuming it’s even listed there. If not then you can try and remove the extension by deleting the entry for it from the registry. Now keep in mind that playing with the registry can be dangerous and if you delete the wrong thing you can render your computer useless. Before going into the registry you will need to enable Developer Mode by checking the box that says Developer mode on the top right of the Extensions page. Then you will find the ID that correlates to the extension and you should next highlight the ID and copy it to the clipboard. Then you will need to close Google Chrome.
Open the Registry Editor by typing regedit into the Start menu. Instead of just searching for the ID, you should check these specific locations where forced extensions are usually registered:
- HKEY_LOCAL_MACHINE\SOFTWARE\Policies\Google\Chrome\ExtensionInstallForcelist
- HKEY_CURRENT_USER\SOFTWARE\Policies\Google\Chrome\ExtensionInstallForcelist If you see a entry with the matching ID in these folders, right-click and delete the numbered string (e.g., “1”, “2”) associated with that ID.
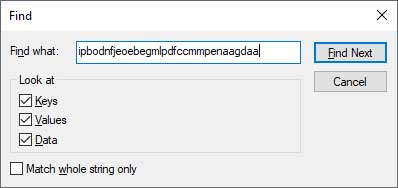
Then after the search is complete you should be taken to the string value that contains the same text as the ID. Now you can right click on that value and choose delete and then say yes to the warning that pops up next.
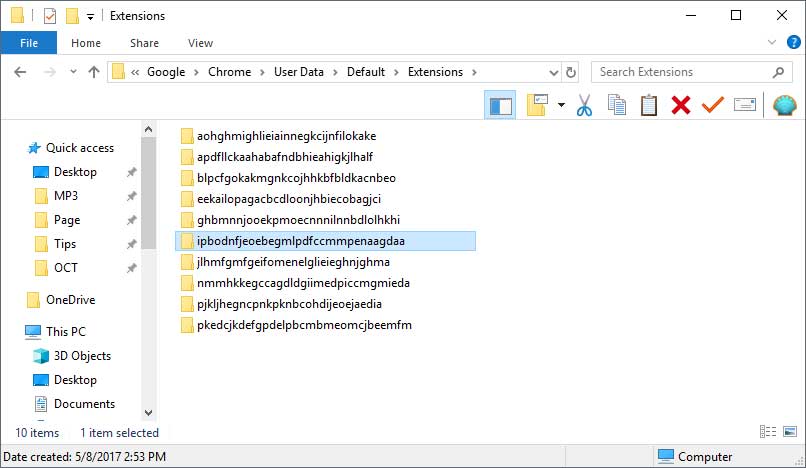
Now that the registry entry is deleted you will need to go into the Chrome extensions folder on your computer and delete the matching folder from there. Open File Explorer and paste this path into the address bar: %LOCALAPPDATA%\Google\Chrome\User Data\. Look for a folder named Default or Profile 1, Profile 2, etc. Inside that folder, go to Extensions and delete the folder that matches your malicious extension ID. Using the %LOCALAPPDATA% shortcut is much faster and avoids the need to manually type your username. Just be sure to replace USERNAME with the name that you log into your computer with.
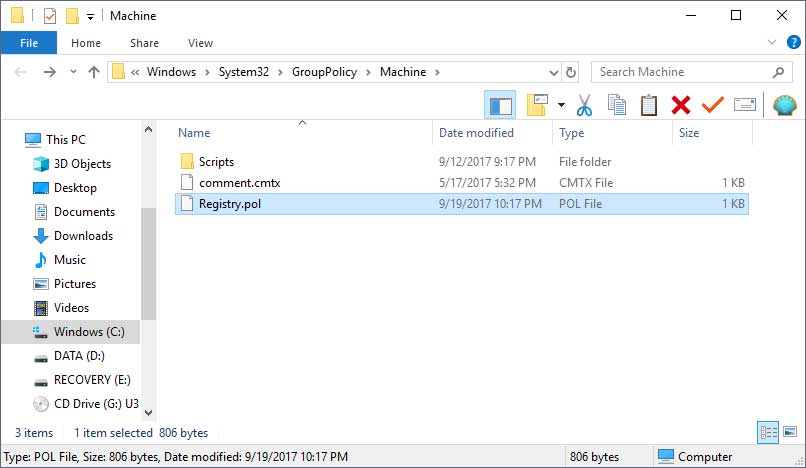
One more thing we need to do is to delete the Registry.pol file from the computer. This will be located in C:WindowsSystem32GroupPolicyMachine. If it’s not there check the C:WindowsSystem32GroupPolicyUser folder. The Registy.pol file is used to store registry based configuration settings and registry keys that were made while creating an Administrative Group Policy Template. Deleting this file will remove all group policy settings for the computer so keep that in mind if you have created and group policy settings on your computer. If you are in a network/domain environment this file and the policy should be recreated on the next login but hopefully without the extension you are trying to get rid of!
If the extension reappears, your browser may be synced to a malicious configuration. Go to Settings > Reset settings > Restore settings to their original defaults. This will disable all extensions and clear temporary data. Finally, go to chrome://settings/syncSetup and choose “Manage what you sync” to ensure that “Extensions” aren’t being automatically re-downloaded from your Google account after you delete them locally.
Removing the “Managed by Organization” menu item
Even after deleting the extension, you might still see “Managed by your organization” in your Chrome menu. To clear this, you often need to delete the entire “Google” folder within the Registry’s Policy key: HKEY_LOCAL_MACHINE\SOFTWARE\Policies\Google. Doing this resets Chrome to its “Out of the Box” state regarding enterprise management.
For additional training resources, check out our online IT training courses.
Check out our extensive IT book series.


