If you cannot get your Windows XP computer started and have ran out of options then there is the option to try a repair install. A repair install will install Windows over your existing copy and leave all your settings, documents and programs intact. If you do not see this option during the following the procedure then your Windows installation may be too corrupt to repair. If you can get into Windows and you have Internet Explorer 7 installed then you need to uninstall it through Add/Remove Programs first before attempting the repair installation or else Internet Explorer may not work anymore.
A repair installation is fairly simple to do if you follow the instructions correctly. If you don’t then you may end up formatting your hard drive and losing all of your data. The first thing you need to do is configure your computer to boot from the CD-ROM drive. Click here for more information on how to do so or refer to your computer’s documentation or contact your computer manufacturer. You may also want to check your BIOS for boot options. After you set this up, insert your Windows XP Setup CD, and restart your computer.
When the Press any key to boot from CD message is displayed on your screen, press a key to start your computer from the Windows XP CD.
Press ENTER when you see the message To setup Windows XP now, and then press ENTER displayed on the Welcome to Setup screen.
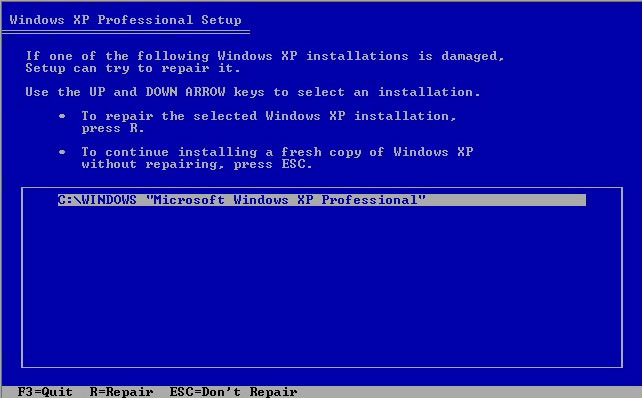
DO NOT choose the option to press R to use the Recovery Console.
In the Windows XP Licensing Agreement, press F8 to agree to the license agreement.
Make sure that your current installation of Windows XP is selected in the box, and then press R to repair Windows XP.
Follow the instructions on the screen to complete Setup. They will be very similar to installing a new copy of Windows so if you have installed Windows XP before it should be pretty easy.