Last Updated on July 26, 2026
If you are experiencing problems when running Microsoft DirectX applications, the DirectX Diagnostic Tool can help you find the source of the trouble. It isolates incorrect versions of DirectX components, lack of hardware acceleration, devices that are not connected, and unsigned drivers in Windows.
This built-in diagnostic utility gathers detailed technical information about your system hardware and video drivers. Running it provides an accurate overview of your multimedia setup without requiring third-party software.
Today, the most important part of this tool is the “Save All Information…” button located at the bottom of the window. Exporting this log gives you a shareable text document packed with system specs and error history.
Why Use DXDiag on Windows?
1. Generate Technical Support Logs
If you are having a technical issue with a game or software, support teams will often ask for your “DxDiag log.” Game developers and IT help desks rely on this file to see your exact hardware configuration. Providing this file cuts out endless back-and-forth troubleshooting emails.
2. Export Detailed Hardware and Crash Reports
Clicking the save button creates a text file containing every detail of your hardware, drivers, and recent app crashes. The crash history appears right at the bottom of the generated log file. You can easily scroll down to read specific memory fault codes or software failures.
3. Identify Outdated Graphics Drivers
This tool offers the fastest way to spot if your GPU driver is outdated or if a specific system file is failing. You can compare your installed driver version dates against the latest releases on manufacturer websites. It takes the guesswork out of video card troubleshooting.
How to Open and Initialize DXDiag
1. Launch DXDiag via the Run Dialog
The quickest way to launch the diagnostic tool in Windows 11 is to press Windows Key + R on your keyboard. Type dxdiag into the text field and hit Enter. The application will initialize immediately on your desktop.
2. Launch DXDiag via Start Search
You can also type dxdiag directly into the Start menu search bar on your taskbar. Click on the command result that appears at the top of the search list. This works identically across both Windows 10 and Windows 11 operating systems.
3. Confirm Digital Driver Signatures
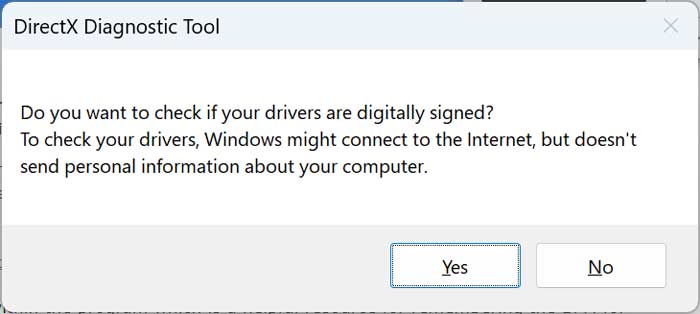
When you run the tool for the first time, you may get a prompt asking if you want the tool to check if your drivers are digitally signed. Click Yes on the dialog box to allow Windows to verify driver integrity online. Signed drivers guarantee that your installed files have passed Microsoft stability testing.
Understanding the DXDiag Diagnostic Tabs
Next, you will see a new window with various tabs. These tabs vary depending on what version of DirectX you are running on your computer.
1. The System Tab
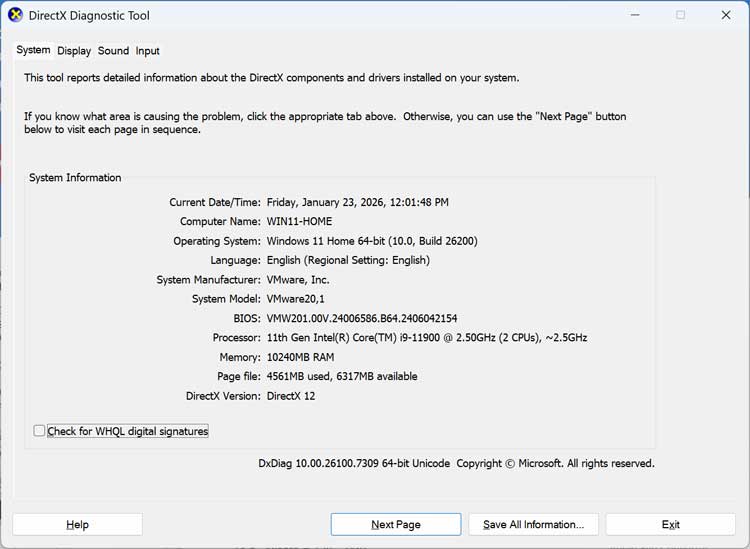
The System tab shows information about your computer and displays the version of DirectX installed on your system. You can view your processor model, total installed RAM, operating system build number, and system BIOS details here. It gives you a complete hardware summary at a single glance.
2. The Display Tab
In modern Windows, you can no longer manually disable DirectDraw or Direct3D here because they are essential to the Windows desktop interface. Instead, use the Display Tab to verify that DirectX 12 (Ultimate) is supported and that your WDDM (Windows Display Driver Model) version is up to date. It also provides a quick look at your VRAM (Display Memory), which is critical for checking if your PC meets the minimum requirements for new games.
3. The Sound Tab
The Sound Tab is now purely informational for modern systems. It lists your sound card hardware ID, device names, and current audio driver versions. If you are hearing crackling or popping audio, note that the old Hardware Sound Acceleration slider is gone. You should check the Sample Rate settings inside the standard Windows Sound Control Panel instead.
4. The Input Tab
The Input tab lists all peripheral input devices connected to your computer, such as USB devices, game controllers, and PS2 equipment. It displays the specific input drivers installed for each piece of hardware. If the DirectX Diagnostic Tool detects a problem with an input device or driver, a warning message appears in the Notes box.
5. The More Help Tab
The More Help tab allows you to further troubleshoot problems that the other tabs could not resolve. Features include the DirectX troubleshooter, sound troubleshooter, system information tool, and override options for legacy DirectDraw refresh rates. It offers deep diagnostic tools for stubborn hardware glitches.
Is Your PC ‘DirectX 12 Ultimate’ Ready?
1. Verify Hardware Feature Level Support
Modern games often require ‘DirectX 12 Ultimate’ for features like Ray Tracing, Variable Rate Shading, and Mesh Shading. Look at the Display Tab under the Drivers section to check if your video card supports these capabilities. It will explicitly list whether your hardware meets these modern graphical standards.
2. Check WDDM Driver Compatibility
Your graphics driver must support modern WDDM versions to run demanding 3D engines properly. Check the Feature Levels listing on the right panel of the Display Tab. If your card shows Feature Levels 12_2 or higher, your GPU handles full DirectX 12 Ultimate features easily.