
Last Updated on April 28, 2026
Are you the “go-to” tech person for your friends and family? If you find yourself explaining the same Windows procedures over and over, you don’t need to manually take screenshots and write out instructions.
Windows has a built-in tool called Steps Recorder (formerly known as Problem Steps Recorder or PSR). It automatically captures every click, menu selection, and keystroke you make, then bundles them into a neat, step-by-step document with images. It’s the fastest way to create a “How-To” guide or show a technician exactly what error you are seeing.

Windows 7 and newer versions come with a nice feature called Problem Steps Recorder that allows you to record a process on any computer and save it as an instruction sheet for you or someone else to use to do that process the next time saving you from having to do it yourself or remember what you did the last time you did it.
How to Start Recording Steps
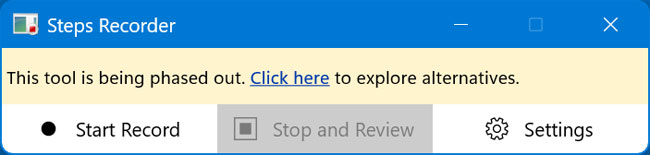
- Click the Start button and type Steps Recorder (or just psr) and press Enter.
- On the small floating toolbar, click Start Record.
- Go through the procedure you want to document. Every time you click, the recorder will take a silent screenshot and note what happened (e.g., “User left-clicked on File Explorer”).
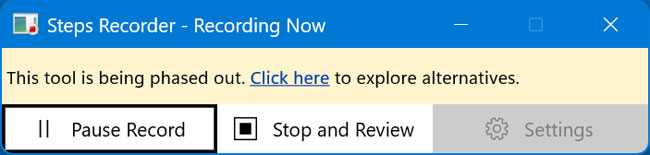
- If you need to explain something specific, click Add Comment. This freezes the recording and lets you highlight a specific area of the screen to add a text note.
- When finished, click Stop Record.
Clicking on Add Comment will pause the recording and allow you to draw a text box anywhere on the screen and then type in a comment which will be saved in your recording.
When you are finished with the steps for the procedure you want to document you simply click on Stop and Review and you will be prompted to save your recording. It will save it as a zip file with an MHT file within the zip file. An MHT file is a web page archive file that stores text and images all in one file. Simply extract the MHT file from the zip file to view it or you can also open it from within the zip file.
You will then be able to review your recording to see the results.
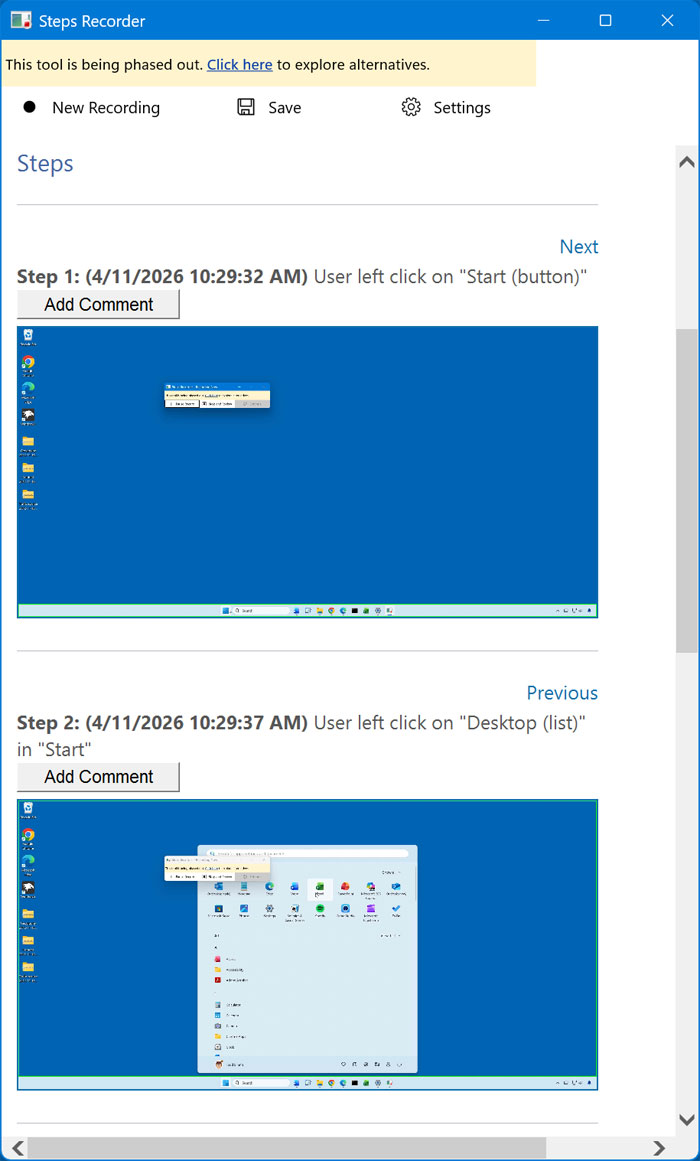
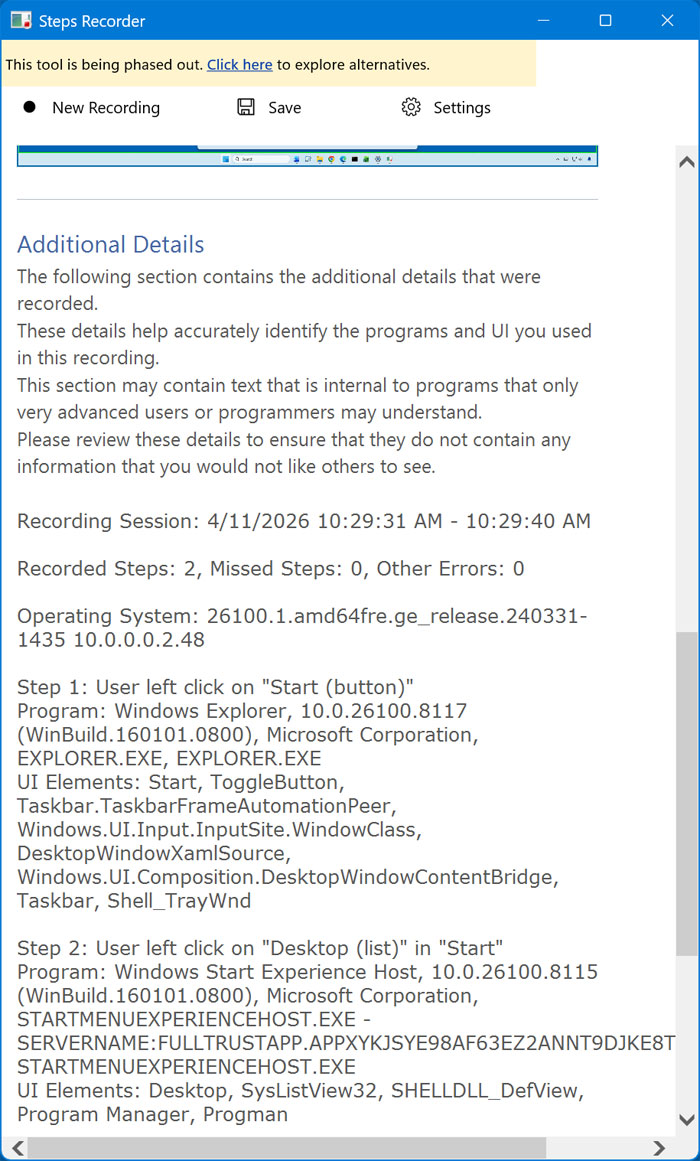
At the bottom of the screen you will be able to see a write up of the steps you performed. You can also click on the Save button to save your recording a zip file that will contain a MHT file that you can open with your browser. The MHT file will contain screen shots and descriptions of what you clicked on and opened as well as some of your keystrokes such as backspace etc.
The Shift to Snipping Tool
Microsoft has announced that Steps Recorder is being deprecated in future versions of Windows 11. While it still works perfectly today, Microsoft is encouraging users to use the Snipping Tool for screen recordings.
- Steps Recorder is better for static guides (images and text).
- Snipping Tool is better for video walkthroughs.
If you find that Steps Recorder is missing from your system in the future, the Snipping Tool’s “Record” feature is the new standard.
For additional training resources, check out our online IT training courses.
Check out our extensive IT book series.


