Shrink or extend your hard drive volumes in Windows
We all know about the concept of hard drive space because when we try to copy some pictures or music to our smartphones we often get a message saying we don’t have enough space to do the operation. This concept of “space” also applies to computers and their hard drives which store the operating system, installed programs and your files such as documents and pictures.
Hard drives contain volumes which are used to carve out portions of the drive to be used for storage space for all the purposes mentioned above. You can have multiple volumes on a hard drive to create partitions for things like creating different drive letters for other purposes such as file storage etc. When you install a new hard drive into your computer you will need to create a volume on that drive before you can format it and then use it with Windows.

When creating a volume you do not have to use all of the space on the hard drive right away. You can create a volume of any size you like as long as it’s within the total size limit of the hard drive itself. That way you have space left over for additional volume creation later if needed. But what if you have a volume on your computer that you would like to make bigger or smaller? Well if you do it’s a rather simple process to achieve with only a few steps required.
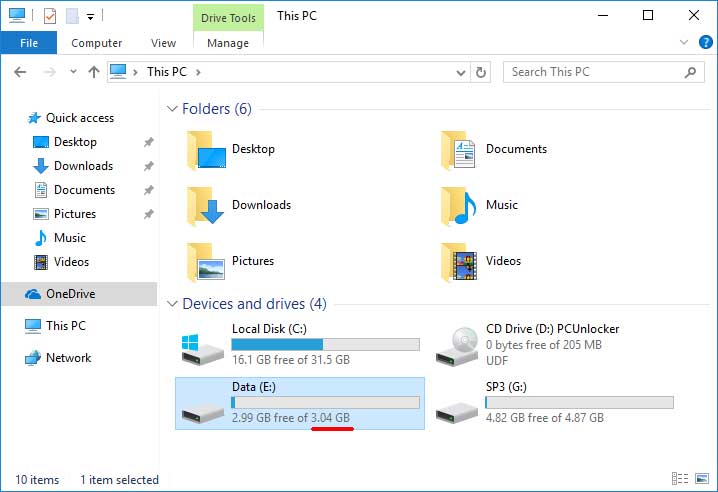
Let’s start with extending the size of a volume. In our example we can see the Data drive E is 3.04 GB in size and we want to copy 6 GB of files to it so we know that they all won’t fit so we need to extend the drive assuming we have the space to do so.
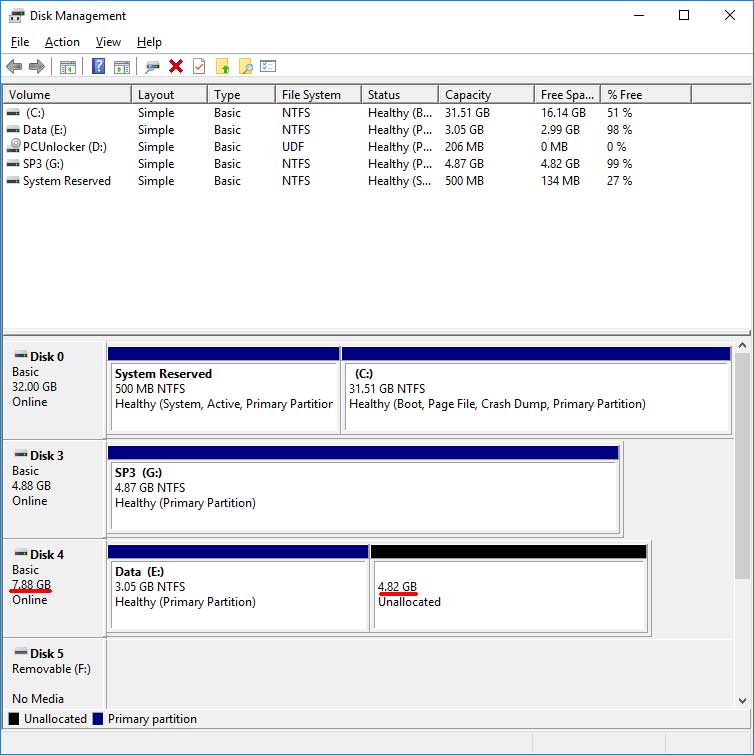
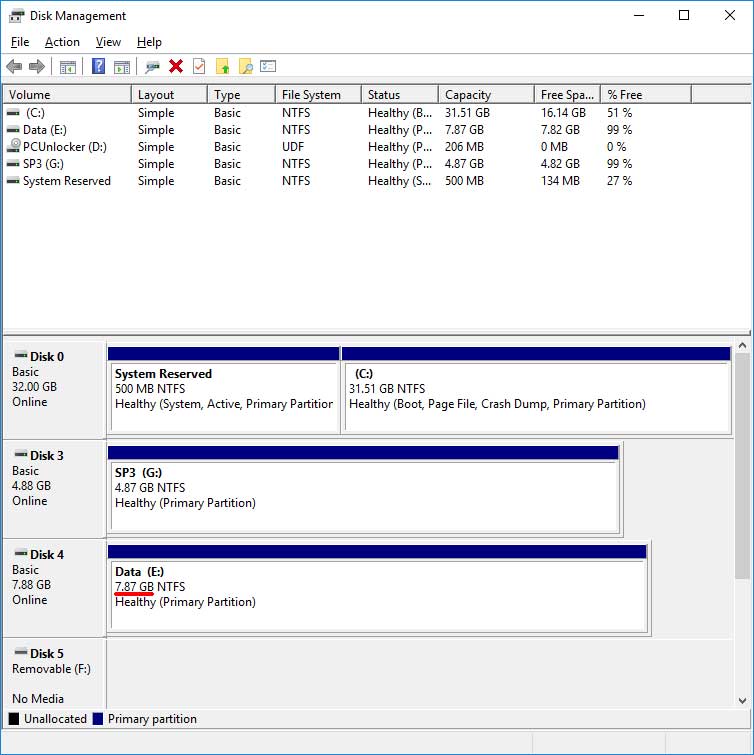
To check we need to go into Disk Management which you can get to by typing disk management in the search box or Cortana in Windows 10. As you can see our Data drive is on Disk 4 which has a total size of 7.88 GB with 4.82 GB of unallocated or available space free. So if we use up the rest of the unallocated space we will have a Data volume with a total size of 7.88 GB.
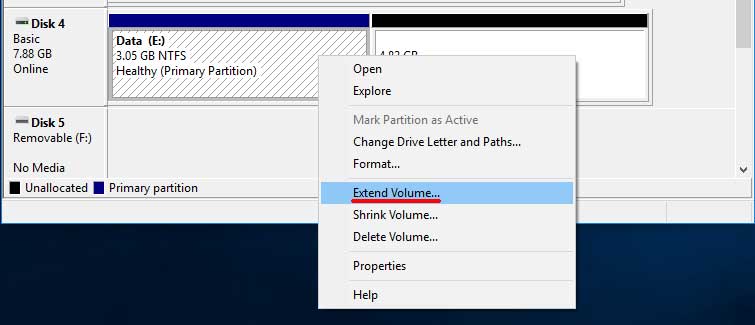
To extend the Data volume simply right click on the part of the volume that is already in use and choose Extend Volume and it will bring up the Extend Volume Wizard.
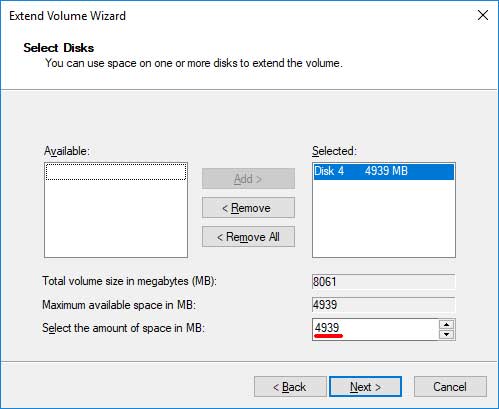
Then you will click Next on the first introduction screen and then add the available space to the selected box if it’s not already done for you. As you can see it shows the total volume size and the maximum space available. In the last box you can choose how much of the available space you want to use to extend the volume by. In our case we are going to use all of the available space.
After you choose how much space you want to extend the volume by click Next and then Finish. As you can see our Data volume has now taken up all of the space on the hard drive and is big enough to fit our 6 GB of files that we want to copy over.
If you look at the E drive in File Explorer you will now see that the total size is 7.87 GB.

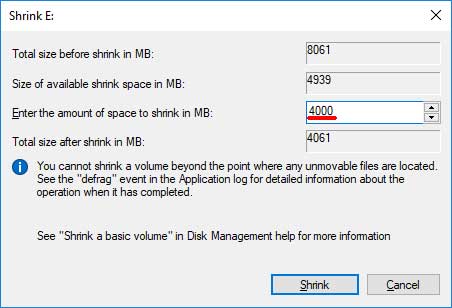
Now let’s say you want to shrink the size of the volume because its more than you need and you would rather make another partition to be used for some other purpose. This is done the same way except you now right click on the volume and choose Shrink Volume and then choose the amount of space you want to shrink it by. Notice that it tells you the maximum amount that you can shrink the volume and how large the volume will be after you shrink it by the amount you enter in the box.
After you shrink the volume you will see in Disk Management that you have available space once again to either extend the volume in the future or create a new volume on that same hard drive.
For additional training resources, check out our online IT training courses.
Check out our extensive IT book series.