
Last Updated on April 8, 2026
Blur out those private images in Adobe Premiere
If you like to edit movies and are fortunate enough to have your own copy of Adobe Premiere then you might run into a time when you need to blur out something like someone’s face or maybe a phone number or email address. Fortunately the process is not that difficult but there are a few steps involved. Once you do it a couple of times you will find its really easy to do.
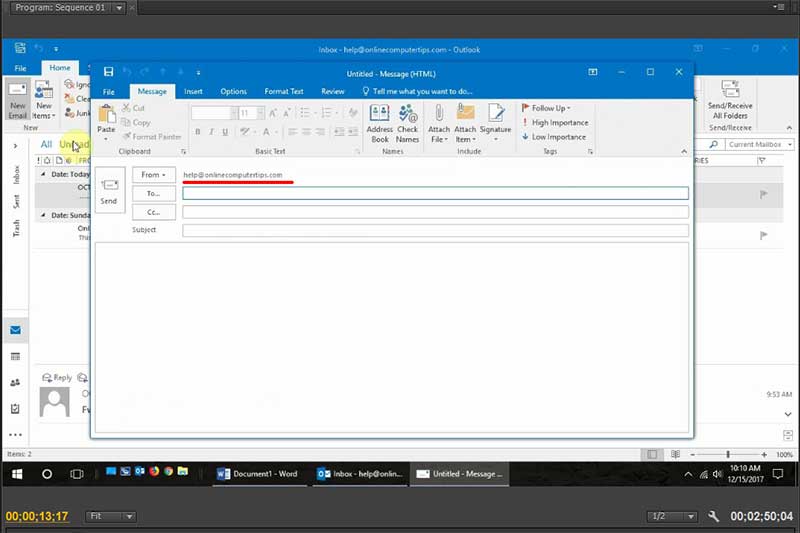
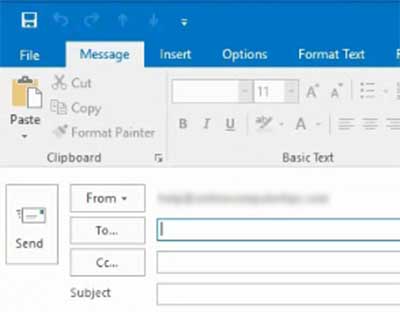
In our example we need to blur out the email address in this video about how to create an Outlook signature and we don’t want to blur out anything else in the video.
As you can see in our preview window we have a new email open with the email address being shown and that’s all we want to blur in this video and don’t want to hide anything else.
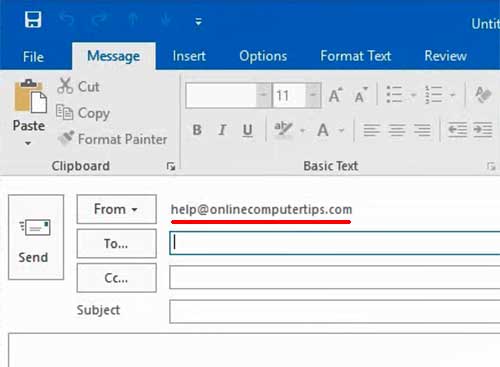
Blown up view of what we want to blur.
First we import our clip into Premiere and then add it to the timeline like you normally would.
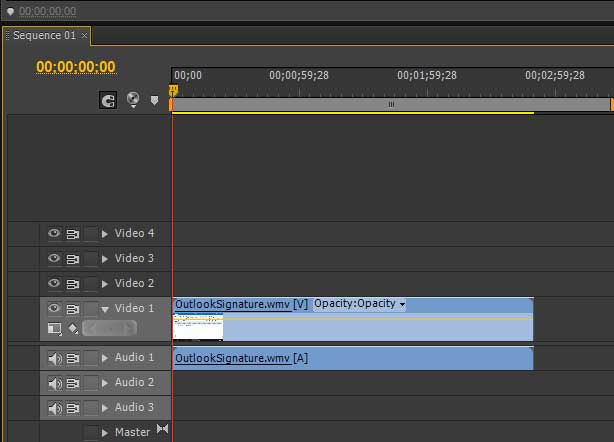
Now here is where things get different. Next you need to drag the same video clip into the timeline again but on a different line. The first copy of the clip was on Video 1 and then the second copy of the clip will be on Video 2 with the audio on Audio 2.
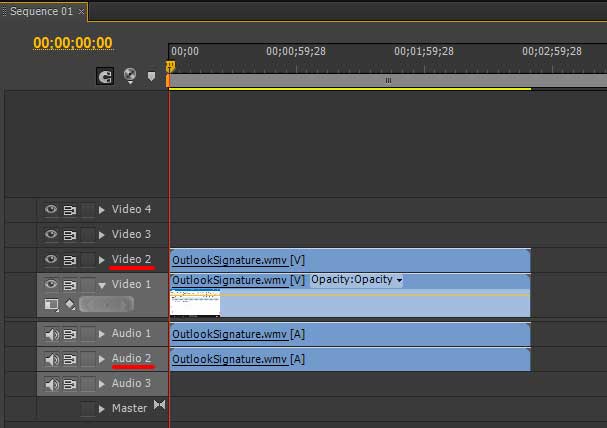
We don’t need the audio on there twice so if you right click the clip on line Audio 2 you can then click on Unlink to separate the audio from the video. Next click on the clip on the Audio 2 line and delete it and you will notice that the video part of the clip stayed on Video 2.
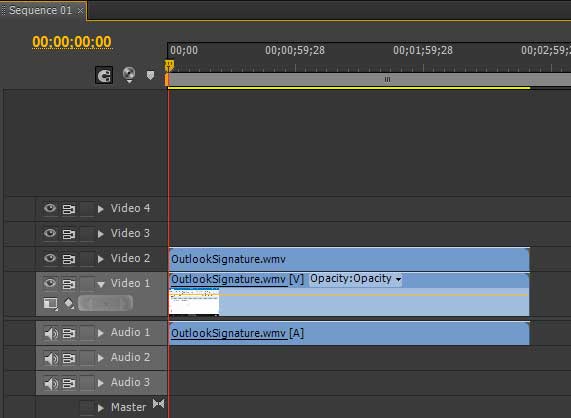
Now we need to add the blur effect to the clip on Video 2 by going to the Video Effects and drilling down to Blur and Sharpen and then finally Gaussian Blur. Drag the Gaussian Blur effect onto the clip on the Video 2 line and release. Now the blur effect is applied to the whole area of the clip but we don’t want the whole clip blurred, just the email address.
So now we need to go back to effects and go to Transform and then find Crop and drag the Crop effect onto the same clip.
You should now have the Effects Controls tab open and if you don’t then go to the Window menu and click on Effects Controls. Under the Crop section expand the arrows for the Left, Top, Right and Bottom sections.
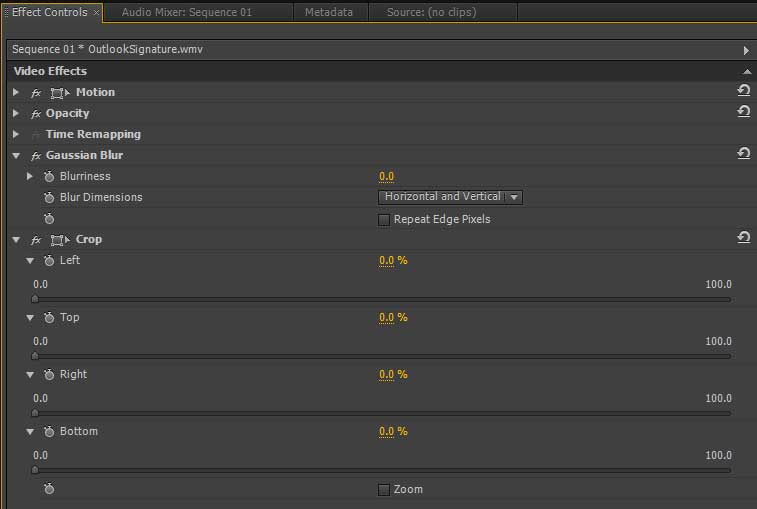
Now you want to set the Blurriness level to however blurry you want it to be so it covers what you are trying to hide. You will notice your entire clip is now blurry and this is where the Crop section comes into play. Drag the sliders for each position where you want them so the blur only covers the one area you want blurred out. You can also type in numbers to fine tune the blurry area and even use decimal places.
As you can see here we moved our sliders to the right positions so only the email address was covered up.
Once this is done you will need to crop your video in the timeline at Video 2 so the blur only applies when you want it to because when the video moves off this email box then we don’t want the blur to be there blurring whatever footage takes its place.


