Last Updated on March 24, 2026
For the longest time it has been the norm to install operating systems and other software from CDs and DVDs. Now everything is online and eventually the CD and DVD drive will go the way of the floppy disk drive. You probably do not even remember those ancient magnetic storage disks! While there are several ways to install an operating system on your computer, one way that many people like to use is to install the OS from a bootable USB flash drive. This way they do not need the actual installation CD or DVD to complete the setup process. If they do not have a physical optical drive then they can still easily install the OS.
When you download an operating system image from the Internet it will most likely come in the form of an ISO file. Think of an ISO file kind of like a zip file where you have many files contained within one single archive file. ISO files can be converted into bootable CDs, DVDs or even flash drives that can be used to start your computer with.
But what if you want to create a bootable flash drive but only have the CD or DVD version of the operating system? One thing you can do is convert the contents of that physical disc to an ISO file. This digital file can then be used to make a bootable USB flash drive. There are many ways to do this but we will go over one program that we like to use called ImgBurn. It is a free download and very easy to use.
Converting a CD or DVD to an ISO File
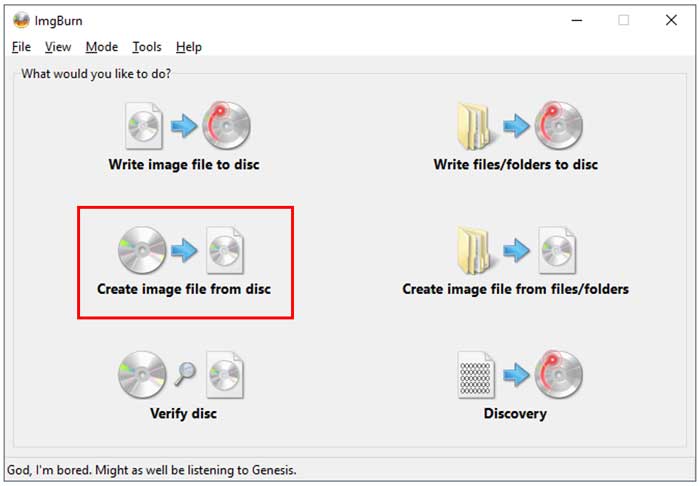
1. Install and Launch ImgBurn
Once you install ImgBurn and run it, you will see the main menu like shown in below. From there you will insert your CD or DVD into your physical disc drive. Click on the button labeled Create image file from disk to initiate the extraction tool.
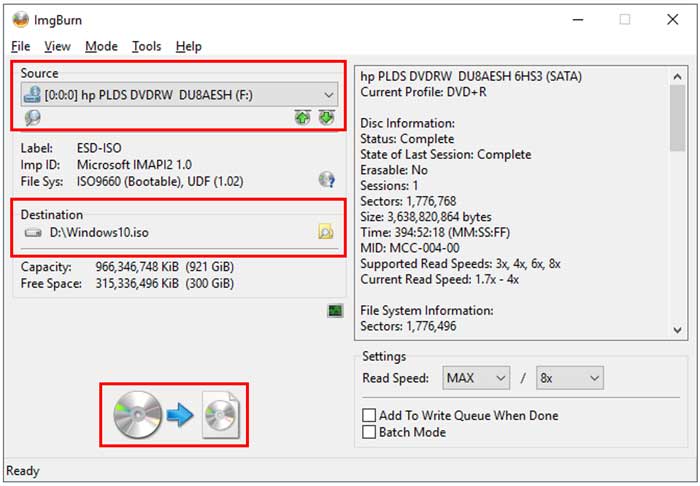
2. Choose the Source and Destination
Next you will need to make a couple of selections before creating your ISO file. Select the specific source of the files that will be used to create the ISO file which will be your CD or DVD drive. Decide exactly what you want the ISO file to be named and choose the folder where you want it created. When you are ready to go simply click on the large CD to file button on the bottom of the window.
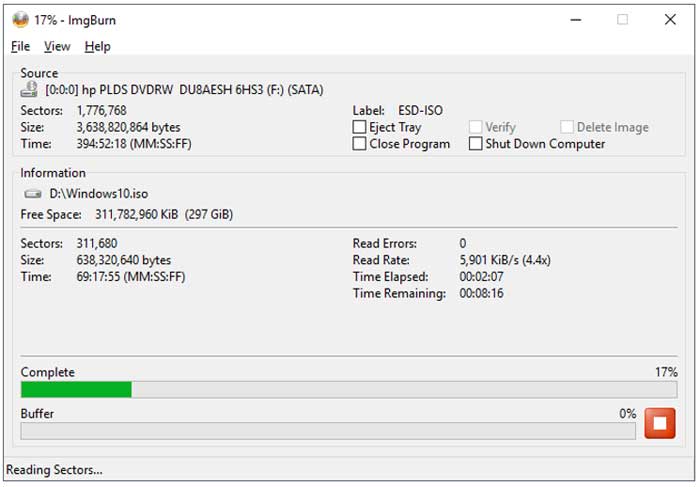
3. Monitor the Conversion Process
ImgBurn will go through the conversion procedure automatically. It will show you a detailed status bar letting you know how far the process has completed. Wait patiently while the laser reads the physical media and writes the digital copy to your hard drive.
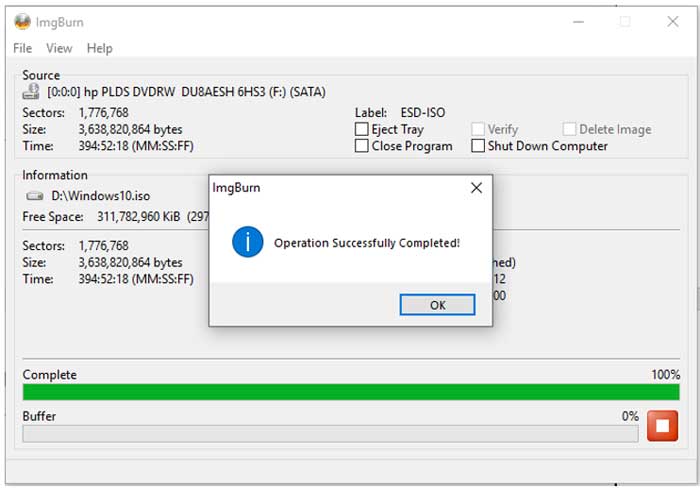
4. Finish the Extraction
When it is complete it will pop up a message saying Operation Successfully Completed. You can then click OK and close the program entirely. Now if you browse to where you told ImgBurn to create the ISO file you will find it sitting there waiting for you. You are now ready to create your bootable USB flash drive.
Using the Rufus Bootable USB Utility
For the creation of the bootable USB flash drive we will show you two methods using two free programs that are available to download from the Internet. We will also be using Windows 10 for our ISO image for the bootable flash drive. Rufus is a free utility that will make a USB flash drive bootable allowing you to boot your computer off of that flash drive like it was a bootable CD or DVD. Rufus can be used with Windows, Linux and other operating systems that can boot off an ISO file.
1. Launch Rufus and Select Your Drive
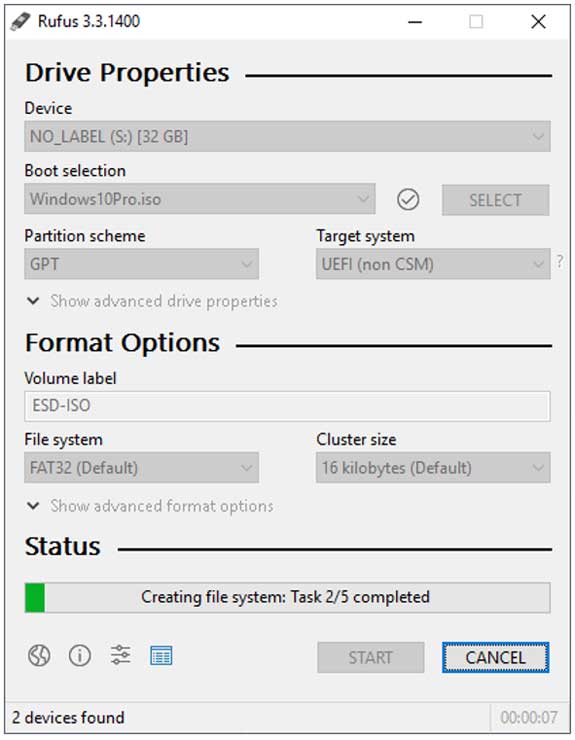
All you need to do to get things going is have your USB drive plugged into your computer. Have your newly created ISO file on your computer where you can easily get to it. Run the Rufus executable file that you downloaded. You will be able to customize your settings depending on what type of computer you are attempting to boot if needed. Look at the image below to see our flash drive is currently the S: drive and is 32GB in size.
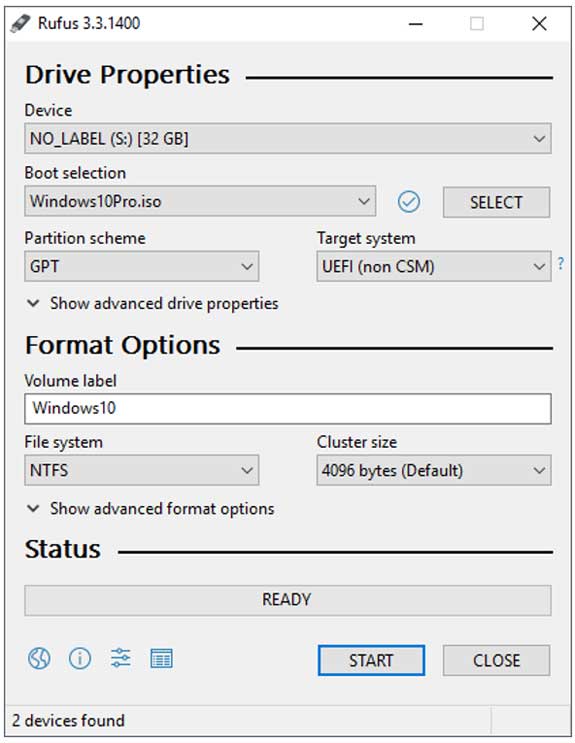
2. Choose Your ISO and Configure Settings
If you have more than one flash drive connected to your computer, make sure you select the one you actually want to use. This avoids accidental data loss on a drive you do not want to wipe. Or better yet, remove any other flash drives to avoid any potential confusion. The ISO file we selected to use is called Windows10Pro.iso and is stored on our local hard drive.
3. Start the Formatting Process
For the volume label name to be used after the bootable flash drive is created we will use Windows10. The rest of the options will be selected for you automatically depending on the type of flash drive you are using. You can customize them to suit your specific needs if necessary. There are also advanced options for the Drive Properties and Format Options sections that you can change.
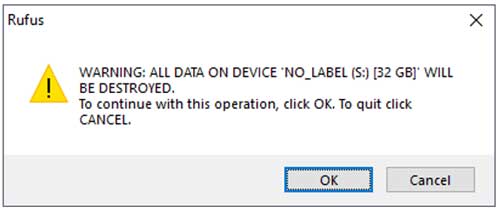
4. Accept the Data Warning
When you have everything set click on the Start button. You will immediately get a warning telling you that everything on the flash drive will be destroyed before creating the new bootable flash drive. If you are absolutely sure you do not need any data off of that flash drive, click the OK button.
5. Wait for the Drive Creation
Then Rufus will do its thing and begin extracting the files. You will clearly see what is happening on the status bar at the bottom of the application window. Do not pull the USB drive out of the port while this bar is actively moving.
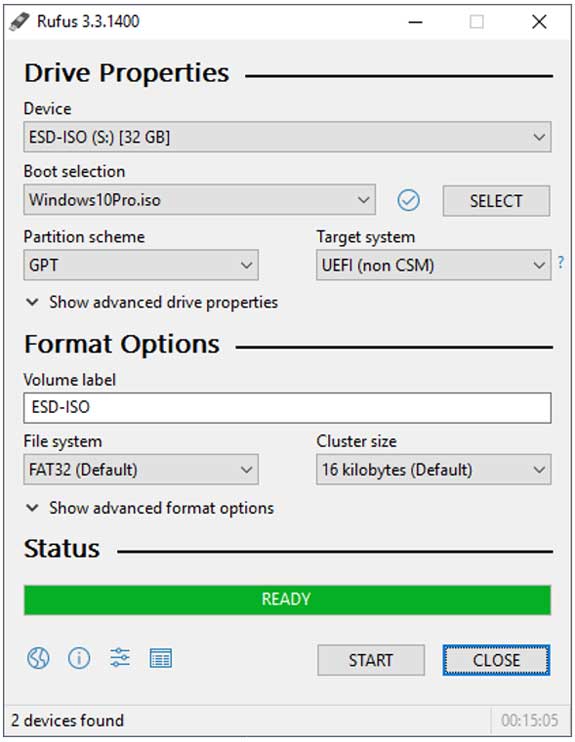
6. Close the Application
When the process is complete it will say READY in the green status bar. This can be a little confusing because it does not explicitly say complete or finished but it is actually done. Simply click on CLOSE and safely remove the USB drive from the computer. Now you will have your bootable flash drive ready to go for your operating system installation. Rufus can be downloaded for free from their website.
Using the Windows USB/DVD Download Tool
Another free and easy to use tool for making a bootable USB flash drive is the Windows USB/DVD Download Tool. Since it has Windows 7 in the name there is no guarantee how long it will be around for. As of this writing it is still available for download directly on the Microsoft website.
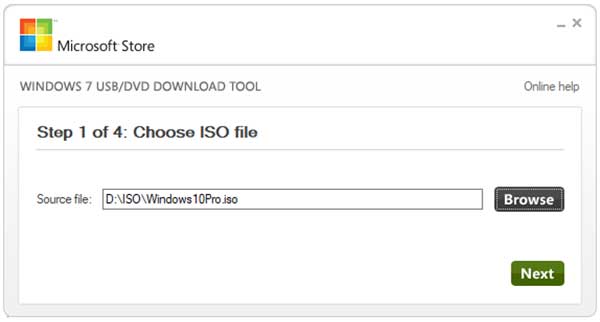
1. Select the Target ISO File
Once you install the tool simply run the shortcut from your desktop. It will ask you to choose the exact ISO file you wish to use for your flash drive. Once again we are using the Windows10Pro.iso file for this specific example. Click the Next button to proceed.
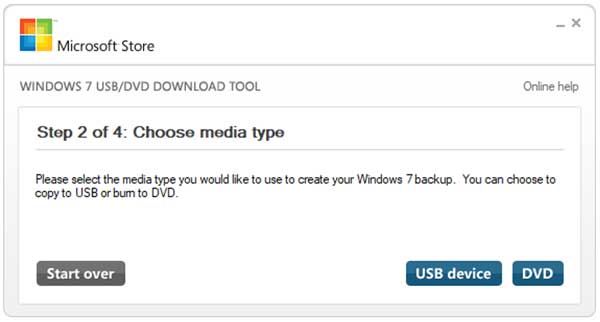
2. Choose the Media Type
Next you will need to decide if you want to make a bootable USB flash drive or burn a physical DVD. In this case you will click the USB device button. This tells the software to format a removable flash drive instead of spinning up your optical disc burner.
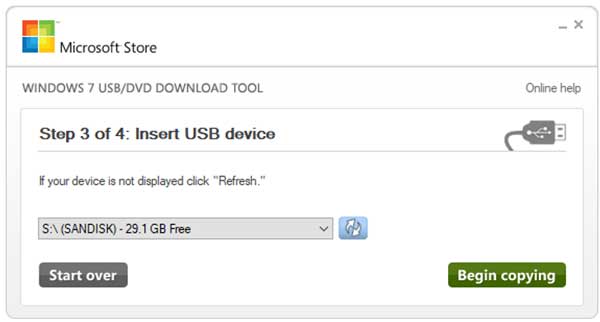
3. Insert and Select the USB Drive
For the next step simply plug in your flash drive if it is not already connected. Choose the right one from the dropdown list. If it is not displayed then click on the refresh button to have the tool search your system for it again.
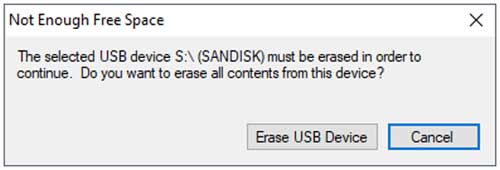
4. Erase the Existing Data
Once again, make sure you pick the right one so you do not wipe out any data you want to keep on a different flash drive. When you have everything set click on the Begin copying button to start the process. You might get a warning saying there is not enough free space on the drive if you have data on there already. Click the Erase USB Device button to clear it out.
5. Confirm the Deletion Warning
The tool will warn you that the drive needs to be completely erased. As long as you are sure there is no important data on the drive you need, click the confirmation prompt to proceed. Now the tool will go through the process of creating a bootable USB drive that you can use to install your operating system with on your computer.
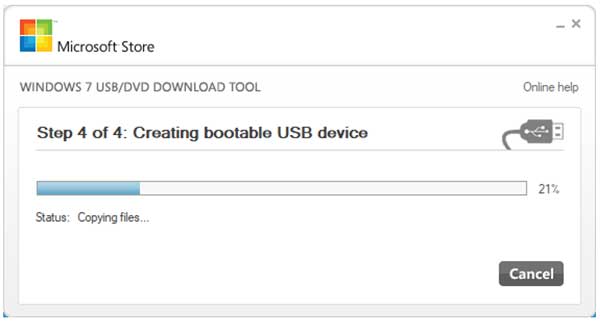
6. Complete the Setup Process
Watch the progress bar as the utility copies the installation files over to your flash drive. When the status bar reaches 100% then the process is fully complete. You can close the program and safely remove the USB drive from your computer.
For additional training resources, check out our online IT training courses.
Check out our extensive IT book series.